Quantcast
Channel: Fly Fish Food
Viewing all 629 articles
Browse latest View live

Carp Dough Boy

$
0
0

Move over dough balls

Carp Dough Boy

Here is a little carp pattern that we have been playing with recently. With some of the new carp toys out like Cohen's carp dub, and Allen carp hooks, I couldn't resist messing around with some bugs.  This fly is also very functional as a mini crawfish and can be tied in a variety of different colors to match the forage in your waters.

A couple of keys for this fly:


  1. It's compact like a little edible nugget for the fish
  2. It is a low odor fly.  No superglue was harmed in the making of this film.  The glue was Loon water based stuff.
  3. It's tied on a beefy hook that will hold up to the biggest and baddest carp battles.
  4. Ice dub - it plain catches fish.
Recipe:

Hook: Allen MP003BL #4-#8 BUY HERE
Thread: UTC 140 - fl. fire orange BUY HERE
Eyes: Barbell eyes with eye - 4mm yellow BUY HERE
Tail: Wooly bugger marabou - hot orange BUY HERE
Legs: Magnum predator legs - grizzly barred rootbeer BUY HERE
Body: Cohen's carp dub - cray-zee orange BUY HERE
Collar: Whiting coq de leon hen saddle - speckled orange BUY HERE
Wing: Wooly bugger marabou - rusty brown BUY HERE
Head: Ice dub - pheasant tail BUY HERE


Junk Yard Soft Hackle

$
0
0

Turn your tying waste into fishy goodness

Junk Yard Soft Hackle - From trash to treasure


This is another one of those videos that isn't necessarily to show you a new pattern, but it's to show you a few different techniques.  I have dabbled with throwing a bunch of stuff in dubbing loops for years, but since I got my new Stonfo tools it has kind of gone into overdrive...  In this pattern I specifically use the "under-fluff" part of a coq de leon hen saddle feather to create a functional soft hackle.  If you like a really sparse soft hackle you can use fewer turns, and if you like a full hackle (like the one I was shooting for) you can load it up.  I also used a dubbing loop technique for the body that isn't anything new, but it helps really compact buggy materials into a tight loop.

~ Cheech

Recipe:
Hook: Allen D202 #10 BUY
Thread: UTC 70 - fl. orange BUY
Body: SLF dubbing - RFSN thorax BUY
Thorax: SLF dubbing - RFSN abdomen BUY
Hackle: Fluff waste feathers from coq de leon hen saddle - dyed salmon BUY 


Complex Twist Bugger

$
0
0

Complexity in a simple form

Olive Complex Twist Bugger

The Wooly Bugger is the first fly that I learned how to tie back in 2000, and I bet it was one of the first flies that most people learn how to tie because of it's simplicity and effectiveness.  As my tying skills increased, like many of you, I started to add lots of variations to my buggers including flash, different chenilles, and dubbing loops...  For the past few months I have been in full mad scientist mode at the vise, and dubbing loops have been my main medium for my madness (even though I kind of ditched the whole idea of dubbing.. and loops).  The first complex twist bugger I tied really made me realize how endless the possibilities are for this twist.  Here are some of the items that I have put in this bugger...

- Schlappen
- Cactus chenille
- Palmer chenille
- Polar chenille
- Simi seal dubbing
- Small animals
- Unicorn mane fibers
- Pictures of Curtis' mom

Now you can see that you can throw almost anything in this bugger, but I have kind of settled on the materials that are listed in the video and recipe below.  One thing that I realized is that it was hard to get a grip on all of the materials that I put in these flies, so I made a very rudimentary tool that just so happens to work so well that I made a bunch of them to sell on our store.  It's not too hard to figure out what it is, and if you want to make your own go right ahead...  For those of you who want a cheechcrafted original, you may purchase these gator grips here...

~ Cheech

Recipe:

Hook: Allen S402 #4 BUY HERE
Thread: 3/0 Uni - white BUY HERE
Bead: Tungsten - 3.8mm BUY HERE
Tail 1: Wooly bugger marabou - olive BUY HERE
Tail 2: Senyo fusion dub - tobacco BUY HERE
Body 1: UV polar chenille - rusty copper BUY HERE
Body 2: Speckled chenille - lime olive BUY HERE
Body 3: Schlappen - olive BUY HERE
Veil: UV ice dub - olive brown BUY HERE


5 Habits of Highly Effective Brook Trout Anglers

$
0
0

Be a Brookie Boss

Hefty Brook Trout taken from a remote lake
When it comes to emails and questions we get about our patterns, posts and fish we chase, we get a lot of interest generated by our obsession with Brook Trout. So with that in mind, I figured it was time to throw out some of the things you can pay attention to in order to get into these awesome fish. There are, of course, a lot of other factors, but these are some good starting points.

1. Research. Because most people are fairly respectful of the discretion that surrounds some of the better Brookie waters, you can't expect to just start asking around and get the skinny on these types of  lakes and streams. If you expect to get some information, you'll need to start digging. I usually start with stocking reports and Google Earth -- both publicly available and neither of them are moochy "Hey guys, give me some info on secret locations" questions posed on the interwebs. Books, some internet sites or even photo sharing sites can also be of help once you have a good starting point or places to go on. I even found some great information in an old outdated wildlife resources pamphlet I happened to stumble across. And don't assume that because you don't find a lot of information on a lake or stream that it's not going to pan out. Often, the least known locations will have the best opportunities. I once followed a hunch to fish a lake that I knew had Brookies but that did not turn up on any reliable sources I could verify. Those are the ones that will have the potential for huge payoffs.

2. Be willing to invest in the trip. Like most of their trout cousins, Brookies especially like cool
The ATV's come in handy
clean water which is more often found in higher elevation lakes and streams.  That also means, thankfully, there are not as many paved roads that lead to prime Brookie habitat. Whether it's a hike, an ATV ride or a bumpy 4WD truck trip, you need to be prepared to sometimes put in the time to get to where you're going. On the bright side, you'll see a lot fewer people and you'll often have the entire place to yourself. Don't let the difficulty of travel push you to an easier-access location. The best fishing will likely be at the end of a gnarly trail.

3. Know where they hide. In my experience, more than other trout (or char) species, Brookies are notorious for hanging out in and under structure. Whether it's fallen trees, weed patches, overhanging rocks or just shadows here and there, you'll most often find Brookies where they aren't as easily seen by predators. One of my favorite techniques, when fishing a lake with a rocky shoreline is to throw the fly as close as I can to the shore right next to overhanging or submerged rocks. I've seen really nice fish come rocketing out of nowhere to smash the fly. Not only that, but if you know a body of water has Brook trout, and you can find a cooler stream inlet or spring, you can probably be guaranteed to find fish in those locations. Combine the two -- structure and cooler water -- and you've just scored a touchdown.

4. Be "vewy vewy" quiet. You've probably all seen how fast Brook trout will scatter for safer confines when you spook them. So it's obviously important to keep a low profile and use stealth when approaching any holding lies. But what people often don't realize is that you can spook a fish without sending it swimming for cover. I've seen many times where a pod of fish maintains the same position, but will keep a zipped lip due to the heightened level of jitters caused by my presence. So stay low, stay quiet and you'll be better off.

Chimera army ready for some brookies
5. Fly Selection Matters. I'm not sure what it is, but I frequently hear the same thing about Brookies and other high mountain fish: "Oh, they'll take anything!". While that may be the case on some days under certain conditions, I've found that it doesn't usually hold true. Like most other trout, Brookies will most normally key in on their typical food sources. And while they'll be opportunistic in taking bigger flies like articulated streamers and mice patterns, I've really done the best with patterns that imitate a good variety of their day-to-day food source. And my favorite Brookie pattern, the Chimera, imitates a few different bugs at once.

So these are a few of the things we've found that help find these colorful and challenging fish. Now, get out and find a few!


A fall brook trout


The Pre-Poob Damsel

$
0
0

Fish 'em young

Pre-Poob Damsel

The first time I ever saw a lighter lime colored "baby" damsel, I noticed how much they really stand out from their surroundings. As opposed to the more natural colored olives, browns, tans etc, these little immature damsel nymphs would stick out like a sore thumb.

So the first time I started to notice these little dudes in the water was an early spring outing a number of years ago. I also had a friend that had taken a nice photo of the bugs previously and so I was inspired to throw out the pattern below. It was fairly complex, bigger and chunkier and never did as I had hoped. It caught a few fish here and there, but nothing crazy. It's a fun fly to tie though, so you can check it out here if you're interested...

The pre-cursor to the pre-poob
So, flash forward to spring this year and I came across good number of these lighter colored smaller bugs in a few throat samples. My noob theory (and later confirmed by my bug buddy Phil) was that as these little guys go through their instar phases, they often maintain a lighter complexion. So in the early spring and fall when  they're still going through these phases and haven't yet reached full maturity (in size or color), they stand out as bright little targets for trout on the prowl. The key is light color and slender profile, so the Pre-Poob (pre-pubescent) Damsel was designed to fit that bill.

I tried to keep the pattern relatively simple, but still life-like enough in appearance and motion to keep fish interested. There were a few variations tested before settling on this pattern, but overall the concept has proven to be crazy effective. And if you haven't tied with Arizona Synthetic Dubbing, this is a great pattern to start with. The light dubbing loop method for the body helps keep a slender profile and gets some flashiness in there to boot.

So if you're fishing waters with damselflies, this is a pattern you might definitely want to have on hand. See the video tutorial and material list below.


Nice Brookie on a Pre-Poob

Material List:

Eyes: 25 lb Mono, melted

Dude, Where's My VCR?

$
0
0

Welcome to Fly Tying 2.0


When I was a kid, I remember the epic battle of video formats between Betamax and VHS and my Dad's choice on which one to buy. We went with VHS and soon began filling our basement shelves with those huge VHS tapes. My first exposure to fly tying actually came from a couple of borrowed VHS tapes from the local library. 

Much later on, Cheech and a couple other buddies and I had the "great" idea to create a series of awesome fly tying DVD's. Between the time involved getting it all filmed, edited and the price to create the DVD's, we probably only came out a little ahead of the game by the time we sold some in a few fly shops, at shows and over the internet. By the way, those DVD's are now officially collector's items and might be worth something like a couple of bucks by now. Start your search on eBay right away!

Nowadays, you can find an online video or SBS tutorial on pretty much any fly pattern or method you can imagine and the best part: you don't have to pay a dime to view it!

So the point I'm getting to is that the method of fly tying "edutainment" consumption has evolved a LOT in the past 10 years. I like to refer to where we are today as "Fly Tying 2.0". Gone are the days where you need to buy or rent any sort of old-school physical media. 

Today, in the world of Youtube, Vimeo, Facebook, Instagram and all other avenues to get video delivered to any device you wish, there are literally thousands of options to either learn how to tie or learn new patterns -- at no cost!

So with this incredible level of no-cost on-demand material, I'm always surprised when I see tyers or even media companies that still try to hock DVD's or worse: charge people to view tying videos online. Hmmmm...let's see, $0 vs $30? Or even $0 vs $3? I know the math might be hard, but come on! 


People have asked us why we don't charge for or sell the videos we produce. I think first and foremost, we're not naive enough to think we've somehow discovered the end-all-be-all solution to catching fish or tying flies or come up with a super-secret technique that, if shared publicly, would somehow cheapen it for the elite few who can afford to order a DVD or pay an on-demand fee to watch. We tie a lot of flies and so we will often slap the camera in front and let 'r roll. No reason to charge you to watch us doing something we love.

Now we're obviously not filming with a camera phone and I happen to have about 12 years of video editing and photography experience under my belt, so I hope our material is top-notch quality compared to a lot of the other stuff you'll see out there. But if you look out at the fly tying material tutorial landscape, you'll see the likes of Davie McPhail, Fly Fishing the Ozarks (Brian Wise), TightlineVideo, In the Riffle, Hans Weilenmann and a few others -- all throwing out high quality stuff at no cost. I can't imagine paying someone else to see a level of fly tying that would likely not equal let alone surpass what's already out there.

Now that's not to dismiss the usefulness of a book or even better an in-person class, but that's comparing apples to oranges. And I'll give slightly on the argument that there are tyers out there with some wicked skills that might not feel comfortable in the public forum or who could legitimately command some level of compensation to see them work. I get that, but those are, by far, the exception.

So if you're making or buying old-school physical media or making/buying video downloads for fly tying, you're wasting time and money. Those DVD's will make good coasters for your coffee table and they put off a great light display if you nuke them in the Microwave. Whether by karma or just overall exposure, you'll be much better served by joining the Fly Tying 2.0 world and letting the tying footage flow for free. And if you're wanting to get into tying or have the need to learn some new patterns, Google is your friend. Well, and we'll be your friend too cuz we've got a few videos to share....


Belly Scratcher Minnow

$
0
0

Weighted flies can have a very slim profile.

Belly Scratcher Minnow


In the past year and a half the Low Fat Minnow has quickly become one of my favorite flies for any specie of fish that eats other fish...  One of the things I really like about the Low Fat Minnow is that it suspends nicely in the water, and is designed to be fished on a sinking line in order to control the depth of the fly.  I knew that I wanted to make a weighted version for rivers, so I started researching about a year ago.  I really like throwing big articulated streamers, but I wanted to come up with something that I could throw at those lookers and chasers that might not want to eat something on the large side of the spectrum.  I also wanted something that I could tie in various weights without effecting the profile of the fly.  Most of the time, more weight means bigger barbell eyes or tungsten beads.  One of the great things about the low fat minnow is the slim profile, and adding heavy barbell eyes would take away from that.

Enter the Belly Scratcher Minnow.  Pretty much a Low Fat Minnow tied with a weighted belly and a zonker strip for a tail instead of marabou.  I also made the head a bit different because I have been playing with some different glues to attach eyes with.  I really like the fact that I can vary the weight of the fly to match the water I'm fishing by simply adding or subtracting tungsten beads when I tie it.  The initial test for this fly included lots of interest from hungry fish, but my tie-in technique for the beads was flawed, and they ended up falling off of the fly.  Once I dialed that in, the fly produced just like I thought it would.  It worked along the bottom of the stream bed and proved to be irresistible to some big browns.

This weighting technique is nothing new, so I'm definitely not taking credit for using it.  What IS brand new is the new short length of bruiser blend that we are introducing.  It's perfect for tying flies like this that don't need the extra length of the original bruiser blend.


Recipe:

Hook: Allen B200 #6 (BUY HERE) or Daiichi 2461 #4-6 (BUY HERE)
Thread: Uni 6/0 - white (BUY HERE)
Eyes: Montana Fly Fishize 8mm (BUY HERE)
Tail: Zonker Strip - Chinchilla (BUY HERE)
Body: Holographic cactus chenille - silver/gold (BUY HERE)
Weight: Tungsten beads - 3.8mm gold (BUY HERE) connected with articulation wire (BUY HERE)
Head: Bruiser blend short 1" - Alpha wolf and cream (BUY HERE)
Additional color: Sharpie
NOTE: We use Tear Mender Adhesive for the eyes. It's great to keep those eyes in place. BUY HERE

Product Review: Fish Cat Scout

$
0
0

The Swiss Army Boat


Fish Cat Scout -- Frameless Fishing Craft
The first personal flotation craft I got was one of those old-style diaper-donuts with an automobile tire tube for the guts. I felt like I was suspended by a couple of those floatie wing things my kids wear to the pool. And talk about difficulty getting in and out of -- I was tempted to find a way to launch myself from shore and lawn-dart my way into a seated position in the "boat" in order to avoid the awkward waddling fin dance entrance you'd normally have to perform. 

Luckily, over the years, these personal flotation craft have gotten a lot more user-friendly, versatile and comfortable to boot. We went from higher end float tubes to "U" tubes to pontoon boats and now to frameless flotation craft that neither qualify as pontoon or float tube. Between Cheech and I, we've fished from most of these types of boats at one time or another, so when we saw the Fish Cat Scout from Outcast, it screamed out for a look-see.

Before I get into the boat specs and review, let's set the stage on what we normally use these types of boats for -- because for you it might be different. Because we fish big stillwaters, where we need to cover distance and carry a lot of gear, the bass boat is the choice for us there -- for both trout and warmwater fishies. And if we're floating bigger rivers with more rapids, it's probably a bigger raft or drift boat on those occasions. But beyond those circumstances, this style of boat works great for floating all sorts of lakes, reservoirs and less-technical rivers. In other words, it combines the best of a float tube and a bigger pontoon boat in one do-it-all style boat.

Most recently, I had been using a Scadden Outlaw Escape (which is also a great boat), so I have a good baseline to compare experiences with the Scout and this style of boat in general. And in case you've been living under a rock, you've no doubt seen most of the major manufacturers move more to a frameless style boat. Because of this unique combination of features, weight savings and price, I think we'll see more and more people embrace this style of boat unless you're looking to backpack it long distances or really have the need to put a motor on it and rig it with a fish-finder etc.

Before we get to the written review, here's a quick summary by way of review video with Cheech at the helm:


Pictures are worth a thousand words, but we'll summarize the main functional aspects we look at for this style of boat and how the Scout stacked up.

Portability: One of my "non-starters" with any fishing rig these days is whether or not I can carry it at least a short distance to the water or pack it onto an ATV. The Scout weighs in at 35 lbs, which is definitely not a deal killer, but probably not something you'll want to backpack in longer distances. My Outlaw Escape came in at roughly 22 lbs, however, due to the way Outcast designed the "carrying" handles at the center of gravity on the Scout, I have an easier time carting it around. We've even carried them up to a mile in very windy conditions.

In addition to being relatively light-weight, I can deflate the boat and put it into a Rubbermaid tote for storage and transportation. Whereas a framed pontoon boat would require much more assembly/dis-assembly, I pull this guy out of the tote and it's inflated in a few minutes with no assembly necessary. That's a huge win for this style of frameless boat.
Stability: I think the only thing I need to say about stability is that Cheech, with his 290 lbs of muscle mass, is perfectly stable on the Scout in even some of the rougher water we've experienced. See the video above for examples. In any case, you feel much safer and stable in this than you would in most tradition float tube style boats (or even when comparing against the popular Fat Cat boats from Outcast).
Durability: Probably one of the most pleasant surprises to me was the quality of PVC skin construction on the Scout. The first thought that went through my head was "hey, I'm sitting on a modified white-water raft". Because of this construction, the boat held its shape very well on the water, with little to no flex or give when moving around. This helps both stability but also speaks to the durable construction. Now obviously, durability is a longer term aspect, but I'd say the chances are good this will stand up to a lot of years on the water.
Maneuverability:  First off, we didn't have the chance to take the boats on any rivers in the past few months. However, I have it on good word that they handle rivers quite nicely, track nicely and make for a good fishing experience. As for lakes of varying sizes, when you combine the fact that you have oars to cover distance and the design and shape of the pontoons, there were no issues maneuvering around. As part of this, I'm mention the seat design because I think that lends to increased maneuverability in the sense that you're seated above the water on a nice air cushion. This reduces the amount of drag your non-hydrodynamic legs are in the water. It definitely made it easier to put into position than a framed pontoon.

I'll also throw in the oars for discussion here. Obviously a huge advantage to this style of boat is the fact that, unlike regular float tubes, you have oars to move around with. While not as big as pontoon boat oars, they get the job done. Plus, they have a great oar "lock" system that will keep them out of your way while you fish.

Price: It's tough to rate the price, but at a retail price of around $650, you're only looking at a few more bones than the Fat Cats (or other "high-end" tubes and substantially less than the Scadden boats of similar size and function.

Fishing Comfort: Comfort may be a bit more subjective in nature, but there are a few things worth mentioning. Like I mentioned earlier, the seat bottom being a nice fat comfy air cushion that sits your butt above the water, I didn't get numb legs or rear-end like I would in previous pontoons I'd owned. The seat itself is a kayak style adjustable seat and is easily the most comfortable one I've used. And just being that far out of the water is going to make you more comfortable regardless of the seat type.

The stripping basket is a clever design that sits at just the right level to contain your line but not interfere with your cast. Plus it's adjustable enough to accommodate a few different positions and is easily removable -- no snapping, attaching or buckling (see the video for how it works). My only complaint there is that I had a couple of instances where I accidentally jarred it loose and it also can get in the way of rowing. Otherwise, it's a great feature.

Also a huge win for the Scout is the very roomy "trunk" for storage. Immediately behind the seat is an area big enough to hold all the gear I'd normally have on my pontoon or tube, including my camera bag, food bag and the kitchen sink. And the nice thing is that it's completely dry and easily accessible. It's important to note that while the Scout comes only with a smallish gear "pocket" attached to it (something I initially viewed as a negative), I much prefer to keep my gear in the same bags and not have to transfer all my crap from my stream or wading bags into the pontoon style saddle or gear bags. Plus, the gear pockets on the Scout work great for rod holders.

Overall assessment:
After having fished in the boat a number of times, packed it up, unpacked it and put it through a couple of big storms, we'd give this boat a solid "A". If you're in the market for a new pontoon boat or float tube, it's definitely time to think about the move to a frameless model. So unless you need to attach a trolling motor or need to backpack it long distances, the frameless models like the Scout are the way to go. 


Belly Scratcher Sculpin

$
0
0

Sculpin Overkill


Belly Scratcher Sculpin


Wet vs dry.
I have to admit that I have been on a mission to tie a realistic sculpin for the last couple of years.  El Sculpito has been a great fly, but it's still a pretty impressionistic pattern instead of being a dead ringer.  When Bruiser Blend came to be, I was trying to incorporate it into flies any which way I could, and I got an idea for some fins.  If you have seen a sculpin you will notice that they have huge pectoral fins, and that it's hard to duplicate how big they are with materials that will stay big once wet.  I have seen them tied with hen hackle, mallard flank, zonker strips, etc...  All of that stuff compresses a LOT when it gets wet.

It's hard to explain all that goes into these fins, so you will have to watch the video to see it.  Yes, it is overkill, but it's the closest thing that I could get to huge pectoral fins.  They get a bit softer as you fish them, but they still hold a shape pretty well.  This is the first fly that I tied "woolhead" style with bruiser blend dubbing, and it works REALLY well in that technique.  I realized that I would waste a lot of the dubbing by tying it in woolhead style, so I started using Bruiser Blend Jr. to avoid excess waste.

Another version with a thicker head.
On the first few that I tied I put stick-on eyes on them, but there was something that just didn't look right about them.  I went through several versions of eyes until I just decided to build my own right on the dubbing.  Because these eyes are epoxied right into the dubbing of the head, they don't ever fall off.  If all you get out of this video is a new way to make the eyes, you will still come out ahead of the game...

Initial fishing tests were pretty insane because the fish would come out of the woodwork to absolutely SMACK this fly.  The best part is that you can tie some that are lightly weighted, and some that are heavy in order to put them in all of the water columns.

The four things to watch for in this video are the weighting system, the fins, the head, and the EYES.

Recipe:

Hook:  Allen B200 or Daiichi 2461 (BUY HERE)
Thread: UNI 6/0 - white (BUY HERE) Veevus GSP 100 - black (BUY HERE)
Tail: Zonker strip - olive (BUY HERE)
Body: Holographis cactus chenille - silver gold or olive (BUY HERE)
Weighting system: Articulation wire and 3.8 mm tungsten beads (BUY HERE and HERE)
Fins: Bruiser Blend dubbing - brown olive (BUY HERE)
Head: Bruiser Blend Jr. dubbing - brown olive (BUY HERE)
Eyes: Loon UV resin - flow, and thick (BUY HERE)


The Gut Sack Sow Bug

$
0
0

It's Got Guts

Gut Sack Sow Bug, wet and buggy

Ok, I know there are a lot of sow bug patterns out there and a lot of them are pretty similar. This one, however, should stand out a bit cuz it's taken, well, about 20 years of evolution to get to where it is today. And the last piece of the puzzle was the dubbing, which didn't come about until this year, but we'll get to that. First, the genesis...

As a college student about 20 some odd years ago, I fished a local tail water in between classes and as often as I could make the drive 20 minutes up the canyon to find a piece of water. I was also a typical fly shop rat, scrounging up information on what patterns to use and how to fish them, so I usually threw the standard fair of midges, mayflies and caddis patterns.

One day as I was having a particularly tough time getting any fish, I ended up tossing out a bigger size #12 hare's ear pattern and immediately hooked up. While I don't use one very often, I ended up taking some throat samples with my mini turkey baster (aka throat pump). With the exception of a few small midges, the sample was dominated by what I thought were little potato bugs. So that afternoon, I went to a couple of local fly shops looking for good patterns but didn't find any matching flies or any decent information.

I ended up experimenting on my own and produced a few patterns that matched. The next time out on the river, the pattern was a winner. Eventually, I found out what these strange bugs were and since then I have worked to come up with something that was easy to tie but a good match for the original. Check out some of these naturals to get an idea of what we're trying to imitate with sow patterns in general.

Several factors come into play but the flatter profile was the biggest imitation point I went after. This latest iteration has the same aspects, but the addition of the "see-through"Gut-Bomb-esque innards profile using UV resin was the clincher. The lead-free wire acts as both a way to flatten and weigh the pattern, but also a way to imitate the tell-tale segmentations of sow bug.

The final piece to this pattern was the dubbing. I've tied hundreds upon hundreds of sow bugs over the years and found my own personal mixes were the consistency and color that I needed. This last round saw me going through most commercially produced sow mixes out there. With the exception of a special sow mix from John Rohmer, that's not made any longer, I came up short. Luckily, we have the dubbing wizard in Cheech and he worked through a lot of different mixes before we settled on this specific style. We simply call it Sow Dub. You can obviously use it for scuds, but it's a killer sow imitation. It has some stiffer fibers to imitate the legs, but yet can hold a bit of water for some nice translucent effects. Anyway, you can buy it now on our website. We'll be throwing together a few more colors here shortly.

And here are some variations with the same style you can try as well...
Original Recipe
Pink Thread Hot Spot
Red Sharpie on Lead Base
Red Vein


Material List

Hook: Daiichi X710 #12 - #18  -- Buy Here --
Thread: MFC Premium Thread, 6/0, Dark Gray  -- Buy Here --
Under-Body: Lead-Free Wire, .030"-- Buy Here --
Vein: Krystal Flash or Sulky Fiber, Black  -- Buy Here --
Body: Fly Fish Food Sow Dub  -- Buy Here --
Coating: Loon UV Fly Finish, Flow & Thick  -- Buy Here --

And note a few of the tools we use for this pattern:
-- Dr. Slick Scissor Clamps (for crimping barbs or smashing lead etc)
-- New super-awesome Elite Rotodubbing Twister
-- Dr. Slick All-in-one dubbing brush


Art Led Me to Fly Fishing

$
0
0

Fly Tying is Art

Some colorful Arizona Princes

I grew up in Vernal, UT, which can be described as a big little city in the northeastern extreme of the state.  There is a lot of oil and gas influence in the city, and most of the people there enjoy the outdoors, but my parents were nothing of the sort.  My dad is a local Vernal kid and was a school teacher and a florist of all things (believe me... there is a LONG story there), and my mom is a hippie transplant from the bay area who has lost her mind due to raising 6 rowdy boys and being a kindergarten teacher for about 100 years.  We didn't really camp, hunt, or fish.  We didn't have guns to shoot, ATVs to ride, or animals to feed.  I really was fueled by sports, mainly soccer, through my younger years but I always had access and drive to create art.  In about 5th grade I realized that I couldn't draw anything that was realistic, so I'd draw and create caricatures and abstract stuff (like the flyfishfood logo) that would freak out my teachers.  I guess the sculpture of a figure in a hooded robe with his mouth sewn shut was the kicker for her...  Anyway, I loved art because it was a good outlet for me to create anything that I wanted.  The only thing that pissed me off about my art classes was when the stoners in ceramics class would make bongs that would blow up in the kiln and destroy my
Some of my tying mascots
latest piece.  I enjoy good art and my tying room is covered with it.  I have pictures that friends have drawn and painted, I have some old sculptures including a Bob Marley head that keeps breaking off dreads, and I have a piece of art that I highly value - a piece of old drift wood with a big foam patch stuck to it with flies that have inspired me.  They are all flies that people have given me at a show or in a trade, but they all have a story.  FLIES ARE ART.

My fly tying career began at a call center of all places.  I was the Spanish speaking agent on our team, so I got paid more, but took about 1/10 of the calls the English reps would take so I HAD time.  There were a group of us that would go out and hit some of the local bass fishing establishments in the evenings which usually consisted in throwing banjo minnows until we couldn't see anymore (yes they work.)  We would view fly fishing as a three headed monster that we might not ever catch, but we would try - unsuccessfully...  One day, one of my co-workers brought his grandpa's old tying kit and sat down to
Heathen Fishing.
"tie me some flies." I still remember to this day that he would rub beeswax on his thread for what seemed 10 minutes before he tied any materials in...  Well, guess what habit I had for the first few months...  My first fly was a wooly bugger with a blue tail, yellow body, and red hackle.  The hackle was WAY too big so I just trimmed it down to size...  It was glorious and terrible all at the same time, and I wish that I still has that thing because I'd frame the sucker.  It was the catalyst to my obsession.  That call center was where I met my bride, so I guess that job really worked out well for me.  My Father in Law to be just so happened to be a fly fisherman, and the very first fly rod that I got my grubby mitts on was an old Fenwick fiberglass jobber with an automatic reel that I cast in his back yard.  It seemed like I was in the back yard for hours trying to figure out how to make that dang thing work.  Luckily for me, my wife bought me a high quality Pflueger Trophy Tamer and a fly tying kit for Christmas that year.  Little did she know what she started...  The rod didn't experience proper bendo for over a year due to me lugging along the fly rod kind of as an afterthought in the event that the stars would align and that three headed dragon would be attained that day.  The vise, on the other hand, was getting ABUSED...  I was burning through 50 packs of Mustads faster than I could save up
This is one of the walls in the dungeon.
to buy them.  I tied everything that the poorly illustrated book that came with my kit would show me, and then I started to just freestyle.  I had about every color of wooly bugger, hare's ear, and brassie, and they were all very poorly tied.  I also tried to tie the  Royal Coachman because it was my Father in Law's favorite pattern.  His favorite fishing phrase was "If they aren't eating a Royal Coachman or a Black Gnat you might as well just go home." This phrase created a false sense of confidence in this fly, and one of my ugly Coachmen was the first fly I caught a fish on.  It was at Tony Grove reservoir in Northern Utah, and it was a tiny stocker rainbow.  What I remember most about that fish was that I was alone, and I was stripping a dry fly under the surface.

Fly tying started to get more serious for me once I started to try to match the hatch more.  That is where I realized that every little detail made a difference.  I remember getting together with my buddy Aaron to tie flies, and we would challenge ourselves to tie flies that looked as good as the flies in the Orvis catalog.  It was about this point that I stopped looking at pattern books for the most part.  I regularly referenced the Benchside Reference because it showed techniques instead of flies.  These techniques were what fueled the art of tying.  From there I tied crazy bass flies out of flip flops, trout streamers out of weed whacker line, and the infamous caddis pupa tied from hair from nether regions tied especially for my buddy who would raid my box and hold the fly in his mouth as he got ready to tie it on...  Yeah he was pissed.  I had found my art medium.  Tying flies had become much more than just fooling fish (which was still really important) - it became a way to express myself.  When I was angry I'd crank up Rage Against the Machine and tie big gnarly streamers, and when I just wanted to chill out I'd turn up some Reggae and tie more delicate stuff.

This IS organized
When I fish, part of it is to catch fish - but I'm really motivated to come up with flies that could be the next big thing - and once I find a fly that works I'm off to find another one.  I'm in a constant state of
creation and imagination when it comes to attaching junk to a hook.  Art still lives strong in my basement fly studio/disaster zone, and because of art; many fish have been brought to hand.  I'm good with that.

~ Cheech

Quick Chironomid/Buzzer

$
0
0

Multi-Tasker


Chironomid Soft Hackle Nymph
I'm a big fan of throwing soft hackles for midging trout, so this is a style of chironomid, or buzzer, that can double as both a soft hackle nymph as well as a pupating emerger. Although we'll probably do a video tutorial on it at some point, it's not that difficult to tie. 

The body is just regular turkey biots in black with a Krystal flash ribbing. The wing case is red holographic tinsel with some Loon UV coated on top. The wing case covering the bead is a great way to keep more of a natural shape to your patterns without worrying about the effect of a bulbous appendage wrecking your look and feel on the pattern.

I will fish this in rivers as a regular nymph -- especially on a Euro rig but it works great swung through the current as well. And fished from an indicator on a still water is another deadly combination for this style of pattern.

Anyway, give it a try:

Material List

Soft Hackle: India Hen or Coq De Leon Hen, Black
Wing Case Coating: Loon UV Fly Finish, Flow


Fat Sancho Shrimp

$
0
0

Fish it or dip it in butter

Fat Sancho Shrimp

We have been throwing together some creative flies for buddies that have been heading out saltwater fishing lately, and we have sent baitfish crabs and shrimp patterns all over the planet!  The majority of the shrimp patterns that I had tied were designed to ride hook up and close to the bottom, so I decided to try my hand at a more realistic shrimp that rides hook down.

The materials that we use on this fly are key to its creation because they are very transparent when wet.  The body is made out of a new dubbing blend that we have been playing with called "Salty Snack Dubbing." This dubbing is a very coarse blend of synthetic fibers that can be twisted up in a dubbing loop, tied in like a hank of material, or tied in perpendicular to the hook shank for
merkin/toad style flies.  The other key is Loon UV resin in all three thicknesses (thick, thin, and flow).  This UV resin allows me to stick the top of the fly to the bottom half, and it allows me to properly saturate the fibers in order to make the top half of the fly solid.

Have fun tying this little beauty, and let us know if it catches anything for you.

~ Cheech

Recipe:
Hook: Daiichi 2546 #1 (BUY HERE)
Thread: Uni 6/0 - White (BUY HERE)
Eyes: Epoxy mono crab eyes - Black (BUY HERE)
Egg Sack: Salty snack dubbing - lt. orange (BUY HERE)
Body: Salty snack dubbing - gray (BUY HERE)
Flash (Turd Vein): Crystal flash - black (BUY HERE)
Over Body: Bruiser blend dubbing - gray (BUY HERE)
Resin: Uv clear fly finish - Thick, thin, and flow (BUY HERE)

Complex Twist Slider

$
0
0

Slow down your sink!


Complex Twist Slider
As we continue to venture toward the saltwater side of things, it was only natural that we tie a slider pattern.  I was intrigued by the construction of the head and tweaked it a bit before I settled on the method that we will show you in the video (It has a bruiser blend beard...)  I also decided to incorporate the same tail and body from the complex twist bugger to make up the bulk of this fly.  

The slider is a great way to help your bug "suspend" more in the water because of the half buoyant head, and can be a great application for freshwater trout as well.  The key to tying these bugs is to vary your weight system based on the type of water you fish, and how your fish like to eat.  You can use everything from small bead-chain eyes to large tungsten eyes.  

Deer hair...  This can be a four letter word for some tyers, but I assure you that this pattern makes it "doable." The eyes help the hair stay right in place, and you don't have to worry about stacking, packing, or spinning (unless you want to.)  It's a great starter fly for people wanting to get used to tying with hair.

~ Cheech

Material List


DONT FORGET NEW RAZOR BLADES!!! (BUY HERE)

Hook: Daiichi X452 2/0 - 2  (BUY HERE)
Thread: UNI 6/0 White and Veevus GSP 100 denier (BUY HERE)
Eyes: Brass Barbell eyes - 4.8mm (BUY HERE)
Tail: Marabou - Lt. cahill, med brown (BUY HERE)
Body: UV polar chenille - gold uv (BUY HERE)
Body 2: Schlappen - fiery brown (BUY HERE)
Body 3: Holographic cactus chenille - silver/gold (BUY HERE)
Head: Deer belly hair - brown and natural (BUY HERE)
Throat: Bruiser Blend Jr. - Tan (BUY HERE)
Weed Guard: 25# monofilament

Alternate Trout Recipe:

Hook: Allen B200 #6-10 (BUY HERE)
Thread: UNI 6/0 White and Veevus GSP 100 denier (BUY HERE)
Eyes: Brass Barbell eyes - 4.8mm (BUY HERE)
Tail: Marabou - lemon yellow, med olive (BUY HERE)
Body: Palmer chenille - olive (BUY HERE)
Body 2: Schlappen - olive (BUY HERE)
Body 3: Holographic cactus chenille - olive (BUY HERE)
Head: Deer belly hair - olive Body: UV polar chenille - gold uv (BUY HERE)
Throat: Bruiser Blend Jr. - pale lemon (BUY HERE)


Things That Entertain Me - The Fishing Guys

$
0
0

Laughter is the best medicine.
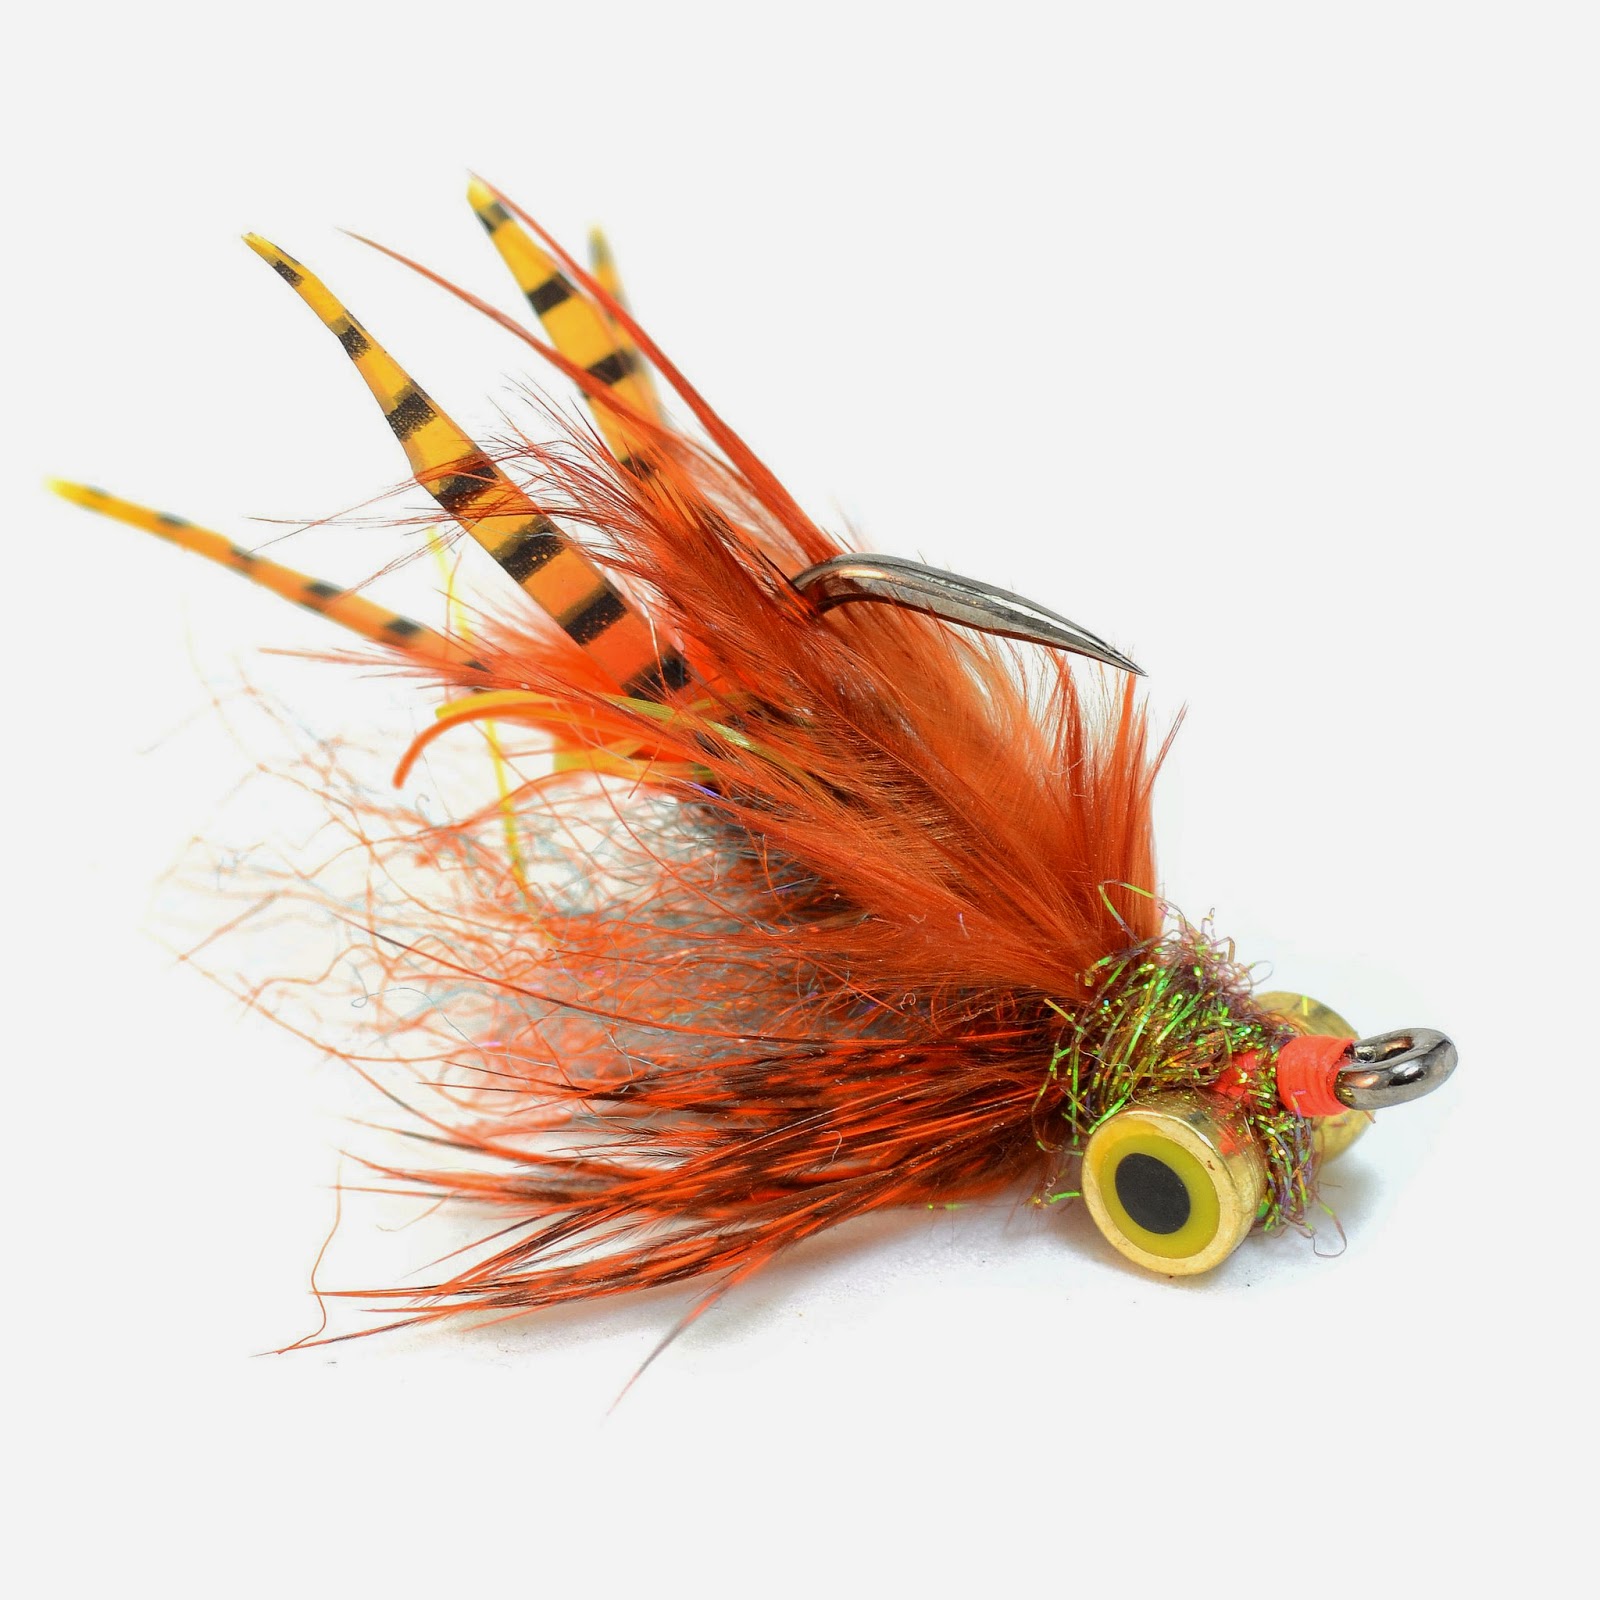

Fish entertain me too...
Recently I was pondering the great world of fly fishing/tying and how naturally preconditioned human behaviors seep their way into our sport.  At first I thought these things were a nuisance, but as I looked deeper into this very crucial topic, I realized that these things exist in all walks of life, and that they are there to ENTERTAIN us along the way.  I used to hate running into these situations, but as I thought about it more - I am highly entertained.  Here are a few.
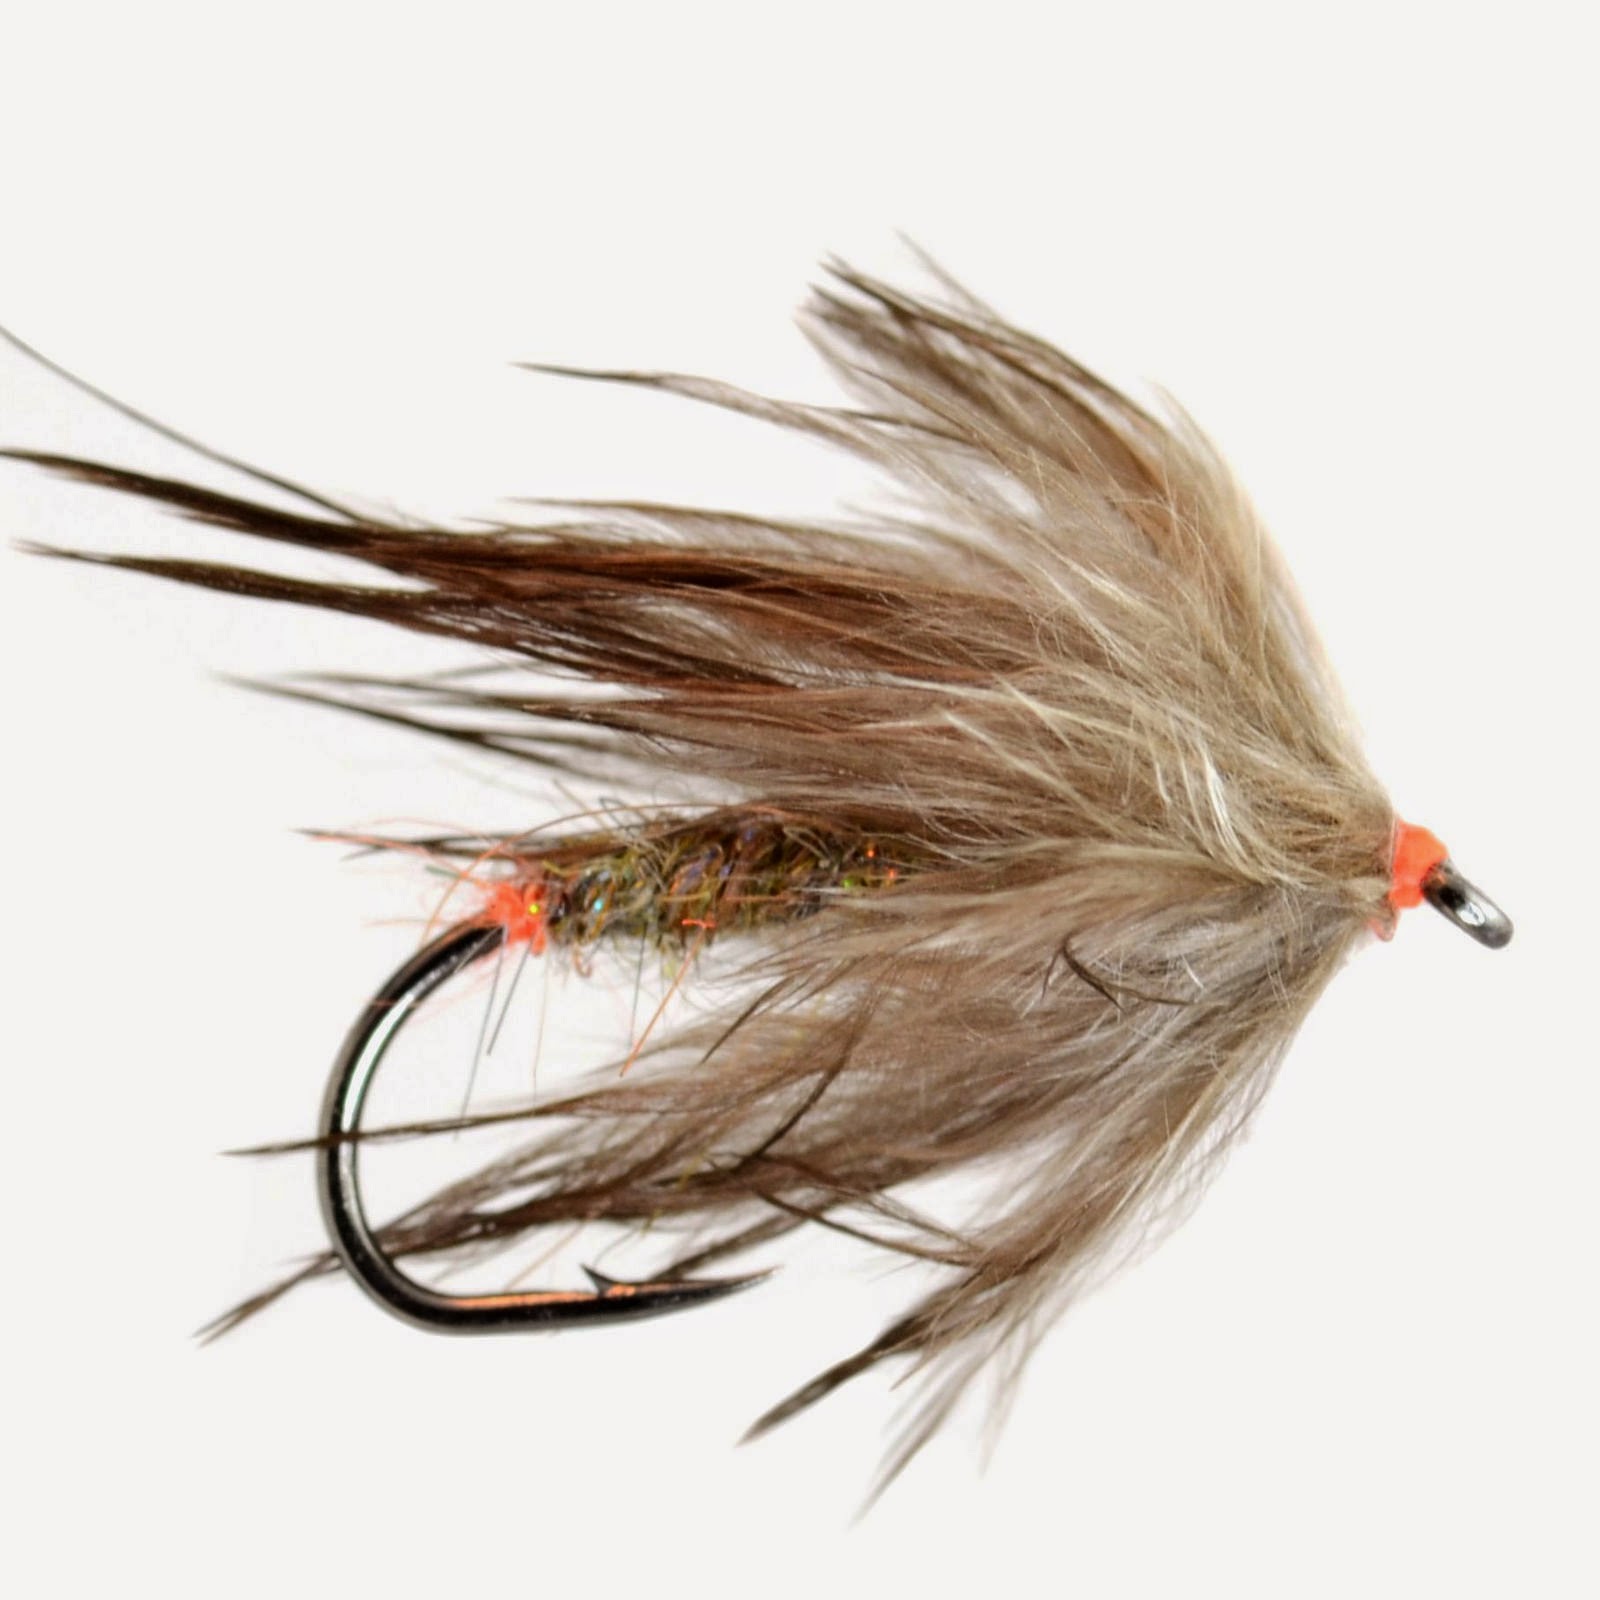

It HAS to be tan dubbing #5899 
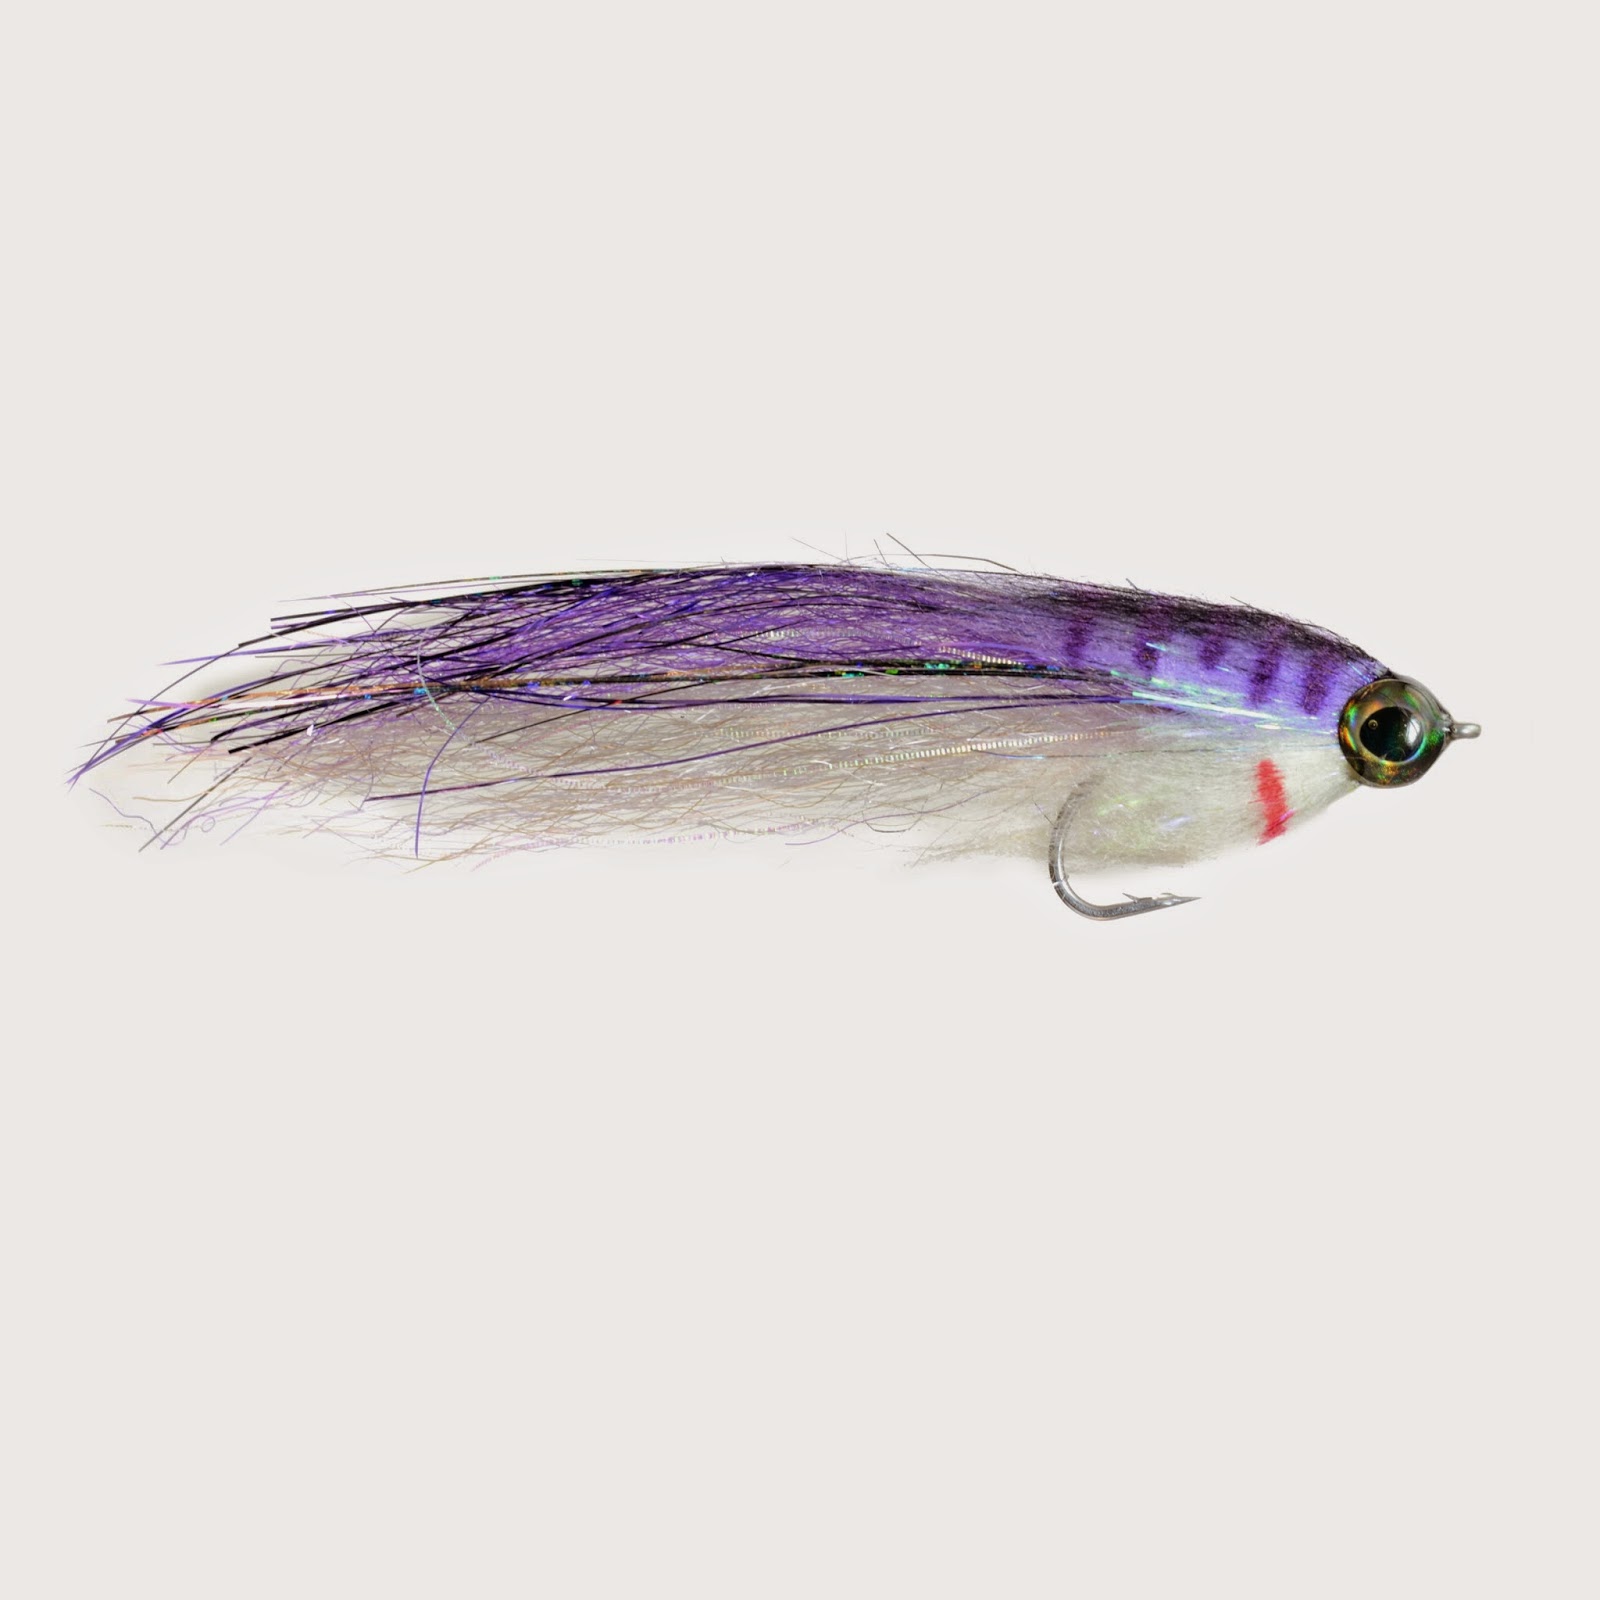
Recipe guy- I know that I have talked about this creature before, but he deserves mention in this post too.  He is the guy who has to have the EXACT material for the fly that he saw in a book or on the internet, and if he can't find the material, it's no use...  might as well go golfing.

Everything has already been invented guy - I get it...  Most of the patterns out there are variations of other flies, but there is still a LOT of room for creativity (especially with all of the new materials out there.)  This guy though...  His goal in life is to
Grumpy Frumpy AKA Wooly Bugger
educate you that your pattern is nothing more than a variation of a wooly bugger.

Accessory guy - Now, I don't have any room to talk on this one in regards to fly tying, but there is a limit.  I once fished with a guy who literally had crap coming out of his vest at every angle.  It reminded me of a waitress at Chili's with "flair" buttons pinned all over the place. (Yes...  a reference to the movie Office Space.)

Fished for 25 years guy - It's a question that gets asked from time to time...  "So how long have you fished?" I always get a kick out of the guys who mention that they have fished for X number of years over and over again as if that tells me how good of an angler they are...  Even better is the guy who says that he has fished for 25 years -  twice a year for 25 years.  I know guys who have fished for 5 years that can really throw it down.  It's all about progression and how vigorously you pursue the sport.

Hater guy - Not to be confused with one upper guy who is not mentioned in this list.  Hater guy can't handle it if he's not the only one KILLING it, and goes above any beyond to try to put you down.  "Pssshhh, Cheech Leech???  so what can that catch that a wooly bugger can't?  What a stupid fly."

Mad guy - I once fished with a guy who, on his first attempt at fly fishing, caught multiple fish on dry flies because the fish were recklessly destroying caddisflies that were skating across the surface.  Once the fish switched to mayflies and dead drifts he stopped catching fish.  I didn't.  He was pissed that he only caught 10 or 11 fish as opposed to 35.  I never fished with him again.  He is Mad Guy.
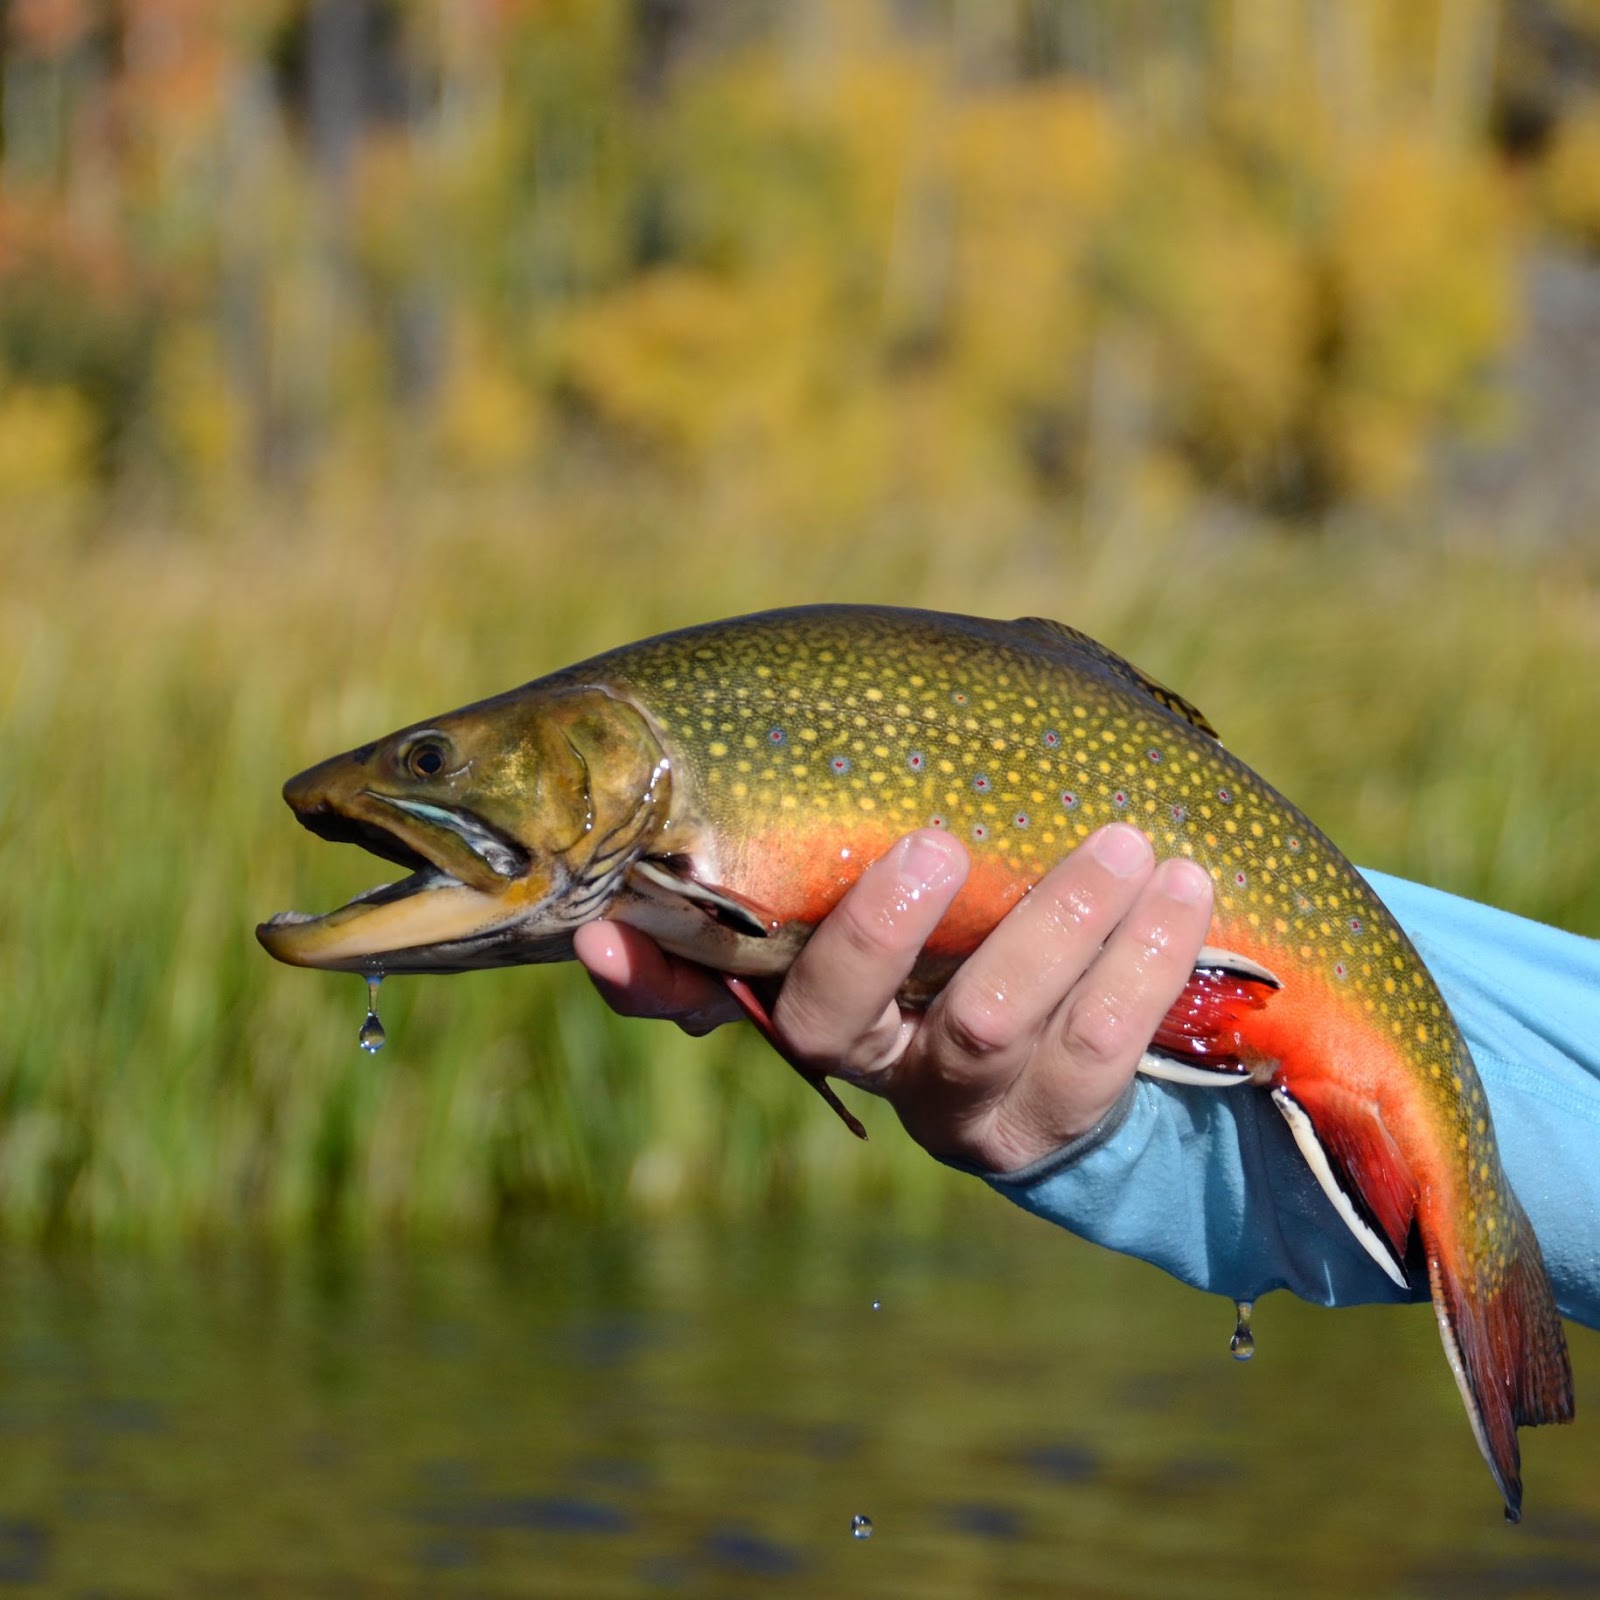
Don't put em' back until your count em!
Fish counter guy - Curtis tells this story much better than I do, but there was a guy several years back that would claim ridiculous numbers of fish caught.  So he's a fish counter... good for him.  On a club outing one year where everyone was basically fishing within view of everyone else, he came in with some pretty astronomical "numbers" of fish caught that day.  Our only guess was that he was logging every time he got a bump... from weeds or fish.  I really have no issues with the fish counter guys, but it's the fabricators that entertain me.  This being said, Curtis and I once caught 256 trout in one outing and if you don't believe me I'll punch you in the neck.

Wader guy - I have to admit that I love gear.  Good waders, packs, boxes, boots - you name it, I like it.  I'm entertained by the guys I see in July standing ankle deep in a creek with their 6mm duck waders on when it's 90 degrees outside.  "Hey rookie, you do your fancy wet wadin' over there.  Real FLY fishermen wear WADERS."
No waders???  Noob.

One Water Willy - This is the guy who fishes one and only one body of water, therefore he knows everything about fishing.  Granted, he is REALLY good on his home water, but if he goes anywhere that has different conditions, he's completely lost.  I mention this because I can become so obsessed with certain bodies of water that I can become One Water Willy at times.

I know, I know, I know guy - This guy, in all aspects of life, is one that HIGHLY entertains me.  One time I was out on a very technical piece of water and I was supposed to be showing someone the ropes.  Every time I'd try to recommend a rig or a fly I was greeted with "I know, I know, I know." I promptly stopped talking and just continued fishing.  Upon the next question, I just responded "I thought you said you knew??!??" Well, if you know, go knock er' out champ...

Unsolicited coach guy.  This guy cracks me up too.  Everyone has had "one of those days" where your flies end up in more trees than fish...  I was having one of those days when a dude walked up and started to say something like "You know, I was watching you cast from over there, and it looks like you need to open up your loop a little bit..." WELL NO S#!T SHERLOCK!!!  He turns me into "mad guy" and "I know" guy pretty fast.

False cast guy.  This is usually a guy who has watched A River Runs Through It one too many times.  He sees rising fish and proceeds to take 500 false casts before laying his line down.  Of those 500, 473 of them would have been perfectly fine presentations for that fish...  This is particularly entertaining when you are on a small river and you are taking turns.  I may or may not have grabbed branches and pulled them down behind him to help him decide to stop casting.  I'm a bad friend.

This post was more therapy for me than anything to help me realize that we are all human beings, and we have our quirks.  It's better to be entertained than frustrated (which is easier said than done.)

~ Cheech


Turbo Snail

$
0
0

Add Crunch to the Diet

Turbo Snail!
A number of years ago, while fishing a favorite stillwater, I caught a few trout that had big bulging bellies that crunched when you handled them. I first assumed it was maybe a belly full of crunchy crawdads, but looking closer at one of the next fish I landed, there were a few smallish black-shelled snails that were visible in the back of his mouth. I knew trout would eat snails, but I had no idea it could be to such a large part of their diet. It was then it dawned on me, and as I walked back to the truck that afternoon and saw the shoreline littered with bleached little while shell, that these big trout liked a bit of crunch to their diets.

Since then, I've fished a few snail patterns here and there -- mostly simple peacock herl jobbies that didn't really look like snails too much. It wasn't until this past summer that a friend mentioned he was fishing another lake and happened to find big healthy trout also gorging on small snails. And since I was headed to fish for big snail-eating Rainbows the following week, I set about to find a better imitation.

Aquatic Snail
My first goal was to make it a good match for the naturals we were seeing. And secondly, I wanted to make it a relatively quick tie. I went through several iterations of failed patterns until I found the right mix of hook and materials. If you look at the natural snail on the right and compare to the body shape of the imitation, you'll notice the fly is a bit more gradually tapered, whereas the natural snail has a more aggressive taper. The problem with imitating this aggressive taper is that you lose hook gap pretty fast -- especially with this style of a "hard body" fly. So I opted for a 2X long nymph hook and constructed the taper so as not to impede the gap. And I went through a lot of different style hooks before deciding on this specific one. The Daiichi X710 had the gap and shank length we needed, plus it's a super-sharp hook.

In my first few fishing tests, it was a great success and I had no problem hooking fish. I think the shiny and hard surface nature of the pattern gives it the advantage over more traditional less imitative patterns. And yes, the trout eat the snail, shell and all. So don't be put off by the hard body. You'll also notice that, once again, two Loon UV Clear Fly Finish products were used together in this pattern. I find myself using more and more of this stuff. It's great!

Material List:

Hook: Daiichi X710 #14 -- Buy Here --
Thread: UTC 70 Denier, Black  -- Buy Here --
Bead: 2.8mm Tungsten, Black Nickel  -- Buy Here --
Body: J:son Realskin Nymph Body Material  -- Buy Here --
Thorax: Ice Dub, Black  -- Buy Here --


Tenkara - Help Me Understand

$
0
0

Simple or Complex?

If you had to chose one fly for the rest of your life....

My father in law is the guy who is responsible for putting a fly rod in my hands, and he tells some great stories about how he and his brothers would take a snelled Royal Coachman down to the "crik" and cut a willow to fish it with.  No rod needed, and they learned how to stalk and catch fish.  They did it because they didn't know any different, and to them it was fishing!  They eventually switched to fly rods and reels because it opened up a whole new set of doors for them.  When I told him about the Tenkara movement (I'll explain why I call it that), he just kind of had a puzzled look on his face.

I will fully admit that I have never cast a Tenkara rod, tied a Tenkara fly, or had the though on the river that "man... I sure wish I had a Tenkara rod for this application..." and here's why.  Similar to when my wife came up to me last night and informed demanded that I go Christmas caroling with her and the kids, my natural reaction was to shut down because I was being ordered to do something.  Call me a Grinch.  No. I will not be sharing my musical talents with the neighborhood.  Tenkara seems like the same sort of thing.  I don't respond very well to having something shoved in my face over and over again.  I'm not saying that there are not applications where it would be fun to try it out, but some guys are passionately religious about it as if it's some sort of revolutionary "Tenkara Movement," and somehow if you aren't fishing Tenkara you are a neanderthal that lives in a cave.  I think it would be a fun technique to try on high mountain creeks full of the brookies that my Father in Law used to catch, but when guys tout it as the ultimate fishing experience that can cover all bases - that's when I shut down.

The flies.  So they are basically just soft hackle patterns with the hackle tied in facing forward.  Sure, I could tie that in a billion different varieties that would catch fish, but this alone would severely limit my desire to tie flies at all, and what if the gran pappy under the bank just wants some real live meat in his face?.  I know. You don't have to throw those flies exclusively, but are you really taking advantage of the pure simplicity of Tenkara if you aren't fishing with them? ;) ;)

Simple is good.  Tirelessly preaching about something that is supposed to be simple to the point that it gets complex is just that - complex.  Also, ditching the reel and focusing on one style of fly might not actually make your life all that simple anyway.  Picture this scenario (It happened to me).  You are walking from a higher vantage point along a small stream that has notoriously spooky fish, and they are particularly skittish and spook each time your sasquatch size 14 wading boot hits the soft dirt.  They are readily feeding on top, but not if you spook the hell out of them first.  Through fancy research you calculate that you can get about 60 to 70 feet away before they go berserk.  You have two options: A) Put on a ghillie suit and get on your belly and inch toward the fish using Navy Seal sniper techniques so you can make a short cast at them and hope they eat your soft hackle, or B) comfortably stand behind the pool and use your casting ability to lay down a cast at distance using a fly that precisely matches the hatch.  Option B seems a little less complex doesn't it?

I don't really want to assign a standard prototype to "Tenkara Guy," because there are a lot of them out there who understand that it's an application that might not cover all the bases.  I mostly shut down when guys build up tenkara by putting down all other types of "fly" fishing.  I have heard that there is even turmoil within the tenkara ranks about what "real" tenkara is.  Rules suck, and it seems like tenkara has too many of them.  I'm also not saying that I'll never try it... now hand me a tenkara rod and some mittens so I can go out caroling with my wife.

Alpha Predator

$
0
0

Large Profile Baitfish


My favorite color combo: Purple and White

Early last year I had some buddies that wanted some flies specifically for musky fishing, and I just happened to have one of those "itches" to tie big flies.  I wanted to try something that was 100% synthetic to maximize durability and color ranges the fly could be tied in.  The original Alpha Predator was tied very similar to this one, but it was done on a 5/0 Trokar hook.  I had it with me one day when we were fishing for bass, so I decided to give it a swim just to check out its action etc.  Long story short the bass wouldn't leave it alone that day, and I knew I had a winner.  It has since been to many destinations (both salt and fresh water) and it doesn't fail to attract fish.  I really think the all-star of this pattern is the flash-n-slinky fibers.  They have surprising movement in the water for being synthetic fibers, and they are extremely durable.  If I'm tying a fly with long fibers I usually pick flash-n-slinky or Steve Farrar UV blend .  One modification I make to this fly is I'll add a collar of bucktail right behind the bruiser blend if I'm tying in 4/0 or larger.  


~ Cheech


Recipe:

Hook: Daiichi 2546 #1/0 (BUY HERE)
Thread: Uni 6/0 - white (BUY HERE)
Body1: Flash n' Slinky - purple and anchovy (BUY HERE)
Body2: Holographic flashabou - purple and black (BUY HERE)
Collar: Palmer chenille - pearl (BUY HERE)
Head: Bruiser Blend - purple and cream (BUY HERE)
Eyes: Fish Skull Living Eyes 8mm - ice (BUY HERE)
Coating: Loon UV clear fly finish - thick and flow (BUY HERE)

Wasatch fur comb for Bruiser Blend (BUY HERE)


The Brothers Hike of 2004

$
0
0

Meet the Schaefermeyers


Curtis and I camp in style.  It wasn't always this way.


Here is a little gem that I posted on an old blog that I used to keep.  This trip is still talked about at family dinners and get-togethers all the time.  Sorry for the grainy pics on this one...  I was running solo with a Nikon Coolpix 3.2 MP camera.

~Cheech


The crew with dinner
The famous “Brothers Hike” of 2004 was set, and through research, my father in law and his wild bunch of brothers remembered a place up in the hills that would make a great base camp with close fishing opportunities.  Last year we decided to go explore the Timothy Lakes because everything looks good when you are just looking a squiggly contour lines on a topo map.  The most important things I learned that trip were that the maps we had used 40' countour intervals, and that there were a lot of lines that were really close together. We didn’t want to go back to the Timothy lakes because we found out that the destination was really 10 miles as the CROW flies… That’s the last time we let uncle Robin play with the GPS. 14 miles later I found myself too tired to fish for the first time in the history of sliced bread.


The Brother’s Hike is an event in which the crazy Schaefermeyer family delves deep into the woods for a few days to remember the good ol' days of gallivanting
Uncle Mike and his Zebco 33
through the Uinta mountains. It’s a great group to spend a few days in the backcountry with, and there is usually an inappropriate story told by Uncle Neal around a campfire big enough to heat a small skyscraper. There are 6 crazy brothers who used to do this all the time back when they weren’t so… well, OLD. The eldest brother happens to be my father in law - the one who first stuck a fly rod in my hands.

Now that I have FULLY explained that, The 2004 trip was all planned out, and I was along for the ride.  My father in law had a 2WD Ford Ranger that had the ground clearance of a Yugo.  I know this because the trail coming into the meadow where we set up camp was full of oil pan rattling boulders and sink holes of mud that were not Yugo friendly.  We got a late start that day, I ended up walking in front of the pickup at 11:30 at night feeling around for oil pan eaters.  Long story short, we ended up sleeping in the back of the truck halfway down the trail that night until reinforcements arrived the next morning. The camp took place close to where I grew up on a chain of lakes that we will call lake X, Y, and Z. I usually don’t have any problem listing names, but these are true gems that held HUGE fish. Not just huge fish, but huge
4WD is a MUST
BROOK TROUT. You will have better luck getting me to wear a pink dress fishing than getting the names of these lakes.  The best part about this trip is that we had no idea how big the fish really were because none of them had fished it for over 20 years.  We were expecting the normal run-of-the-mill 6 to 10 inch brookies that make excellent camp table fare.

The grueling hike up to the water from the base camp tested my ever fit and trim 6’5” 250 pound frame because it was straight up the side of a mountain with no trail, but an abundance of Volkswagen sized slide rock and downed timber.  What a great day to hike up it in shorts and Tevas. I came around the final corner wanting to sit on a rock, eat some jerky, and pound a Mt. Dew and I heard Uncle Greg yelling to see if I had a net. I thought, “why in the world would you need a net for 6” fish?” I looked and saw a MONSTER! Big brooks! I strung my rod as fast as I could and proceeded to get skunked for the next hour as I flogged the water, casting for distance, changing flies... etc. Then logic hit and told me to start fishing them like smallies.  I really like chasing smallmouth bass, and I think that brookies and smallies have kind of a similar "hide in the rocks and ambush" mindset.  The whole lake was lined with boulders, so a few parallel-to-the-shore casts later, I saw my first red flash. It was BIG. 19.5” is what my
I ate this sucker
tape told me. The fly-o-day happened to be a plain jane brown conehead bugger.  The fishing wasn't fast and furious by all means, so we moved from lake to lake trying to find a pattern that was consistent.  One lake shined above the rest, and that's where I spent most of my time chasing smallies but landing brookies. My father in law caught a fish that was just .25" smaller than mine, and I was sure to let him know that. Of course, I was the one driving the measuring device...

I’m usually a C&R fisherman, but this was the Brother’s Hike for Pete’s sake. We’re eatin’ fish (which explains the fingers in the gills and the pic of trout on a stringer).  These trips create memories that will never be forgotten, and over the years we have reminisced many times about the surprise of big fish, the stories around the campfire, Bill Jr. disturbing the ecosystem and our eyes by trying to bathe in the crik, and me escorting a Yugo pickup through enemy territory.  These are the trips will forever be in my memory, and are a vital part of the fishing journey for me.

~ Cheech

Murica Merkin

$
0
0

Made in 'Murica

Murica Merkin


Alright.  Living in Utah doesn't provide much opportunity to fish for saltwater species, but my vise sure has an appetite for stainless hooks...  Merkins and toads have become a very entertaining style of fly to tie, but the technique was frustrating at first because I kept binding down the clumps of material together.  I also realized that this style of body can be tied out of a variety of materials to get some really cool effects, and I have successfully tied them with EP fibers, congo hair, bruiser blend, and our new salty snack dubbing.  In this video, you will see a very cool technique that helps keep the bundles out of the way while tying other bundles and legs into the fly.  You'll have to watch it to see.  The other tidbit on the video that you will find useful is how to separate and color the claws.  It's a very easy process if you use Loon clear UV resin.

We posted this color combo merkin on our Instagram feed, and one of the comments was simply "Murica." That's where the name comes from.

Recipe:
Hook: Daiichi 2546 #2 BUY HERE
Thread: UTC 140 - tan BUY HERE
Eyes: Bead chain eyes - large black BUY HERE
Body1: Palmer chenille - root beer BUY HERE
Body2: Salty snack dubbing - crab tan BUY HERE
Legs: Round rubber - tan BUY HERE
Weed guard: 25lb. mono
Coating: Loon UV clear fly finish - flow BUY HERE

Viewing all 629 articles
Browse latest View live