Quantcast
Channel: Fly Fish Food
Viewing all 629 articles
Browse latest View live

A Hook is a Hook, Right?

$
0
0

Why skimp on your most important piece of gear?


Copper John tied on a TMC 2499SPBL


The hook.  The essence of a fly, and the business end of what makes our sport what it is.  When I first started tying flies, there was a wide array of hooks that could be bought at the fly shop, online, or in my case in Dennis Brakke's garage.  When I first started out, I bought the original Mustad hooks that were so popular because they were cheap, readily available, and strong.   These hooks were very functional, but they were lacking what I later found to be the most critical part of a hook...  A sharp point.  Sharp hooks are critical to fly fishing because of the minimal pressure applied to the fish (compared to most other styles of fishing) when setting the hook.  Sharper hook points will protect your tippet, penetrate more easily, and essentially catch you more fish.   I remember my first pack of Tiemco hooks, scratching the hook across my thumbnail only to have it dig in - THIS was a real - live - hook.  I learned that the key to these lazer sharp hooks was a chemical process that the manufacturers used to sharpen them.  Chemically sharpened, conical point hooks became the only hooks I tied with.

The aforementioned Mr. Brakke, who is no longer with us, taught me a lot about hooks in my early years of tying, and inspired my tying a lot.  He was always tinkering with different varieties of hooks, and showed me what to look for is a quality hook.

In todays market, there are many manufacturers that make fine quality hooks, and I have tied and fished with most of them.  Chemically sharpened hooks are more readily found, and even Mustad has moved to chemically sharpened hooks.  Mustad's signature series is a very fine quality hook with a needle sharp point that far surpasses the Mustads of years past.  For you streamer aficionados and people who like to tie and fish BIG stuff; there is a hook for you.  Eagle Claw (a company that proudly makes hooks in the USA) has come out with a line of hooks tailored mostly to bass fishermen called Lazer Trokar.  They use lazer technology to cut the points on their hooks into a three sided killing machine.  I have been bass fishing with them for a few years now, and they are probably the meanest hooks for big bugs on the market.  If a fish even looks at it wrong, you are going to hook up.  They are a bit spendy, but if you are chasing a trophy, it would be worth it to tie your trophy flies on a Trokar.

As you will see, there isn't much that I don't like, but I decided to break down several of my favorite hooks.


Tiemco / TMC

Bunny Midge on a TMC 518 #30
  • 3761 - Slightly longer than a normal nymph hook and heavy wire.  Great for longer nymphs such as the Masked Marauder, or other stonefly nymphs.  I love the #10 and the #12.
  • 102Y - Light wire dry fly hook with a wide gape.  I don't know if I just love the matte black color of the hook, or the odd sizing.  I use this hook a lot, and use them when I tie the Grumpy Frumpy, or Iris Caddis.  I like the #13 and #17
  • 2488 - This is perhaps one of the most versatile hooks made.  A wide gape curved shank hook with a straight eye.  I use them for everything from #28 midges, to #10 chironomids.  
  • 2499SPBL - Imagine the 2488 on steroids.  It's barbless, but it has the spade point that penetrates very quickly.  I like this in bigger sizes for Czech nymphs and stoneflies.
  • 100 and 100SPBL - The Tiemco 100 is their standard dry fly hook.  I use it for dries, nymphs, soft hackles, etc.  It's just a great all around hook.  The SPBL is barbless with the mean cutting point.
  • 5262 - 2x long streamer hook.  I tie most of my stillwater flies on this style of hook.
  • 5212 - 2x long dry fly hook.  This is a great hook style for hoppers and other long bodied dry flies.  I also tie stimulators on this hook instead of the TMC 200R due to a wider hook gape.  You can see that the 200R didn't make my favorite list but that's another story...
  • 518 - This is a great hook for tying micro flies in the #28-32 range.  Yes the fish eat them.


Stonefly on a Mustad C49S
Mustad Signature

  • C49S - Scud/pupa hook similar to the TMC 2488, but with a slightly different bend.  This has become one of our favorite hooks, and Curtis even tied big hopper patterns with it.
  • R30-94833 (Barbless Dry) - Very light wire barbless dry fly hook.  I like it for fishing very delicate dry flies and light leaders.
  • R72 (Streamer) - Another great 2x long streamer hook.  the Cheech Leech on this one when they are sitting on my desk.
Allen Flyfishing 
 A lot of people have asked up about their hooks, and we have been very impressed with the quality, especially in their barbless series.  I have purchased about 3500 of these hooks to date, and they have proven to be worth every penny.  Here are some of my favorites.

Elk Hair Caddis tied on an Allen D102BL
  • B200 - Bass bug hook.  I tie most of my El Sculpitos on this hook, and it holds up great to being banged off of the rocks constantly.
  • D102BL - This dry fly hook has amazing retaining ability for a barbless hook.  I have started to switch to this hook for my dry fly needs.  I only wish it came in sizes smaller than 16.
  • D104 - 2xl dry fly hook.  For a light wire hook it has great strength, and a really good point.  
  • J100BL - $3.49 for a legit competition ready barbless jig hook?  Yes please.
  • N204BL and N203BL - LIght and heavy wire scud hooks.  Need I say more?  This is the original hook that I ordered to see what kind of quality I was dealing with.  They passed the test with flying
    Stonefly tied on an Allen J100BL
    colors.
  • N205BL- Their newest release in the barbless arena.  It's got a great bend that is great for Czech nymphs and caddis pupae.  It is also light enough to tie emergers and dry flies.
  • S402 and S402BL - This is the one that gets the most mileage on my desk.  Great for stonefly nymphs, buggers and Cheech Leeches.  The BL is crazy sharp.

Daiichi (they mean it when they say "world's sharpest hooks")

  • 1130 - One of my favorite curved shank hooks for dry flies.  Thin wire, and slightly offset.  This thing hooks up really well.
  • 1150 and 1250 (barbless) - Another curved shank hook that has a slightly "up" eye.  This hook makes great chironomids and pupae patterns.
  • 1710 - 2xl nymph hook that is great for anything from stoneflies and mayflies in the smaller sizes, to wooly buggers in the larger sizes.
  • 2461 (Black straight eye 3xl) - This. Hook. Is. Mean.  One of my new favorites.  Flat black finish, and SHARP!!!  

Dai Riki

  • 730 -  2x nymph hook.  An affordable option for a bugger/nymph hook.  Typically sold in quantities of 50.  I have not had any problems with this hook.  Gold finish.
  • 135 Scud/Pupa - Dai Riki's scud hook.  Again, a good product for the money.


Umpqua Comp series  (Hanak)

  • 300BL Scud/Pupa -  Finally a good comp hook that is readily available.  These are top of the line barbless hooks, and you will pay the price for them.
  • 400BL Jig - Great hook for tying your anchor flies on.  With a tungsten bead, this one will ride hook point up and slither over rocks.


Umpqua U series - B sides... ( I avoid these hooks in smaller sizes.)

  • U301 3X nymph/streamer - I typically have these in sizes 2 and 4.  That's about the only size that has a consistent barb.  I have had deformities in barbs and eyes with these, but they are fairly cheap.
  • U502 Bass bug hook - This seems to be one of the shining stars of the U series.  Black nickel finish, and nice points/barbs.

Gamakatsu

  • S10 - This is a 2x long 1x fine dry fly hook.  I really like it for terrestrials and other longer bodied terrestrials.
  • R10B - 1x fine dry fly hook that is barbless.  This hook really penetrates well and retains fish due to its funky bend.  It is a very light wire hook, and I have bent some on fish, but it is a great tool for light line fishing to picky fish.
  • B10S - This hook has the same design as some of the wide gap bass bug hooks, and is great for warmwater flies, streamers, and some terrestrials.  I always have these on hand from 2/0 to 6.
  • C12U - This is THE worm hook.  I tie a lot of pig sticker style worms on this hook and it really hooks up well.
  • C12 BM 26-30 - This little hook is pretty insane...  Gammy quality all the way down to #30.  It also has somewhat of a larger eye to make threading tippet a bit easier.

Lazer Trokar

  • TK180 Straight eye streamer hook.  Designed to be fished with plastic worms, there is a plastic barb that is easily cut off to make it tying friendly.  The hook points on these Trokars are INSANE!!
    Cheech Leech tied on two TK180s
  • TK97 Curved shank / straight eye hook.  This is a great hook for tying clouser type flies.  This hook has pretty heavy wire, so a weightless fly will suspend and slowly sink.  This is my preferred hook for the low fat minnow.
  • TK10 Straight shank, straight eye, and straight money for pike/musky flies.  It has a welded loop and very think wire designed to be fished for huge saltwater fish.  I also use this a lot for bass patterns.


Cabela's

  • Why rate Cabela's hooks?  Because they are essentially identical to TMC hooks.  A Cabela's employee once told me that they get their TMC orders and the Cabela's hook orders in the same package...  The finish is dead on and the quality is great.  

As a general guideline, if you stick to hooks that have a conical - chemically sharpened point, you will have better luck hooking and keeping fish.  The above list is just a compilation of some of the hooks that I like to tie with.  I hope you find some of this information helpful so you can go out and rip some big fish!

~Cheech


Online Fly Shop Ready to Roll...

$
0
0

We finally got our act together


Baby steps, right? After a bit of poking and prodding from a number of people here and there, we finally got our act together and built an online fly shop to showcase some of the custom patterns we feature here on the site.

So starting today, you can go to store.flyfishfood.com and you'll see the (somewhat limited) selection of custom flies we have to offer. If you want parachute adams or regular pheasant tails, this isn't the site for that. We're focusing on more specialty patterns.

Over time, we'll add more patterns and eventually materials and who knows what else...

Check it out and let us know what you think and what else you'd like to see there!

Callibaetis Emergers a la Deep Dish

$
0
0

The Deep Dish dishes on the fish


For those of you that follow our site here, you know that we're fanatical about field-testing our patterns and tweaking them as needed. The Deep Dish Callibaetis, tutorial and fly design found here, has continued to sizzle on our trips -- both still water and even rivers.

callibaetis nymph emerger mayfly deep dish

As with any field-test flies we throw, we usually try to fish them side-by-side with other patterns to see how they stack up and we try to fish them in a variety of waters to get a better idea of how they'll perform. As with my first rounds of field-testing, the most recent results prompted this update.

Just a few days ago, we hit yet another high mountain lake that held good numbers of native Bonneville cutthroat. Early on, the dry fly action was insane and we didn't really have any reason to try a dropper, but eventually the fish went deeper with the sun rising higher, so I decided to throw on a dropper. After a few unsuccessful midge patterns and a damsel pattern, I decided to go with the Deep Dish. My fear was that the fish had already retreated too far for a simple dropper from a hopper. Nonetheless, I tied on the Deep Dish Callibaetis and the first cast resulted in a swing and a miss. The next two casts were similar. Then on the fourth or fifth cast, with hits on all preceding attempts, I was into a solid fish.


And so it went for the next hour or so, until we left, catching fish after fish after fish. Granted the fish ended up also turning onto damsels later, but during this non-hatch time period, there was just something about the pattern that got some attention.

So once again, a pattern has moved onto the varsity team in the fly box. As Hannibal always said "I love it when a plan comes together..."


Mongrel Meat

$
0
0

A fly made for carnivores


Mongrel Meat : mongrellus truttaconsuma

To be honest, I have a list of names that I keep near my desk in the event that something comes off the vise that is worthy.  This fly flew off the vise one night, and it definitely fit the name.  Off to the streamer river for testing.  I was fishing a stretch of river that isn't totally loaded with fish, but the fish that are there are a bit bigger than average - a perfect testing ground for this morsel of bait.  I won't go into details, but the fish came from far and wide to eat this fly.  

Video to be posted soon.
This mongrel ate the meat

Recipe:

Back Half
Hook: Allen B200 #8
Thread: UTC 140 Brown Olive
Tail: Marabou
Body: Cactus chenille
Hackle: Spirit River Schlappen
Collar: Marabou wrapped soft hackle style.

Connection:
19 strand Beadlon wire and two 6mm plastic beads

Front Half (aka business end):
Hook: Allen B200 #4
Weight: lead barbell eyes and .035 lead wraps. (place the barbell almost in the middle of the hook)
Tail: Marabou
Body: Cactus chenille
Hackle: Spirit River schlappen
Flash: Chartreuse holographic flashabou
Collar: Arctic fox tail fibers
Head: Senyo Lazer dub. Striped with sepia colored prismacolor marker
Eyes: CCG eyes reinforced with a bit o' Hydro

More details on the construction and engineering of this one coming soon...

The Anatomy of Fly Design

$
0
0

A breakdown of the creative process in designing a pattern

There's a certain mantra in fly design that basically says "it's all been invented, so you're basically just ripping off someone else's pattern". To an extent that is likely true. We all attach crap to a hook and it's called a fly. So at a high level, the first dude to ever do that, is likely sitting on his cloud laughing at us all for ripping off his idea.

At a more realistic level, I think you can borrow techniques and aspects of a given fly design and incorporate those into a pattern you are designing. Who's to say what constitutes a "new" pattern? Is it a small change in color or a swap-out of a few materials? That's a judgment call, but if someone wants to change the color of my Fripple and call it a Stripple, then have at it. But whatever you decide on in your design, it may not be new or revolutionary, but it's part of a creative process that every fly tyer must go through when they decide to create something new or newish. In other words, they're not following a recipe.

On a somewhat related note, there are also the naysayers that comment "A hare's ear or pheasant tail are the only nymphs you really need. Why re-invent the wheel?". In other words, why create a "new" pattern when the current ones work well already? By that logic, why not just fish with a worm on a hook? For me, I tie flies as part of a creative outlet that is also very therapeutic.  So even if my "new" pattern didn't catch any more fish per se, I'd still put in the time at the vise in design mode.


But I digress...this post is about the process of new fly design. So the other day, I sat down at the vise and went through my "to-tie" list. I keep notes after most every trip, or just when ideas come to me, regarding patterns or ideas I'd like to try out. The genesis for this pattern was a situation where I was throwing an indicator rig with some chironomids. Only problem was the fish were a bit spooked by the indicator or just didn't want chironomids. So I took the indicator off and went with a small beadhead generic stillwater nymph pattern. I still didn't get the results I was looking for as the fly seemed to just sink a bit too fast for the fish to take notice. I switched flies a few more times. As it turned out, the ticket turned out to be an unweighted simple pheasant tail type fly on a floating line that could sink very slowly, thus maintaining more "face-time" with the fish as I stripped it slowly through the water just below the surface. I realized I didn't have many small nymphs that fit the bill, so I jotted down the need to have an unweighted very sleek and slender mayfly imitation (callibaetis or baetis etc).

I'm basing my new pattern, somewhat on my previous Aero-Baetis in that I wanted something sleek (gotta have the CCG) but unweighted. With that in mind, here I begin my design process...


First pass: 
I'm never afraid of messing up a few hooks during the first pass. This is the rough draft, I'm looking for some proportion checks and whether all the materials will fit as I had hoped. This specific first pass really sucked, but I changed my mind on some proportions for the second pass. Note I left out the legs and tails because I'm not focusing on those areas just yet.


Second Pass: 
After the first iteration, I decided on a more chironomid shaped thorax (maybe a dual purpose pattern) with some flash. Got done and realized...yup, it's a chironomid. Next...
Third Pass: 
Back to the thorax. I made it a bit more mayfly-ish and finally added some legs. I also used some Montana Fly Co. Skinny Skin for the wing-case (I liked it better than mylar) and some brown Hun for the legs.  Getting closer.


Fourth Pass:
Now that I have the overall shape and material list dialed in. I work on proportions and tying steps. I didn't like the tail as it was too long and I also changed up how I built-up, tied and coated the thorax area with the CCG so that it didn't gum up the legs.


Final Version: 
I shortened the tail, tweaked the CCG coating sequence again and adjusted the legs so they came out at a more level angle with the body (as opposed to the previous step where they hung down a bit more.


So that's a little breakdown on how I go about designing a new or different pattern. I chucked a few iterations into the round file, but ended up with something I think I'll really like.

Unsinkabeetle

$
0
0

Your Mom can't even sink this...

Unsinkabeetle fish caught by FFF customer Joe C.
So I was working alone in my hometown Vernal, UT for several weeks, and like always, I had my tying stuff with me so I didn't have to watch the Gilmore Girls with my Mom...  I had foam on the mind, and I really wanted to tie something that had superior floating ability for swift water and had the bouyancy to hang Rosie Rainy's,  so I wanted to see what it could do with it.  Foam was wrapped upon foam, and a similar bug to the Unsinkabeetle popped out.  It immediately went into a bowl of water and my mom and I pushed it to the bottom of the bowl every time we went by.  It lasted 3 weeks in the bowl and we finally gave up.  It was deemed the "Unsinkabeetle" because of its foam construction and its Molly Brown characteristics.   I tie it in a variety of sizes and colors, and it has been distributed to better anglers than I to verify that it has the ability to fool pea brained trout.  It does just that.
O'Donnell sized nymphs from.  Now, not all foam is created equally, and I had just gotten a supply of Evazote and crosslink foam from

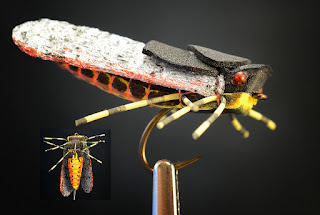
This is a great attractor pattern that can be adjusted in size to mimic all types of beetles and cicadas.  I have had the most success with this pattern in mid to late summer when the terrestrials start showing up.

If you like to tie, the video tutorial is posted at the bottom of this post.  If you like to buy, you can go HERE to buy the Unsinkabeetle.


Unsinkabeetle


Recipe:

Hook: Gamakatsu S10 or an Allen S402
Thread: Thick 140 Denier (I used red on this one)
Underbody: Insect brown 1mm Rainy's crosslink foam
Overbody: Camel Rainy's Evazote foam 3/16 size, or 2 to 3mm craft foam
Head: Same foam as overbody
Wing: Tan Antron
Indicator: Rainy's parachute post
Dubbing: Olive brown ice dub
Legs: Natural colored round rubber colored with red and black sharpies

and finally... the video.


Review: Grizzly Coolers

$
0
0

A Rugged and effective cooler


So, for the past few years, our trips have been more and more camping or overnight style trips and it's always a crap shoot when it comes to coolers. Some keep the cold stuff cold, others not so well. Some bust open at the drop of a hat, while others have a good lid. I've never tried destroying a cooler, so I can't say which ones are the most solidly built, but I guess some sort of durability is also a good thing. In the end, we ended up pulling the trigger on a Grizzly cooler, as we'd seen them out and about lately.

The first two trips were pretty tame and it just sat in the car most of the time. It did very well at keeping the contents ice cold. Then, we took it out on the Razr for some rough road riding to some high mountain lakes and the lunch and drinks were as cool as the other side of the pillow (assuming your pillow is in the fridge). It got banged around, knocked over, sat on, stood on and fared very well all the while keeping the stuff at cool temps.

The cooler shown above is the smaller size and so we're definitely going to be upgrading to the bigger size here soon for some longer multi-day trips. Great product! Check them out online...


Articulation Engineers: Cheech Leech

$
0
0

Big flies for small guys


Fall Cheech Leech in articulation production
We get a lot of people asking how the Cheech Leech articulation connector is built. We've held off divulging that little tidbit, but we figured it made sense to let you all in on the secret. It takes a 3 man crew, but the connector is solid and the fly hunts.

So, next time out, thank your neighborhood Articulation Engineer for the service they render.

And if you happen to feel the need to throw down on one of the more popular color combos for the fall season whilst you hunt down some big trout, you can buy the flies and materials to make these guys on our store.


Honey Badger Cares

$
0
0

The Newest Fly Meme


So I've been messing around with some different combinations of materials and amounts on streamer bodies in order to get some different movement and bulk proportions. Just mostly dinking around. Because I'll defer to Cheech as the undisputed streamer guru in this outfit, I honestly haven't fished many other streamers beyond the Cheech Leech and El Sculpito lately, but decided to work on something anyway. Oddly enough, the name of this fly has been something I had tucked away ever since I heard Randall narrate one of the more awesome Youtube videos of all time a couple of years back. ;) Combine that with the antics of Tyrann Mathieu and it was a slam dunk.


I figured the fly had to be a streamer. And because I'm a big fan of two-tone flies in general, the Honey Badger seemed to fit.

The body is a mixture of stiffer body shape-holding material in the craft fur and some softer movement friendly Finn Raccoon filled in with Senyo Laser Yarn (of course). Throw in some claws in the shape of rubber legs and it's a decent little fly that really don't give a s**t. Oh, also, it's articulated, has a cone head and likes to eat venomous cobra snakes and Rainbow Trout.


Rainbow Trout being attacked by Honey Badger


NOTE: Before anyone accuses me of ripping off a fly pattern name, I did just discover that there is another pattern out there called the Honey Badger from the guys at CrossCurrentTV. But because Honey Badgers don't really care, I'm pretty sure it's ok for them to have the same name. We'll just call it a Fly Meme.


Lazer Trokar Hooks

$
0
0

Look outside the box for the ultimate big game hook


Several years ago I fell head over heels in love with fishing for bass with gear.  Yep, baitcasters, 50 pound braid, and BIG hooks.  I have always been somewhat of a hook snob, but never so much as when I was bass fishing.  Not only did I need a very stout hook, the point had to be razor sharp, and able to hook fish with ease.  Most of the hooks that I used were chemically sharpened, and I really was happy with the selection that I could get from Gamakatsu, Mustad, and Owner.  Then, my friends, I laid my eyes on a new hook called a Lazer Trokar.  My fishing buddy Brent and I both bought a pack to try and the results were phenomenal.  These hooks turned missed fish into landed fish due to their powerful hooking ability and brute strength.  Brent actually fished the majority of a summer with one single hook.  It was as sharp at the end of the summer as it was when he first tied it on.

Bass fly on Lazer Trokar


Bass on Trokar fly
Like many things in the gear fishing world, these hooks would definitely find a place in my fly-tying arsenal.  I first tried out the TK10 in 4/0 to tie something along the lines of bass/musky.  What I loved about this hook was that it is a very heavy wire hook that helped the fly suspend in the water without having it sink too fast or too slow.  Bass are notorious for short striking, and typically a hard hook set is needed, but with this fly, every bass that ate it got to meet me face to face.  Since then, I have tied flies on several different trokar models, and they are now my go-to hook for tying meaty creations for bass, musky, or big browns.  
Another Bass on the Trokar


See below for some links that will help you creatively use these awesome hooks.  Win some of our flies HERE or buy Lazer Trokar hooks HERE

Soft Hackle Kick

$
0
0

Fun Ties


Every now and again, I'll get on a soft hackle kick. Not only are they uber-effective flies, but they're really fun to tie and the pattern possibilities are endless.

The patterns shown here are a basic tie. Nothing fancy. The new N205BL from Allen is a screamin' hook for softies, so I chose that to start out. I'm also partial to stripped peacock for slender bodies and the segmentation they provide. 

The thorax consists of the popular Arizona Synthetic dubbing from our friend John Rohmer and the hackle is from a great #1 Hungarian Partridge skin in Brown. I coat the body and the head with Clear Cure Goo Hydro for a nice durable and shiny finish.

~ Curtis


The Allen Icon and a new bug

$
0
0

Two new pieces of equipment to try out


For the past year or so, I've been getting into the Euro or Czech style of nymphing and decided to pull the trigger on a legit Euro nymphing rod. I settled on a 10 foot 4 wt and started the search for a candidate. I fished the Sage ESN, an Allen xa 10 footer and threw a Cabela's CZN. I was pretty much settled on the Sage until I heard some really good things about the Allen Icon series rods. With the price-point what it was, I went with the Icon figuring even if it didn't compare to the others, it would still be a good deal.

The week my new rod arrived I had also gotten a new shipment of Trokar hooks including the new "Re-Volve" (TK220) series hook that was going to be used with a newish worm style pattern I wanted to throw as an anchor fly. I like this hook because it's got a great wormy shape, it's sharp as hell (no, wait...sharper).

Here's the finished fly:

Similar to a Vladi Worm, the "Re-Vladi" uses a super-sharp Lazer Trokar Hook


If you're opposed to throwing worms, navigate away now. Otherwise, read on. If you're familiar with Euro nymphing in general, the flies hold the weight (as opposed to split shot). So the fly needed some heavy weight but minimal bulk so it would sink quickly. Granted fish eat worms, but this is also a style fly that sinks fast and can be heavily weighted.


Several take-away's: First, the Icon far exceeded my expectations. Comparatively speaking, it was just as much fun to fish with and matched my casting style (fast) as much as any other rod I had tried. If you have tried the Euro style nymphing, you know that a responsive rod is a great advantage. I was seriously blown away by the action on this stick.

Second, and it's maybe a combination of the rod and hook or my super-fishing prowess, but if you've never fished these Trokar's, you're missing out. They are super sharp and I was hooking fish with the slightest of hits. Even on a day when the fishing was arguably slow (just ask Cheech), I ended up with a decent fish count. 


Anyway, here's the recipe:

Hook: Lazer Trokar Re-Volve #4
Thread: UTC Ultrathread 70 Denier, Fl. Orange
Under-Body: .030 Lead-Free Wire
Body: Orange or Red UV Chewee Skin
Ribbing: Pearl Krystal Flash

And the Video Tutorial:


Palomino Caddis

$
0
0

A "must-have" for caddis fishing


Palomino Caddis
Several years back, I was revamping my caddis dry fly box, and I was tying the typical Elk Hair Caddis, X-Caddis, etc.  Many times when I'm refilling my boxes or looking for new patterns to fish, I'll turn to my friends who guide a lot.  Guide flies are typically fairly simple to tie, and they absolutely catch fish.  I was talking to Charles Card, who guides on Utah's Green River, and asked him about caddis patterns.  He told me about a caddis with an ultra-chenille body, a CDC underwing, and a painted egg sack.  I was curious, so based on what I envisioned his fly looking like, I tied a version of the palomino caddis that I have been fishing ever since.  

This fly is designed to float high, and skate on the water when twitched.  I actually like to cast out, and add a very slight "pop" to it right when it hits the water to entice hungry fish.  This fly has been a top producer for me during the caddis hatch, and also when I'm just fishing it as an attractor when there is no hatch going on.  Most recently, I started teaching my brother how to fly fish, and this is the fly I tied on because it floats really well even if there isn't necessarily a drag free drift.  This fly essentially taught him how to fish.

I asked a good friend (Bryan Gregson) to write about one of his first trips fishing the Palomino Caddis:


There I was, standing in the river parking lot at sunset, shaking my head while frantically rummaging through my gear bag. Rod – check. Waders, boots – check and check. Flies, leader, tippet, floatant, and nippers – check x5. Reel and fly-line, ummmuhh, S*%@!!... no-check.
There were only a few options at this point. Whine andhave my buddy who brought all of his gear take me all theway home, which isn’t really an option, or figure something out. A quick inventory of the gear bag and a few minutes later I was all rigged and ready to go. I tied a knot at the reel seat and strung my rod with 12-ish feet of 25lb maxima. On the end of the mono I tied on a 9-foot leader and a few feet of tippet. Fly selection was a Palomino caddis tied by a good friend, Cheech.
I was limited in my fishing, as I couldn’t really cast. I waded out as deep as I could to the middle of a fast riffle section. My buddy was easily casting and fishing where ever he pleased. It was frustrating, at first.
I would do my best to haul, double haul, triple haul, water haul, any haul, to get the line past my rod tip, but with little success. Once I finally figure out how to hack the fly onto the water, I’d dance the Palomino caddis on the surface, skittering across the fast water… all the way into the mouths of willing fish. At first I was absolutely amazed I was able to get the fly out, let alone actually hook a fish, but many was a bit shocking at first. Landing the buggers was also entertaining and not very graceful. My fishing buddy didn’t have much success that night, even though he was efficiently mobile. Then it all made sense. I was standing in the middle of feeding fish during a caddis hatch with the right materials, the proper profile and with the appropriate action for the situation. I learned a few things that evening, one of which is location, location, fly-select-tion…and not to over fish while casting.

BUY THE PALOMINO CADDIS HERE


Recipe:

Hook: Dai ichi 1130 or Allen N205BL (I really like a #14 for this fly)
Thread: Uni 8/0 Rusty Brown
Body: Ultra Chenille - Worm Brown or Olive.  Buy it HERE
CDC: Dun or natural colored CDC
Dubbing: Arizona Synthetic Dubbing - hare's ear or light peacock color
Overwing: Elk or deer hair.

Video Tutorial:


Streamer Time - All The Time.

$
0
0

When is the "right" time to throw streamers

Pink Cheech Leech - Seriously?


Kemp Bug Variation
When I first started fly fishing I was a nymph and bobber kind of guy - I was fairly limited in my approach when chasing trout.  I would go to the same place, fish the same flies, and be content if I caught a few fish here and there.  I knew that there was a lot of variety in flies, techniques, and places that I was missing out on, but I really didn't know where to start.  Specifically, streamers baffled me for the longest time because I would hear that they should only be fished on particular water types, during particular weather, using particular lines, and using particular presentation methods... Wow.  That was a lot to digest for a new fly fisher, and my immediate response was to just avoid streamers completely.  I was still catching plenty of fish, but I was probably missing out on some good opportunities due to my intimidation on streamer fishing.  My first experience with streamers was on my favorite taco sized Brookie stream near my home town.  The fly was a Kemp Bug, and the fishing was insane.  They ate it dead drifted, stripped, fished upstream, and fished downstream.  There was no wrong way to fish this bug.  I have since repeated that type of day while fishing much bigger flies, and realized that there were bigger fish in that river than I realized - another benefit of streamer fishing.

That day was enough to light a fire in me to start fishing streamers more.  Specifically, I started throwing streamers at nonconventional times and had a lot of success with them.  I had a recent trip to Idaho that will
Snake River Cutthroat meets Cheech Leech
not be forgotten any time soon.  We were told that the 12" to 16" Cutts in this stretch of water were VERY particular, and we would have to do a lot of work to find the right size and color of hopper that they were eating that day.  What did I tie on first?  the Cheech Leech.  Well, the ol' Cheech Leech didn't work very well that day, but the Mongrel Meat and El Sculpito sure did.  Our gracious host was more than blown away at the fact that these fish were eating such monstrosities, and at the fact that we brought in several 20 inch fish.  That streamer day in Idaho cemented in my mind the fact that any day can be a streamer day.

~ Cheech

24" Brown Trout on the Snot Goblin

REVIEW: River Road Creations Cutters

$
0
0

Foam cutting goodness


Tomsu hopper pattern river road creations foam
Tomsu Supreme Hopper cutters on this hopper pattern
A few years ago, I picked up a set of River Road Creations foam cutters. My first cutters were the Tomsu Supreme Hopper set. I was impressed by the sharp edges and the clean foam cut-outs that I could turn out. Plus, being able to turn my plain old foam sheets into a much wider variety of standard shapes and sizes was a great way to work through all the drawers of foam I had collected over the years.

So the cutters come in a variety of styles or shapes and sizes (within a given style). Check out their website to get a good idea of what they carry: www.riverroadcreations.com.

One of the questions I get is "which cutter or set should I start with?". Of course, it depends on what you're going to be tying, but assuming you want to start with something that can tie a variety of flies for bigger dries and hoppers etc, you can't go wrong with the "Hopper/Caddis/Ant" body cutters.


You can do the type of patterns listed in the name, but you can also do the Stoneflopper, Chernobyls or "Blingnobyls" as we prefer them (see inset) as well as other foam dry patterns. The Chernobyl cutters and the Universal Bug Body cutters are also good for this type of purpose


blingnobyl ant
The Blingnobyl Ant
If you can swing it, I'm a big fan of the sets. They come with a nice wooden holder and a cutting pad (very important to have the pad)


And you can churn out all sizes in great quantities...

A Pile of Blings
And one of the other benefits, besides just cutting bodies is that you can get into all sorts of wing shapes with the wing cutters. As shown below, you can see the combination of wing and body parts all cut to the needed shape and size.

The "Sickada" tied using cut foam
Mayfly Body and Wing Cutters

Stonefly Body and Wing Cutters


All in all, the cutters are well worth the money and give you an easy, quick and accurate way to cut out bodies and wings for various patterns you want to tie. We can get the cutters ordered if you wish to purchase them online. We don't carry them in stock, however, so it would take up to a week for delivery. Email us for details.


Fall Sculpins

$
0
0

A mover and a shaker


A few weeks ago, I was cleaning off my never-clean tying workbench and came across a few left-over mini Fish-Skull sculpin helmets from a previous tying session. I was headed up to do some streamer fishing in the next few days so I figured I needed to put it to use.

I snagged some Spirit River Dos Jailed Rabbit in the sculpin color (it was waiting for this pattern anyway), some Rainy's craft fur, some senyo laser yarn and some Wapsi Palmer chenille for a good underbody.

Adding another sculpin pattern to the arsenal isn't a bad thing and to keep this in the family, I'm naming it "El Sculpón" a bit gaudier than its brother "El Sculpito"

One of the key features on this guy is the flared craft fur "fins" that I tie in facing forward and then force backwards as I apply the helmet to the fly. It's a fun one to tie and it ended up having incredible darting and bobbing action in the water, while riding hook-point up and relatively snag-free. Fish liked it too...


Recipe:

Hook: Do-It Molds 785 60 degree jig hook #2
Thread: Tan GSP
Tail: Spirit River Dos Jailed Rabbit - Sculpin
Body: Wapsi Palmer Chenille, Black craft fur, black Senyo laser yarn
Fins: Tan Craft Fur
Head: Fish-Skull Mini Sculpin helmet


Maybe a tutorial on this one would be warranted....stay tuned....

The Muskoka MagnaVise

$
0
0

Innovation meets functionality

Muskoka Magnavise and Workstation

Magnavise with magnetic base
Last spring Curtis and I were tying at the annual Wasatch Fly Tying Expo and people came over to us to ask if we had gone to see "the vise." This piqued my interest, so I went over to see what all of the attention was about.  The "vise" was the Muskoka Magnavise.  The first thing that struck me about the MagnaVise is that it looks REALLY cool, so the sexy factor got a big check-mark from me.  Upon talking to the vise's creator, Matt Plott, we found out that he was a mechanical engineer with a background in designing medical instruments.  Precision... check.  Then I asked him if I could steal one for an hour or so to give it a whirl.  I will preface the rest of this post with the fact that I'm pretty particular about vises, and it's hard for me to tie with anything other than my trusty Griffin

Mongoose.  I got the vise back to my station, and was immediately curious about the holding strength of the jaws.  They are of the "spring-loaded" variety similar to a Regal, but they have grooves in order to hold bigger hooks.  The first hook I put in the vise was a TMC 518 #32.  There is enough bare metal in the very front of the jaw to hold most normal sized hooks, and I found that it held the 32 very snugly.  The next test was a 4/0 Lazer Trokar hook.  This took some doing, but I got it in there and it was rock solid once I found it's sweet spot.  That's another thing that I noticed - with bigger hooks, it took a bit of getting used to in order to get the grooves to bite.  Once I had that figured out, I didn't have any issues.  The verdict?  I needed to take it home to do some more serious tying.

THE VISE

Lever inserted into the back of the vise
Once home, I made some critical adjustments to make it conducive to my style of tying.  Typically, if a vise isn't true rotary, it's not going to get used by me - BUT, I made an exception for this one.

  1. The first thing I did was adjust the angle of the vise to be a little closer to parallel to my desk.  That addressed the rotary issue well enough.
  2. As I got tying, I realized that I would have more room behind the fly if the jaw was upside down
    (as pictured).  Luckily, this thing was built with medical precision, and it was very simple to do, and upon talking to the manufacturer, it was designed to be configured either way.  Cool by me.
  3. I had to have a way to rotate the vise without twisting a "dial" so I constructed a crank assembly out of wooden dowels at the back of the vise.  I talked to Muskoka, and they said that they have something in the works to address this.  They also said that the main lever of the vise could be inserted in the back of the vise in order to rotate it.
  4. The next thing I did was tighten all the screws on the head of the vise.  The tighter you get them, the closer you will come to 100% positive lockout of a small hook.
Magnavise ready for travel
After these adjustments were made, I tied on the vise for 60 days straight, and came to the conclusion that I would probably be able to tie on this vise permanently if I had to.  What I like the most is the adjustability of all the pieces, and how much functionality you have with the magnet system.  

THE WORK STATION

I also got the work station, and immediately found out that I REALLY like the thread management system.  It's very simple to pop a spool into, and out of, the attached adjustable arms.  Very cool!  I must say that I was a bit apprehensive about the magnetic system, but it holds as solid as any other pedestal base.  I have to stand up and put my weight (A LOT) into removing the pedestal from the work station.  Another cool thing about it is that  the stem is adjustable, so you can raise the height as if it were a C-clamp.
Close up of the head

THE VERDICT

Pros:
  • I like this vise.  If I weren't so attached to my rotary vise, I might even consider making this one my every day vise due to the ease of use, and the ergonomics
  • Magnetic features 
  • The thread holders in the work station
  • Very adjustable 
  • Simple to use
  • Very sexy styling 
  • Made in the USA, and great warranty
Cons:
  • Not a true rotary (maybe just personal preference)
  • There is a comfort level that needs to be reached in placing hooks in the vise.  Once I knew where to seat the hook, it became more automatic. (Grooves vs. no grooves)
  • Lack of accessories with the kit (rotary crank, material clip, bobbin cradle

In all, this is a very high quality piece of equipment that will suit most fly tyer's needs on the bench.  If I had my druthers, I think I would prefer a jaw with no ridges, or with only 1 or 2 ridges to get closer to 100% positive lockout on the hooks.  And... I would find a way to design a true rotary vise. 

~Cheech


The Chimera

$
0
0

A fly with many faces...

I went through a phase a few years ago where I tried to really minimize the number of flies I carried -- especially on back country trips where space and weight are important factors. After one specific outing where I caught fish on scuds, damsels and callibaetis, I decided it was time to pick a few features on each type of bug and create a mega-bug "Chimera" style fly that had pieces of several insects. It's not so much a generic searching or attractor pattern as it is a multi-tasking bug imitator.
brook trout fly pattern chimera damsel dragonfly
A high mountain Fall Brook Trout that fell to a black Chimera
 I ended up spending some time at the vise and combined a few nymph styles, including a couple I stole from Cheech, and came up with this pattern. I've been fishing it now on some stillwaters and even a couple of rivers and it's done very well. The nice thing is this fly, depending on color and size, can pass as a scud, callibaetis, damsel, dragon fly or whatever else you might want to cover. What makes it even nicer is that you have a set of materials for one pattern that's tied the same, just mixing those colors up.

Mix up the colors, go wild.
Give it a try. It's a fun one to tie...

Hook:  Mustad C49S #10
Thread:  UTC Ultra thread 70 (color to match)
Tail:  Brown Partridge or Lemon Wood duck (or leave it out)
Ribbing:  UTC Ultrawire Small (gold, silver or to match)
Body/Thorax:  Senyo Laser Yarn or Az Diamond dubbing, color to match
Wing Case:  Skinny Skin with Med Holo Tinsel, in colors to match
Eyes:  50 lb Mono (burned)
Bead: 2.4 to 3.2 mm Tungsten (I prefer a hot spot style with bright colors)


Jake The Snake

$
0
0

Simple and effective

Olive Jake the Snake


We had just arrived at the 4 foot deep beaver dam after bushwhacking through some big nasty "moose hiding" bush, and we see some great brookies at the bottom of the hole.  I knew what I was going to throw, and immediately saw a flash of red, black, and white dart toward my presentation.  Fish on! But - it wasn't the big one.  Jake took a bit more time breaking down the hole, and he saw a much larger fish hanging in the bottom.  I had forgotten that I gave Jake some "experimental" flies to try, and little did I know that he decided to tie one on.  He made quick work of the grandpa fish of the hole, and to my surprise, he held up the fly that he caught it on.  In Jake's honor, It was dubbed Jake the Snake.

mountain brook trout effective fly pattern
Brook Trout Love the Snake!


I tied these originally for czech nymphing to fish in tandem with a much heavier anchor fly because there are times when I just want a lighter presentation to go along with the bigger nymphs.  This fly has no weight and is left to dance in the current a bit more than his tungsten brothers, and is also great for brookie beaver dams;).  The tail and body don't matter quite so much, but the hook and the dubbing really make this fly cool.  The dubbing is a very sparse dubbing loop of Arizona Synthetic Dub (to give the soft hackle effect), and the hook is an Allen D102BL.  Just look at the point on this thing - yep.  MEAN.  It also means that it sticks fish with minimal pressure.

~Cheech


Recipe:

Hook: Allen D102BL <--- Buy it here...
Thread: Uni 8/0
Tail: Coq de Leon
Body: Bug body wrap, or spanflex in a color to match the dub
Head: Arizona Synthetic Dub various colors

Video Tutorial


REVIEW: Fish Skull Fish-Mask

$
0
0

The best disguise for your flies...


Ok, so not really a disguise, but the words rhyme, it's almost Halloween and it's a mask to boot. Anyway, I got a package in the mail a few weeks back and tore open the container of Fish Skull Fish-Masks (in a variety of sizes) to get a good look and feel. 

First off, I was impressed by the wide variety of sizes. Pretty much anything from a smallish nymph or leech all the way up to some big salt-water baitfish patterns would be covered.

The mask has an inset eye "socket" so you can very easily place some realistic style eyes in there nice and snug. A dab of super glue held like a champ. 

The mask also provides just a small amount of weight but without being too heavy and bulky to cast.

So with that said, I whipped up a double Trokar blood-drawing articulated baitfish pattern. Due to a funny incident with auto-correct on Cheech's text message, this fly was dubbed the "Double Wife". Also we live in Utah. ;)

The fly consists of Cascade Crest Tools Body fur (great stuff, BTW), some Arizona Diamond dubbing and some Cascade Crest Tools Krinkle Flash fibers with Senyo laser yarn mixed in there. I also ended up shooting the inside of the mask with Clear Cure Goo thick so that the mask would maintain a better grip on things. I suppose if you crammed it on there and then tied in front, pushing it back with thread, you'd be fine, but the CCG was quick, easy and painless.

Viewing all 629 articles
Browse latest View live