Quantcast
Channel: Fly Fish Food
Viewing all 629 articles
Browse latest View live

The Twitchy Chicken

$
0
0

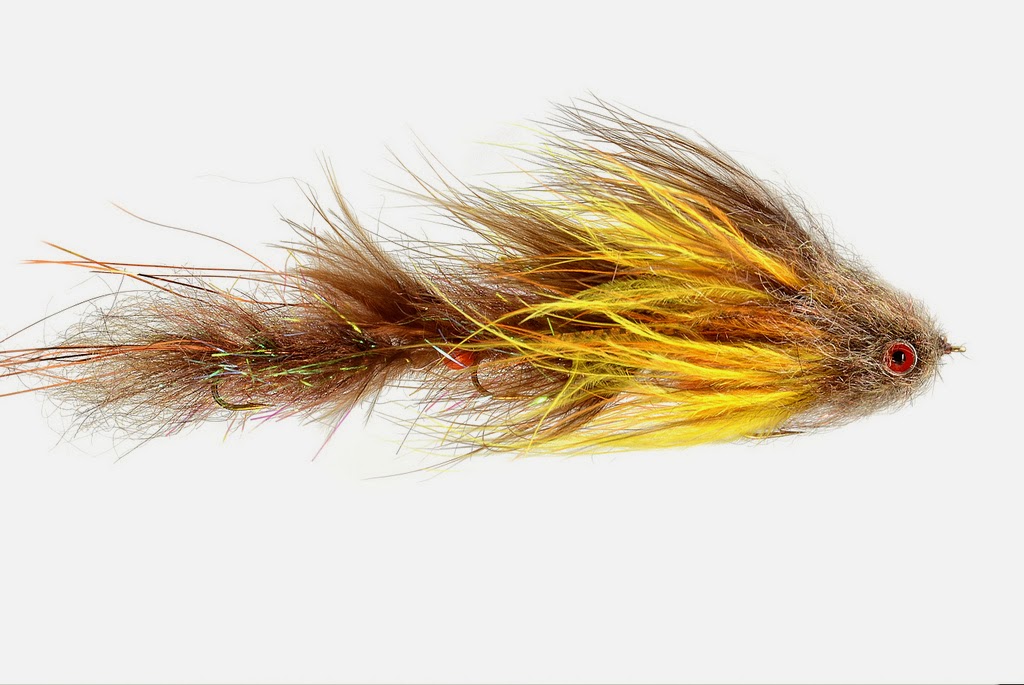
A simple stonefly with maximum movement

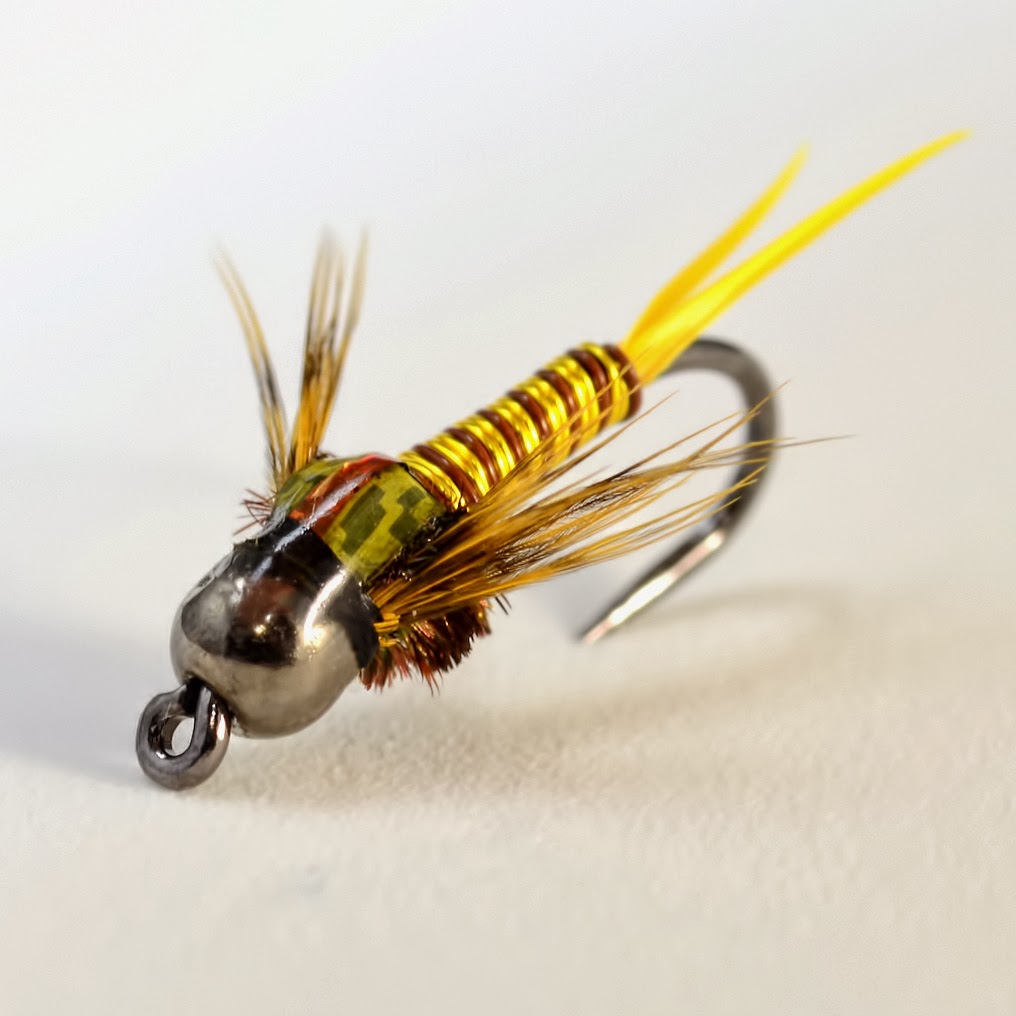
Twitchy Chicken golden stonefly

This pattern is derived from a pattern that I learned a long time ago from Dennis Brakke.  He was an excellent stillwater angler who we highlighted a few months ago.  I remember seeing a pattern similar to this sitting in piles on his workbench waiting to go out to customers, so I knew that it had to be a killer.  He tied his version with a pheasant "church window" feather, and on my version I use Whiting coq de leon hen hackle.  I don't even know what he called his fly, so I'll just call this one the Twitchy Chicken due to the amount of soft hackle that is crammed into it.

This pattern skips all of the fancy (and maybe unnecessary) parts of a stonefly nymph, and highlights the parts that will trigger a fish into eating.  In my opinion, a stonefly MUST have a forked tail and legs to trigger fish.  Not much else.  (Yes, that means that some of my flies are over-done, but I'm cool with that.)


~ Cheech

Hook: Dai Ichi 1260 #10
Thread:  UTC 140
Tail: Turkey Biots
Body: Wapsi sow scud dubbing
Ribbing: UTC sm ultrawire
Hackle: Whiting coq de leon hen saddle

Video Tutorial:

The Quill Gordon

$
0
0

And a new hackle brand


As we do from time to time, we like to try as many materials, tools, vises and anything else out there that we can work into our fly tying repertoire (fancy word for "crap we do"). Anyway, I had seen some good things said about Clearwater Hackle and decided to try them out. We'll probably work up a more in-depth review on their hackle in general later on, but this was one of the first patterns I churned out of the vise. 

As you can see on their website, they offer some really nice colors in a variety of capes, saddles and soft hackle pelts. Additionally, Cleawater's tag line is "Quality Hackle at an Affordable Price", so you can hopefully snag some good values on their products. 

Quill Gordon Dry Fly
The hackle on the fly here was from a Light Barred Ginger Cape #2. It's a great hackle color to begin with and it really screamed Quill Gordon to me.


I had some pretty sweet quills from a recent midge session and a really awesome set of Lemon Wood Duck fibers from Hareline, so it worked out. Plus, the Allen D102BL hook is a great choice for classic dry flies like this. 

Enjoy.

Dyna-King Barracuda vise review

$
0
0

A vise built for generations

Dyna-King Barracuda

When it comes to quality vises, I think it's very clear that Dyna King is almost in a league of it's own in regards to craftsmanship and durability.  When you buy a Dyna-King vise, you are really buying the vise that your grandkids will use.  Dyna-King is a family run company that has been producing vises for over 30 years, and continually seems to get better.  One of the things that impresses me the most about Dyna-King is that they use the same high quality jaw in all of their vises.  In my opinion, the jaw should be the focal point of a vise - nothing else really matters if the jaw isn't a hook holding workhorse.  Not only is the bone crushing jaw the focal point of the barracuda, it's the focal point of all of their vises.  After spending about the last month and a half religiously tying on the Barracuda, I think I have a pretty good idea of how this vise performs.

The Jaw:
  • So I'll jump right to the best part of this vise.  The jaw holds essentially everything that you can throw at it.  When I review vises, I always like to tie something in the range of #30 all the way up to 5/0 to get a picture of how versatile the jaws are.  The Barracuda held solid on a #30 bunny midge, even though such a tiny hook looked out of place in such a rigid jaw.  The key is to not over-tighten the jaw, because it will smash small hooks.  I'll talk about the sweet spot a little bit later.  There is a midge jaw that allows for a bit more operating room around small hooks, but after a short while, I got used to tying the micro stuff on the normal jaw.  For flies in the #20 to #12 range, normal jaw is perfect.  For large flies, there are two notches that allow you to seat the hook with the most solid hold that you will find in any vise.  In all, the jaw is nice... really nice.
The Sweet Spot:
Proper hook positioning
  • The Dyna-King's jaws are kind of like a fine hot beverage (my preference is Yerba Mate).  If you try to drink it while it's too hot, it will burn you, and if you wait until it's too cold, it's not very tasty.  Like my yerba mate, the Dyna-King has a sweet spot that I found to be very important for tying flies in the #12 to #8 range.  This range of hooks is still barely too small to fit in the notches, but big enough that proper tension can take more time to find with the forcing cone.  If you over tighten the jaw you will either smash the hook, or damage the jaw.  If the jaw is too loose, it simply won't hold the hook properly.  The sweet spot is a perfect amount of pressure that will firmly hold your hook using a minimal amount of pressure.  Here are a few pointers to find the sweet spot.
  1. Make sure the hook is placed so the point of the hook is extruding from the jaw right about in the middle of the front of the jaw. (see picture)
  2. Loosen the jaw slightly, and place the hook in the vise.  The hook should slightly slip with downward pressure.  
  3. Take the hook out of the vise, and make tiny adjustments, and repeatedly clamp the jaw until the hook doesn't slip very easily.
  4. You will realize that it takes surprisingly little pressure to hold your hooks nice and snug.  The worst thing you can do with a Dyna-King is crank the jaw super tight hoping to get a tight hold on the hook.  This will cause damage to your vise and cause it to lose holding power.
  5. Over time, you will know how to adjust the vise very quickly, but it can take some practice.

The Rotary Function:
  • With most of the rotary vises that I have tested, the rotary function had to be adjusted and tweaked until it fit my style.  The Dyna King came ready to rock-n-roll right out of the box, and I was able to truly plug-and-play with this vise.  I did find that the rotary tensioning knob would back out as I tied, and If this were my every-day vise, I would just add a bit of lock-tite on the threads to get it to stick where I like it.  The jaw can also be lowered and raised to ensure 100% true rotary (if you are in to that type of thing).  The consensus on the rotary feature is that it is smooth right out of the box, and very low maintenance.
Overall Workmanship:
  • You will be hard pressed to find a vise that is as well made as a Dyna-King.  I think this is what sets them apart int he fly tying arena, and it's also what justifies their prices.  As I said in the heading of this article, this vise is made to last for generations.  Everything on this vise is made from top quality materials from the base, to the accessories, to the vise itself.  I like that they put oversized knobs on the vise to ensure easy adjustment and the ability to crank down on them if you need to (especially on the pedestal).
Overall, This is an excellent piece of workmanship, and would be a good choice for anyone looking for a vise to last forever.  My only criticisms are with the material clip and seating size 8 and 10 flies.  The material clip seems to be too far back, and can be hard to get to if you are tying smaller flies.  I guess I'm too used to the adjustable material clip on the Griffin Montana Mongoose that allows me to move it forward and back on the fly  In regards to tying size 8 and 10 flies, it really just depends on the diameter on the hook wire, but the sweet spot can be a bit harder to find in that size range.  That being said, you won't have any slippage unless maybe you tie some deer hair stuff.  

Kudos to Dyna-King for creating a lineup of really excellent vises! 

~ Cheech 

See the Barracuda in action:


Fly Hack: The Quicker Picker Upper

$
0
0

The Lazy way to pick up hooks


telescopic magnet hook retrieval
Telescopic Magnet
This is a quick and easy addition to our "Fly Hack" series. As is often the case when I'm coolly but slyly cruising through the local craft stores, I found this little gem in some miscellaneous section of the store and immediately had visions of recovering hoards of lost hooks that had gone under my tying table in and amongst all the stuff I can't reach (very easily) down there.

I think it cost something like 4 bucks and the magnet is actually strong enough to pick up a lot of hooks at once and even some bigger metallic junk, if you're so inclined.

The nice thing about this tool is that it's telescopic, so you don't have to get down on all fours to search for your dropped hooks. Just extend it out, sit there comfortably in your chair and run a sweeping search grid across your floor until you hear the tell-tale "click" of the hook being picked up.

So next time you're at the local craft or hardware store, be on the lookout for this little gem and say goodbye to "hooky" socks once and for all.

telescopic magnet hook retrieval
Lost Hook Retrieval 2.0

Chickabugger

$
0
0

An effective "one material" fly.

Chickabugger

When I fish lakes, I really like to have something in my box that is different from the typical brown, black, and olive wooly buggers that are commonly sold at shops.  When I got my first pelt of Whiting Soft Hackle with Chick-a-bou, I immediately started thinking of stillwater applications for it.  I wanted to tie something that was super simple and very effective, so I think you will see this in the Chick-a-Bugger.  This can be modified in size and color to fish like a leech, damsel, or even a small minnow.  All I know, is that there are a ton of moving parts that the fish love.

Recipe:
Hook: Allen S402 #10 (Buy it here)
Thread: UTC 70 Chartreuse
Tail/Body: Chick-a-bou
Collar: Soft hackle from Chick-a-bou pelt.

Here are a few links for the Chickabou pelts.
Link1
Link2

Also, here are some other useful soft hackle links.
The Importance of Good Soft Hackle.
UV Fly Tying: Soft Hackle Drake
Soft Hackle Stonefly

~ Cheech


Swinging Midge Style: The Opal Swinger

$
0
0

Swing High, Swing Low...


Add caption
It was a few years ago that I was fishing a decent midge hatch and happened to realize that, in a given stretch of river, the fish would end up keying a bit more on my pupa dropper pattern as it completed its drag-free drift and began to swing in the current. After a few solid hits and a couple of fish to hand, I decided it was time to go "all in" and I tied on a Syl's Midge and started swinging. Not surprisingly, we had a great hour or two catching fish after fish on the swing.

Since then, I've had a few great midge swinging outings and I've dialed in a few more patterns that work well on the swing. This flashy pupa soft hackle is one of those. I tie it in a variety of sizes from as small as a #22 up to a #14. By using a high quality hen cape, like the Whiting one pictured here, you can get the supple soft hackle style feathers in some very small sizes. And as with other midge pupa patterns, the flashy body imitates the midges as they pupate and emerge. Great combination.


Whiting Hen Cape showing smaller sizes

The Opal Swinger

Hook: Allen N205BL #16 (Buy Here)
Thread: UTC Ultrathread 70 Denier, Black
Body: UTC Mirage Tinsel, Opal, Med
Ribbing: Dark Green Sulky Holoshimmer
Hackle. Whiting Hen Cape, Dark Barred Ginger
Head: Thread with Clear Cure Goo Hydro


Double Wide Cheech Leech

$
0
0

The Cheech Leech Grows Up


How big is too big?  I was busy last summer testing articulated flies, and in particular, how big of a fly was too big for my local trout.  Well, long story short, I couldn't come up with anything that was too big and offensive.  I had a lot of different flies that I had been throwing at them, but the fly that was the most productive was a larger version of the Cheech Leech that I started calling the Double Wide Cheech Leech.

The funny thing is that many of the fish that we were catching on this bug were no bigger than the fish that were eating the normal Cheech Leech.  I think their strikes were a predatory response to something encroaching on their territory.

This fly really swims well and moves like crazy due to the huge amount of marabou that is used.  This bug is definitely more comfortable to throw with a 6 or 7 weight rod...

~ Cheech


And the video:


Get a handle on your dubbing

$
0
0

Avoid a furry mess


Dubbing Organized into organizing containers
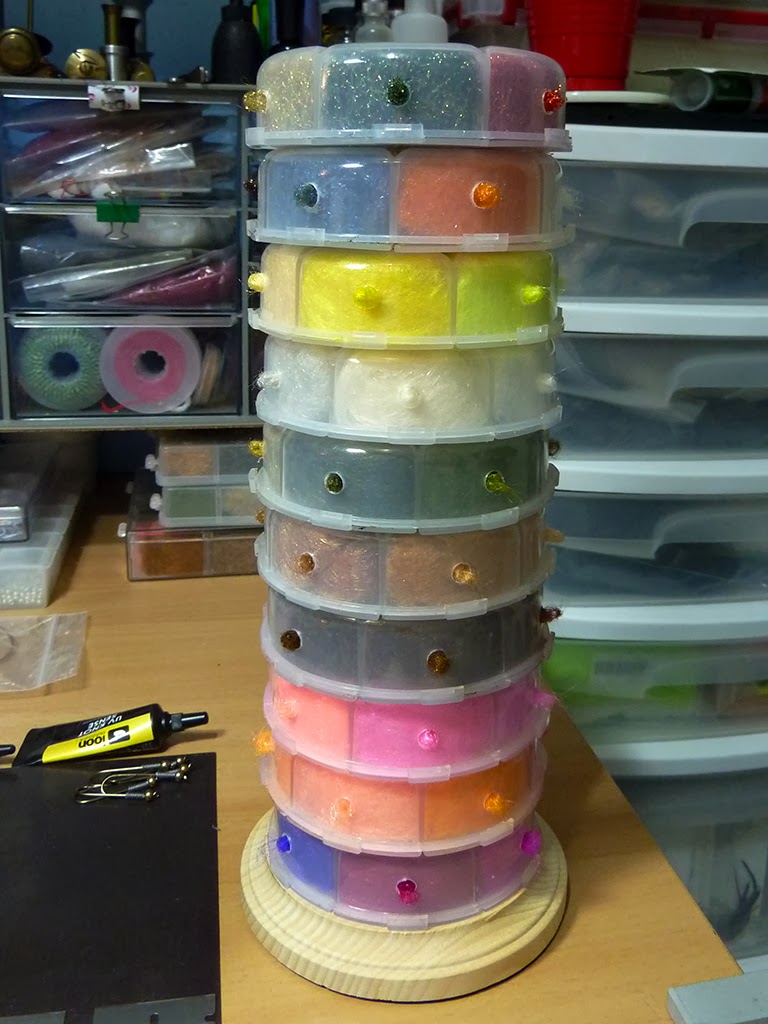
When it comes to dubbing, you'll see a lot of methods to both collect and contain the various fur, fuzz and fibers. I remember my first fly tying kit from High School and it included a couple of small bags of hare's ear dubbing and a synthetic dry fly dubbing in just a couple of colors. From there, my collection has increased just a tad over the past 24 years and I found it's important to keep better track of dubbing so I'm not buying the same stuff over and over again and so I can find what I need. With that said, I've broken it down into two points of focus: Collection and Containment

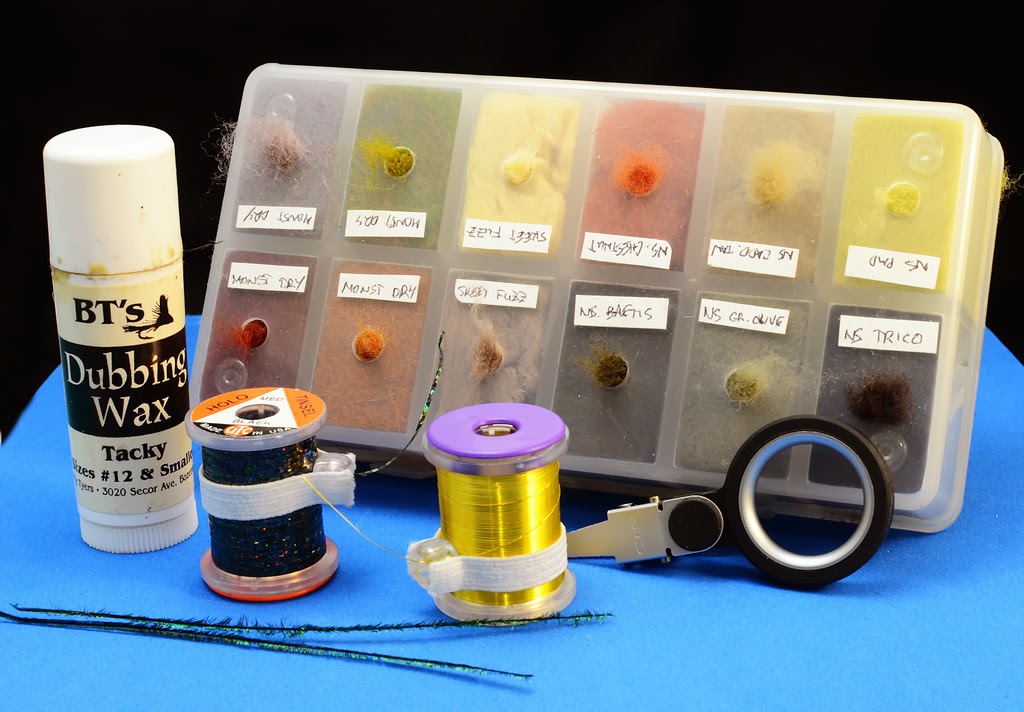
Right off the bat, here's a universal truth for anyone that really gets into the tying gig: You will collect far more dubbing than you can ever use (see the monstrosity above). That being said, start your collecting by remembering that if you like a certain style of dubbing, you'll more than likely want to use it in a variety of colors. Point being, when you buy a package of say Hare's Ear dubbing, get as many colors as you think you'll use in the color scheme that most closely matches the type of tying you'll be doing (i.e. trout vs steelhead vs salt water etc). The little boxes that are most common for dubbing storage are pretty cheap, so it's easy to fill one up with a given "set" of dubbing colors. Probably the best scenario for someone who wants to collect dubbing colors is a lot of dubbing can now be purchased pre-packaged in the 12 compartment boxes and it comes labeled and ready to go. Even if you don't like the container method, it still behooves you to collect your dubbing on more than a package-by-package basis.

Dubbing container labeled with colors
The 2nd and likely most troubling part of dubbing is how to effectively store and contain it all. In addition to the obscene collection above, I also have a desk drawer filled with individual baggies of dubbing that include duplicates, one-off's and home-grown stuff I never ended up using much. I like either the 12 compartment style boxes or taking bigger craft store storage containers (or tackle boxes) and drilling holes in them. I have a couple of 20 compartment boxes, with bigger compartments, that I drilled out (upper photo at the top of the photo). They're nice because I use these for longer fiber dubbings and dubbings that exceed the 12 colors on the smaller boxes. 

Regardless of how you organize the dubbing, it's a good idea to label the boxes -- especially if you've taken the dubbing out of their original containers.

And finally, if the compartment containers don't float your boat, there are a plethora of other options from storing dubbing packages in a 3-ring binder or peg board pegs, to storing dubbing in labeled film canisters to storing them in jars or other smaller clear containers. And if that's not enough, here are a couple other suggestions I've seen floating around the interwebs. Enjoy...

Photo/Idea by Jason Jones, Az by the Fly


Dubbing Tower from Oasis Benches


Petite Sirloin Stonefly

$
0
0

Add some meat to your stonefly box


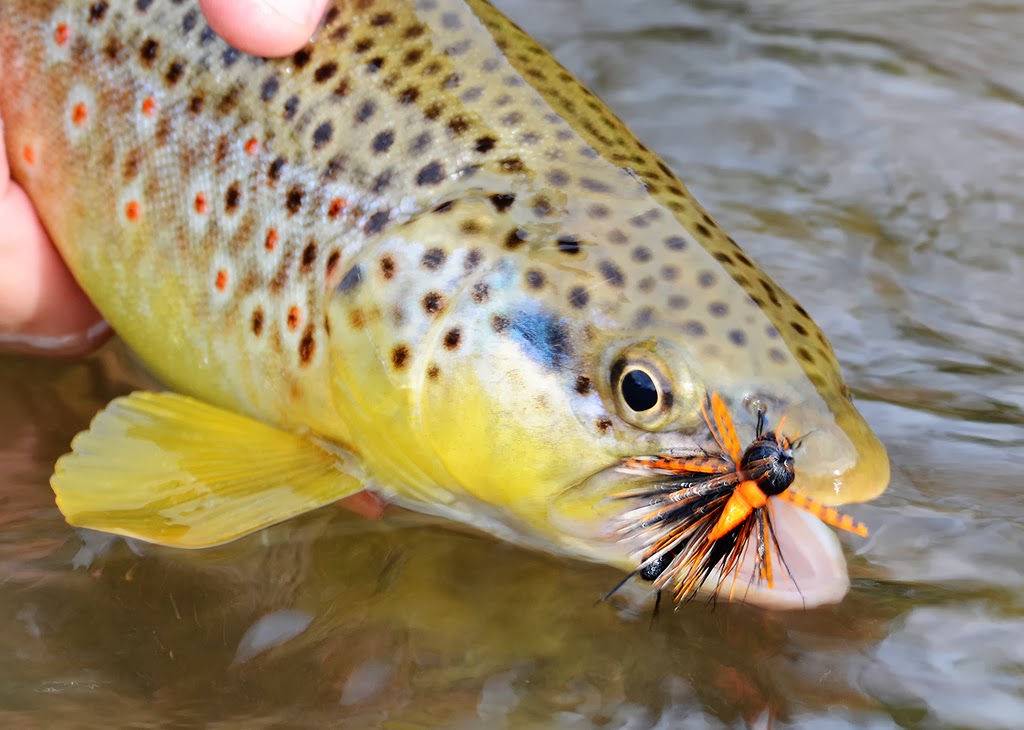
Petite Sirloin Stonefly (Skwala version)

This brown trout couldn't resist some meat
About 5 years ago I was sitting at a booth at the Wasatch Fly Tying Expo in Salt Lake City tying my usual fare of Grumpy Frumpies, Parachutes, and nymphs when the Rainy's rep came up to me with a package of somewhat odd looking extended bodies that were supposedly to be used for stoneflies.  He said "Here...  tie something out of this.." with a grin on his face as if to say "good luck!" He had tossed me some Rainy's Tube Bodiz in the stonefly configuration.  To the vise I went, and came up with several versions that were ready to get wet for some testing.  This is where I'm glad to have good friends who fish more than me, and who are much more skilled than I am with the rod in hand.  The other issue is that I had tied these beasts in a burnt orange / salmon fly colors.  I knew that I wouldn't be fishing any salmon fly hatches any time soon, so off they went to Chris Barkey and Bryan Gregson.  I knew that they would be fishing salmon flies in the very near future, and I also knew they would tell me if the bugs sucked.  I was looking for honest feedback.

Chris called me about 3 days later to tell me that a fish crushed it about his first three casts and that it wouldn't float after that.  This is why having third party testers is so valuable...  If it would have been me, I would have sat on a rock trying to revive it for the next fish.  Thanks to the feedback from Bryan and Chris, I was able to make the necessary changes to the fly in order to make it functional piece of my lineup.  I changed moose hair for deer hair for the head.  I added CDC under the wings for added buoyancy, and I
A dark version of the Petite Sirloin Stonefly was deadly
added a thin foam indicator on top of the fly.  This fly is in the Rainy's catalog, but I think they are still trying to work the kinks out of their factory versions. They struggle with proper hook gap, leg length, and head size (but they still fish really well).

Before people get their panties all in a wad (and believe me, they have), I will point out the obvious here.  this is not a realistic imitation of a stone fly!  It's a very exaggerated version of a struggling, or fluttering bug that gets eaten like crazy during stonefly hatches.  It also doubles pretty effectively as a baby bird.

Recipe:

Hook: Allen B200 (I switched to this hook due to it's large hook gap)
Thread: Montana Fly 3/0 or UTC 140 and 200 denier GSP
Body: Rainy's Tube Bodiz stonefly
Wings: Brown Deer hair, or Moose
Under Wings: CDC to match 
Head: Olive deer hair
Indicator: 1 to 2mm foam
Legs: Sili legs / Silicone streamer legs

Video Tutorial:


Fly Hack: Gear Tie, Material Tamer

$
0
0

Get those materials under control!


As most of you can attest, if you've tied articulated streamers or deer hair patterns with a lot of materials in the tail or collar area, it's a pain to get those materials up and out of the way so you can tie in more materials up front.

When I first saw these little "Gear Ties" in Home Depot, I knew exactly what I'd use them for. They're cheap, easy and you can use them for a lot more than just holding materials out of the way.


Plus, they come in all sorts of sizes and colors to boot.


Here's a quick video on how we used it on the Double Wide Cheech Leech

Copper John -- Skwala Style

$
0
0

How to get a two-toned body

copper john stonefly fly pattern
Two-Toned Skwala Style Copper John
Sit back and get ready for a 2 hour long dissertation on the merits and history of fishing a Copper John. Or not. Suffice it to say, the CJ is a standard nymph pattern. Suffice it to say that here at Fly Fish Food, we tend to throw a curve at the "stand by" patterns.

This is a round-about imitation of a Skwala Stonefly nymph. Obviously not exact and it's meant to be more of an overall searching pattern for the spring. It will sink like a rock and get down fast.

The two-tone method on the wire is actually comprised of three separate strands of wire -- two yellow and one brown -- all wrapped forward at the same time. Check out the video to get the main idea.

Two-Toned Skwala Copper John

Hook: Allen W502BL #10 -- Buy Here --
Bead: Allen 3.8 mm Tungsten, Black Nickel (or Gold) -- Buy Here --
Thread: UTC Ultrathread 70 Denier, Black -- Buy Here --
Tail: Goose Biots, Yellow
Body: UTC Ultrawire; Hot Yellow, Brown; Brassie Size
Wing Case: Fino Skin, Mottled Yellow, Holo Tinsel, Copper, Med-- Buy Here --
Thorax: Peacock Herl, Golden Stone -- Buy Here --
Legs: Whiting Coq De Leon Hen, Speckled Copper Olive

)

5 unexplained mysteries of the fly fishing/tying universe

$
0
0

Why do you do that?!!??

Euro Nymphing...  pfffft.  I only fish dry flies.


There are things in fly fishing and fly tying, that for the life of me, I can't understand. WHY do people do them?  Maybe it's just the way they were taught, or maybe it's some type of superstition that I don't understand.  Here is a list of 5 things of those things that I'm just too dumb to understand.  Keep in mind that these rants (like this and this) are just opinions and observations from an otherwise uneducated redneck from Vernal, UT.

1- The "Touchdown" formation

Cheech is doing it all wrong here. HANDS UP!!!
Setting the hook and fighting the fish with your hands directly over your head.  Yep.  You all have seen this if you have fly fished enough or have watched videos on the inter-webs.  a semi-pro guide is intently watching his indicator and sets the hook by promptly lifting his hands directly over his head.  He gets ALL fish
(regardless of the size) on the reel and keeps his hands up there the whole time he is fighting the fish.  Can someone clue me in here...  Why?  If it's a big fish in a big river, I prefer to stick the butt of the rod into my very non-muscular gut and anchor that sucker in place.  In fact, My arms would get tired fighting bluegill in the "touchdown" formation.  Really though.  If someone can tell me a reason for this, I'm all ears... and arms.

2- Dry or die

Uhhh, yeah, nymphing sucks. I'm Unsinkable.
I get it... dry fly fishing is fun, and I even went through a phase of my life when I would rather sit on the bank and eat sunflower seeds than fish nymphs.  This all being said, if you want to catch more fish, you should get really comfortable fishing beneath the surface.  Here is why I think some people are dry fly only guys...  Nymphing is harder than dry fly fishing.  Yep.  with dry flies, you get to visually see a fish eat your fly.  You set the hook, bring the fish in, and repeat.  With subsurface fishing, you almost have to have a sixth sense to know where to fish and to know when your fly gets eaten.  Nymphing is much more than a bobber, a bunch of lead, and a couple pheasant tails.  If you want to limit yourself dry fly fishing, more power to you, but don't belittle nymph fishermen. Chances are, they catch more fish than you.  Rant over...  I also LOVE fishing dry flies.


3- "Yeah, I used to be a guide..."

I have all the respect in the world for guides because many times they have a thankless job of putting people into fish.  They know the river, the fish, the flies, and how to turn crappy 15 foot casts into fish.  Kudos to you.  On the other side of the coin, I have met several guys that obviously want to try to impress you with their fly fishing prowess to tell you that they used to be a "guide." Now this might mean something in a state where you actually have to get a license to become a guide, but in my home state, if you have a couple of south bend trophy tamers, a spool of 4x, a pocket full of zebra midges, a Toyota Corolla, and a tank of gas you can damn well be a guide.  Those.... those are the guys I'm talking about.  I once had a co-worker invite
This guy clearly needs a guide to catch fish in January!
me to go fishing with him (he had no idea that I fished) that told me that he could help me learn how to fly fish.  He used to be a guide - he told me.  I went without telling him that I knew how to fish, and that I had about 10,000 flies on my person at any given time.  I know, I'm bad.  It went like this...
"Hey, why are you stringing up a 3 wt?"
"You need at least a 6 wt on this river."
"Hey why aren't you putting an indicator on your line?  You will never see the fish eat your fly."
"Hey, what did you get that fish on?"
"Hey, do you always fish dry flies in the winter time?" (See #2)
"Hey, can I borrow one of those flies?"
"Hey man, you should really be a guide."

4- Half Hitches.

So we call it "tying" flies, but if you really think about it, we aren't actually tying materials to the hook shank with a series of "tied" knots.  We simply "bind" the materials onto the hook shank by wrapping thread around it.  For all intents and purposes, yes, technically the thread could become unwound while tying the fly if there were a massive earthquake, or if your fly tying room were invaded by a pack of rabid wolves.  You do not, however, have to tie a half hitch on your fly after tying in every material.  The only reason why you would need a half hitch is if you are rotary tying (with a bobbin cradle) and you want your thread to stay exactly where it is.  Maybe you can help me understand why people do this, but I have seen it a lot lately and I can't get my head around it.  Use them instead of a whip finish... fine by me, but you really only need two or three snug wraps to secure most materials in place.

5- Can't lose that fly guy.

This is the only fly worth climbing a tree for.
I think we all have been here before.  You are fishing with a buddy, and all of a sudden you walk around the bend to find him risking life and limb to pull his $2 BWO from a branch 25 feet in the air.  If he gets it back, it's the highlight of his trip because he doesn't have to buy (or tie) another one.  If he loses it, it ruins his day,
and he grumbles about it through an insane hatch with many trout rising...  So I'm overplaying this a bit, but in my opinion, no fly is worth the risk of me falling out of a tree and breaking my head.  Help me understand this one folks.

Again, like the rest of my rants, I'm probably guilty of all of these things from time to time myself - but I still don't understand why.

~Cheech

Material Review: J:son RealSkin

$
0
0

Buggy Clothing for your flies

J:son RealSkin

Recently, we've had a chance to get our hands on some of the J:son products to mess around with in the lab. J:son is a company from Sweden and they specialize in materials geared to more realistic fly tying. Well, Cheech has been busy filling some new nymph boxes, and so first on the docket was the "RealSkin" product. It's a latex type material and comes pre-cut into a variety of widths (see the photo to the right).

The first obvious applications are nymph bodies. In the stonefly pictured here, you'll notice the pronounced segmentation from the RealSkin. It's thick enough to give the natural-looking segmentation yet it doesn't stretch so much as to lose its thickness along the way.

Cheech's RealSkin Stonefly
Next up was a Czech style fly in Rock Roller flavors. Another nice thing about this product is that the colors don't fade much when stretched and there are some really buggy colors to tie with. Anyway, give it a try next time you're in the mood to tie up some stoneflies or anything else needing a good buggy looking body
Cheech's RealSkin Czech Nymph

Bruiser Blend Dubbing

$
0
0

a new generation of streamer dubbing


Brown Olive Bruiser Blend.  Fly "coming soon"

Barf Brown Bruiser Blend

Brown Olive Bruiser Blend
I'm always on the lookout for new tying materials, and I have been known to make up my own when there isn't anything on the market that quite fits the bill.  I have about 5 bazillion different blends of dubbing that I have tried to implement in one fashion or another, and this year, I have been on the warpath in creating a dubbing that can be used for many purposes.  I started using Senyo's laser dub about a year ago, and was amazed with the versatility of the material and some of the applications that I came up with.  That being said, there were many times when I wished that it was a bit more fine, and longer in length.  I searched high and low, and have been able to find the perfect material to make this blend of dubbing.  I went through several blends of fibers before I settled on what is now called "Bruiser Blend." We have been testing it with great results, and we have made our initial offering of colors available at store.flyfishfood.com  Check out the link to see the colors available.  Several more colors are on the way too!

~ Cheech

Royal Wulff

$
0
0

A favorite for generations


This fly really needs no introduction.  If you have fished with attractor flies, there is a good chance that you have caught fish with the Royal Wulff.  I was first introduced to it by my father in law when I first started fishing, and I caught my first fly rod fish on it.  As  my wife's grandpa used to say, "If a Royal Wulff isn't working, you might as well go home." Fishing the Royal Wulff is pure bliss, while tying them can be pure agony.  My first attempts were about as ratty as they get, but they still caught plenty of fish.  As I progressed, I started making the wings out of turkey flats to make it a bit easier (yes.  they still caught plenty of fish).  The wings are the part of this fly that really make it or break it.  There are plenty of Royal Wulff videos on the internet, but I wanted to show some of the tips and tricks that I have learned over the years.

~ Cheech


The Economy of Thread Wraps

$
0
0

clean up your small flies.


The guys at Gink and Gasoline had a great post a few days ago about proportion and thread wraps when it comes to tying small flies.  Check it out HERE.

If you haven't already, make sure you check out their blog http://www.ginkandgasoline.com/blog/ for great material on a day to day basis.

Film Review: Kiss the Water

$
0
0

A Film by Eric Steel

A while back, we were given the opportunity to screen a new film that tells a story about the art of fly tying. Not being the type to pass up an opportunity to watch a good fly fishing film, I wasn't quite sure how well a film centered around fly tying would work. But as I began to watch the film, I was pleasantly surprised with the artistry, the well told story and how it all came together to form a very personal and compelling picture of fly tying and fly fishing for the people and places in the film.

The film revolves around a well-known and widely respected Scottish fly tyer named Megan Boyd and her influence on the art of tying classic Atlantic salmon flies. Her story, as portrayed in the film and told by those who knew her over the years, shows a true dedication to the art of fly tying, starting from a young age, marked by a gritty determination to attain perfection in the flies she would tie. In addition to the focus on the eccentric Ms. Boyd, the filmmakers struck an excellent balance with showing the plight and importance of the mighty Atlantic salmon and painted a wonderful picture of the sport.

From an aesthetic nature, the film features great cinematography, wonderful snippets of an Atlantic Salmon fly being dressed and some dream-like artistic animations expertly woven in to augment the film footage. For the fly tyers out there, this is a film that would strike a chord with anyone who has  been driven to pursue fly tying as not only a means to an end but a rich journey of enjoyment and constant pursuit of perfection. In fact, Ms. Boyd was so focused on her art and had such high esteem for the fish they would catch, she herself never caught a salmon for fear it would die.

If you're not one of the lucky ones that has a showing at your local theater, here's a link where you can see the film. If you'd like to download, buy or watch online, you can use the code FLYFISHFOOD and get a discount. (for the record, we have no dog in the fight here and aren't compensated in any way).

See it here:    http://kissthewater.vhx.tv/


Wasatch Fly Tying and Fishing Expo

$
0
0

Great Expo in Utah


http://www.wasatchexpo.com
Gut Bomb Bloodworm

For about the last 10 years, Curtis and I have teamed up to tie flies at the expos that have come through Utah.  For the past 8 years we have had the privilege of tying flies at the Wasatch Fly Tying and Fishing Expo, and it's a great gathering of many skilled fly tiers and fly fishers.  This year we are going to both be presenting both days all day... (March 28th and 29th)  The expo is not only held to bring together people with similar interests, it is also a great fund raiser for fish conservation.  For more information about the expo, check out the web site listed above. Also, Curtis and I have something cool up our sleeves, so make sure you stop by and say hello.  Trust me - our fly display won't be easily forgotten (and not because of the flies).


~Cheech
Pink Humpy

Streamers are investments

$
0
0

Fish your streamers tough, but tie them tougher.


Brown Trout on the Mongrel Meat

I think everyone who tie flies has had this happen before.  You spend extra time and care creating the perfect streamer, and when you show it to your "Wooly-bugger-or-die" buddy, he says sarcastically "Man, I sure hope you don't lose that thing."

Double Wide Cheech Leech


Just like anything else, tying flies can be relatively inexpensive and time consuming, or it can be very expensive and time consuming depending on a lot of variables.  I have no issue with trying to save money on fly tying materials (See THIS about our craft store adventures) but there are certain circumstances where, in my opinion, it is worth it to go all out on a fly.  One of these circumstances is tying and buying streamer patterns.  With all the bells and whistles, fancy epoxy eyes, lazer sharpened hooks, GPS homing systems, and attack grenades that you can fit onto a streamer these days, they tend to be expensive both to tie and to buy.  I think that streamers should be treated differently from other types of flies, and they are really more like investments than throw-away $2 zebra midges.  Here are 5 tips that might help you see where I'm coming from.

Splake on a Cheech Leech

1. Larger tippet/leader means you probably wont lose them.

Unlike fishing a small dry fly or nymph, a streamer lends itself well to being fished on a thick leader with a
loop knot.  Most of the time, I'm fishing either 15# Berkeley 100% Fluorocarbon, or 12# Maxima on them.  I can't remember the last time I lost a streamer (while fishing it anyway).  Even if I get it caught in a tree, I turn into a lumber jack via. fish hook by pointing my rod at the tree and lettin' her rip.  My point here is that streamers are not nearly as disposable as other patterns that are fished on lighter tippet.  Also, if you are going to land the fish of a lifetime, you better be hucking some cable at him.

2. Use quality hooks and components.

We did a video on the Cheech Leech using Lazer Trokar hooks last year and I have gotten many comments about how expensive those hooks are.  Granted, I don't tie all of my Cheech Leeches with Lazer Trokar hooks, but I have my limited reserve flies that get tied on if I think something special is about to happen.  For Pike and Musky, I tie almost exclusively on Lazer Trokar hooks and I have been using the same flies for a few years.  I recommend at the very least tying with chemically sharpened conical point hooks.  THESE are good.  THESE are better.  Also, some of the materials for streamers can seem expensive like schlappen, arctic fox, barred zonkers, or Finn raccoon - but If you put it into perspective, the flies you tie with these materials should last you a long time, so it's worth the investment to spend a bit of money if it will make your fly better.

3. Spend time tying them and making them bulletproof.

Black and Blue Cheech Leech
If I'm going to be tying a fly that is going to last a long time, I will spend more time making it "bulletproof." Whether this means substituting a less durable material for a more durable material (i.e. arctic fox for marabou), or adding a tiny bit of super glue in vulnerable spots - it's worth the extra time if it's going to extend the life of your investment.  I think the best way to create a durable fly is to make sure you are using snug thread wraps.  Regardless of the type and size of thread you like to use, make sure you use proper tension to ensure durability.  With super glue, it's important that you realize that a little bit will go a long way, and you shouldn't over-do it because it can be more harm than help if it gets into materials that need to stay flexible.

4. Learn how to effectively resharpen your hooks.

Yes, even the best of hooks will lose their edge if you scrape them on enough rocks and snag them in enough trees.  The fly portion of the fly is still 100% OK, but that dull hook is definitely going to cost you fish.  It's in your best interest to learn how to effectively sharpen your hooks.  A little bit of work goes a long way.  Instead of a boring dissertation on how to sharpen hooks, check out this video by Lefty Kreh.  Very well said Lefty.


5. Limit the quantity of each pattern/color you carry.

Really, my point here is that you won't be losing flies like you would if you are using #18 PMD patterns, so it's not as critical to have 12 of each color and size.  For my personal boxes, I typically like to have 4 of each size and color of each fly.  That is a LOT of streamers to have on my person, and I'm probably lugging around too many streamers, but that's what happens when you have Streamer-OCD.  I firmly believe that you can get by with 2 streamers in each size and color.  This will allow you to carry a bigger selection of flies in a smaller container.
Triple Section Streamer strikes again

I had the idea to write this article because I was thinking back to an experience I had a few years ago.  a guy had seen the Cheech Leech at a tying expo and showed some interest in buying some.  When I quoted him $7 each, he flipped out.  He said "Well, how am I supposed to save any money by buying flies from you." "I'll just go down to Sportsman's Warehouse and get some zonkers and wooly buggers." Be my guest my friend... Be my guest.  He didn't get it.  Funny thing is that I caught my personal best brown trout on that exact fly that I was tying.  It has caught 3 bruiser browns and countless others.  It has also been sharpened several times, and rests quietly in my box ready for the next few years of fishing.

For all your streamer needs be sure to visit our Streamer Depot.

~ Cheech


Product Review: Clear Cure Goo

$
0
0

A product that has truly revolutionized my tying

Not too many years ago, I found myself struggling with the epoxy conundrum: Basically is it worth throwing epoxy on fly patterns given its curing time and all the other challenges that come along with that? I usually found myself opting out of using epoxy in situations where I would have liked to use it, but just didn't want to mess with it all.

Then along came the Clear Cure Goo revolution. This is a great product line that will literally put a totally different spin on both the patterns you tie and the workflow that you use to tie patterns that would normally use a traditional epoxy.

Now there are a large variety of Goo styles, including, Thin, Brushable, Tack-Free, Thick, Flex, Fleck and so on, but our favorite is, hands-down, the Hyrdo. It's the perfect viscosity and will cure tack-free.

But best of all, when it comes to this great UV Cure resin product, you can literally use it on a huge variety of flies.

Midge Dry Fly

Gut Bomb - Tan

Chimera Fly

Experimental mayfly nymph

Jig Style Nymph

Caddis Larva

I've tried most of the resins out there. There are some good ones and some not-so-good ones, but in my experience, you can't go wrong with the Goo and it's got a spot on my tying desk at all times.

You can check out their website at: www.clearcuregoo.com


Viewing all 629 articles
Browse latest View live