Quantcast
Channel: Fly Fish Food
Viewing all 629 articles
Browse latest View live

Trout Fishin' Super Flies

$
0
0

Guaranteed that you will limit out in a half hour

The ever deadly Fatty Longtail

Rarely are we privileged with the opportunity to see these top-secret flies that only my Uncle Ken can tie.  The last time I was using them, the DNR came and checked my line and told me that it was unethical to use something so effective.  In fact, Utah has teamed up with 7 other western states to try to make them illegal, and there is a good chance that you will no longer be able to fish them after 2014.  Without further adieu, I present three weapons of trout destruction.


Weighty Considerations of Fly Design

$
0
0

Put your flies on a diet

Slim version of a callibaetis nymph
I had good reminder of a basic concept on fly selection last year when it comes to how fish will and won't take flies. I was fishing a high mountain lake with crystal clear water and was casting to a pod of very nice fish suspended about 6 feet down in 15 feet of water. They were actively feeding on Callibaetis nymphs, but not moving too much up or down. "Easy pickings", I'm thinking to myself as I slap on a proven nymph pattern and dropped it from my trusty indicator. Not only could I see the fish ignore my pattern, but they were also giving me the middle fin and laughing as I stood there in rejection.

However, as I continued to watch their behavior reacting to my fly, a couple of things became apparent. First off, they did not like the fly just hanging there in front of their faces as it tends to do whilst connected to a floating indicator. Secondly, while the fly did garner some attention from a few fish as it descended through the water column, I realized that the bead-head fly passed way too quickly through their "eating zone". I would get a bit of notice and movement from a curious fish, but the fly would continue to drop as I stripped it in and I would again be on the losing end.

Bead-Head Deep Dish Callibaetis
Once I realized the proper combination (i.e. non-stationary, yet not moving too quickly and in the "eating" zone), I tied on an unweighted nymph, ditched the indicator and watched the magic happen. The rest of the day was filled with successful sight fishing using slimmer unweighted callibaetis nymphs. The big takeaway though was just considering how my nymph selection skewed very heavily to the heavily weighted patterns. Time to retool the box and the tying approach.

So pulling from that lesson, there are a few things that I now make sure to incorporate into fly design when it comes to weighting or adding beads to patterns:

1. Consider the weight AND hydrodynamic (yes that's a big nerdy word) profile of a fly as it affects where in the water column a fly will travel. Remember weight will sink a fly but resistance from hair, hackle, dubbing etc will also affect the sink rate and the action in the water. One of the reasons I think the Cheech Leech, for example, is so effective is that it's not overly weighted with lead and other gizmo's and the copious amounts of marabou and dubbing help provide a bit of lift (and movement of course). To see what I mean, try throwing a Cheech Leech in a small shallow stream and see how it will literally glide through the water swimming more than it sinks.

Fall Cheech Leech
2. As you tie flies and consider the effect of #1 above, make sure you plan your boxes accordingly. In a nutshell, tie weighted and unweighted versions of your nymphs and even streamers. There will be times where you need the weight and times when you don't. Fishing a Copper John in a fast moving stream will really come in handy when you need the fly to descend quickly and get to or close to the bottom. On the other hand, as in my example above, you sometimes need an unweighted pattern that stays longer in the strike zone on its own. After this experience, I went back through my boxes and tied slimmed down versions of a lot of my nymphs -- especially stillwater patterns.

Unweighted slim version of a callibaetis nymph
3. Indicators are not always required and will sometimes be a hindrance. If you've done much Euro or Czech nymphing, you know that indicators of the floating variety can actually work against you in some cases when you want to have the fly control the sink rate and connect you more closely with the fish. So barring the presence of a flotation device and assuming a floating line, your fly will largely control how fast and how far it will sink. Sometimes a slimmer unweighted profile works better than a buggy weighted pattern -- especially in stillwater or slower runs or pools in rivers and streams. Then again, sometimes a heavy weighted pattern is what's needed. So taking the indicator out of the equation can sometimes help you better dial in your fly design and selection.

 At the end of the day, there are no hard and fast rules, but having similar fly patterns with varying sink rates in your arsenal will definitely be to your advantage. It sounds simple and logical to have both weighted and unweighted versions, but I'm slow on the up-take most days, so it's good to be reminded of this every now and again.

5 things I learned from being a gear hucking hillbilly

$
0
0

fly fishing vs. just fishing

Raiders hat + Bob Marley shirt + 50 pound braid = HUGE bass

I always get a kick out of people who say yeah I  fly fish.  Well whoopty-friggin-doooo.  Don't get me wrong here - I LOVE fly fishing, but when the term "fly-fishing" is thrown out there like it's some kind of status symbol I always get a bit of a chuckle.  The majority of the time when I'm fishing it's with a fly, but fly fishing isn't always the most effective way to catch fish.  Just to give a little bit of back-story on this - I grew up in a small town in Utah, and really didn't start fishing with anything other than a wad of velveeta cheese on a hook until I was about 21.  I gradually made the change to lures, then I got a float tube, then I got introduced to fly tying and fly fishing, then I sold ALL of my non-fly fishing stuff etc. etc. you get the picture?  You guys probably all know this so-called progression of fishing that we all perceive to have fly fishing at the very top.  Well...  In 2006 (when in my mind, I had reached the top because I could readily catch fish on a fly), I got schooled.

This bass ate a fly in open water
Around 2006 I found myself living next to a really great private pond that held a very impressive Bass population.  Naturally, it was a huge motivator for me moving to that community, but it proved to be almost too challenging to hit with a fly rod.  The reason for this is that the home owners really loved to fertilize their lawns, which in turn made the pond a gnarled cauldron of matted weeds.  Yes.  A perfect bass environment.  I could get a fish or two on topwater early in the morning when they were hugging the edges, but later in the day when they headed for the depths, it was a complete no-go.  I tried about everything in the book to tie weedless jig/flies that would penetrate the thick weeds and remain effective, but it was no use.  It wasn't until I invited good buddy Bryan Gregson over to fish that my eyes were opened a bit.  He brought his trusty Sage XP and some craw patterns, but he also brought a baitcast setup and a spinning setup.  Even though we had a banner day on fly rods that day, he decided to "lend" me his non-flyfishing (heathen) gear.  For some reason my fishing soul was re-energized with the challenge of learning how to use this gear over again to catch bass.  I gradually built up a small arsenal of baitcasters, spinning rods, and eventually a big sparkly glitter sled (aka bass boat).  Here are some of the things that I learned from then until now.

1- Gear fishing is EVERY bit as technical as fly fishing.

This smallie crushed a tube fly
I have heard it a million times.  "Bass fishing is so easy, because they just come out and CLOBBER your fly," and "All you do with gear fishing is throw out your lure and reel it back in.  There is no challenge in that."   Well, welcome to Farmer Jim's pond with fish that have never seen anything.  Well, guess what... it is rarely that simple when you fish on a water that gets any amount of fishing pressure.  There are myriads of techniques for rigging, casting, presentation, boat position, use of electronics, and use of SCENT (yep, I said it... scent).  There is a reason why I have 6 to 12 rods rigged at all times on the bass boat.  Learning how to break down a bass water has helped me immensely in fly fishing because I have learned how to break down water and come up with a game plan and a technique instead of just flogging the water and hoping for the best.

2- Casting practice is every bit as important with conventional gear as it is with fly gear.

So you are scanning water, and there is a small opening in the snarled tree that you are looking at.  The hole is about 6" in diameter and the water is shallow so you can't splash and spook the fish.  If you miss your spot, you will spend the next half hour untangling your line from the snarled tree.  Yeah, I spend a lot of time in the front yard flipping and pitching into small targets.  Same goes for fly casting.  You should spend a lot of time practicing different casting techniques so you can present your fly more effectively.  Admittedly, I probably practice more with my baitcasters than my fly rods.

3- Knot strength is everything.

I used to try to learn new knots for fly fishing, but after bass fishing I realized that a standard clinch knot and a loop knot are all I need when attaching flies.  When you start snapping 40 pound braid setting the hook on a 3 pound bass, you realize that you need to pay more attention to the type of knot that you use, and to make sure that it is tied perfectly every time.  The amount of torque a 7'6""flippin" stick puts on line is tremendous.  I'm not downplaying the fact that that you need to tie good knots in fly fishing, but bass fishing really made me focus on knots and knot-strength much more.  So far, if I need a knot that will hold as close to 100% strength as possible, I use the good old palomar knot.

4- Fly Fishing isn't always the most effective way to catch fish.

Check out Curtis'ZAGGIN ZOOK
I get it.  We fly fish because there is a major element of a challenge when we do it.  Sometimes, a fly is by far the most effective technique to use because the fish are eating something that is much more effectively represented with a fly than with some type of lure or bait.  Other times, fly fishing might still work if you get lucky, but for all intents and purposes, all you are doing is waving a really long rod in the air for hours.  On one particular trip to one of our bass havens, somebody.. cough, cough, couCURTIS, was going to make 100% effort to throw a fly rod all day while I was hucking my heathen sticks with the heavy artillery.  He had tied up some bugs that were comparable in size to my stuff so he ended up throwing a 9 wt all day.  I probably made 2,500 casts that day- Curtis? 250.  A sore shoulder led him to Tackle Warehouse to order some wares for the next time around.  There are, however, times when fly fishing for bass is the best way.  On a trip to Oregon several years ago, Curtis smoked us all because he was fishing a crease fly that was the perfect size and color.  As hard as I tried, I couldn't buy a bit with my heathen gear.


5- Don't judge.

I learned a long time ago that the guy sitting on the bank hucking rapalas just might be able to teach me something.  We are never done learning and if we think that fly fishing is the be-all end-all of fishing, we can miss out on opportunities to learn and become better fishers.  I'm not telling you to run out and buy a can of worms and an Ugly Stik, but maybe the next time you are out fishing and you see the guy fishing with non-flyfishing gear, you will think twice before you label him as a backward-hilljack-bait-chucker (which I certainly have never done before... right?).

Bruiser Bluegill new for 2014 Bruiser Blend Dub HERE

It would be safe to say that I'm a very avid bass angler, and I enjoy gear fishing for bass every bit as much as I enjoy fly fishing for trout.  For fly fishing, I tie flies, build rods, etc.  For gear fishing, I make lures, I pour lead and do custom paint, etc.  I like fly fishing because I can highly customize the say that I present my fly.  I like gear fishing because I can highly customize the way that I present my lure.  To me it's just fishing.


~Cheech

Book Review: Dynamic Nymphing by George Daniel

$
0
0

If you nymph, you must read this book

I had been somewhat interested in Czech/Polish/Euro/Tight-line style nymphing ever since I was introduced to it by my very fishy friends Ryan Barnes and Lance Egan a number of years ago. It seemed for me, at least, more of just a switch in tactics to fit the style of fishing for the international competitions and besides, I had lost interest in nymphing for the most part so it didn't really grab my attention enough to dig into it much. It wasn't until the last couple of years that I really saw the vision of what some of these other nymphing techniques brought to the table. And once I read "Dynamic Nymphing", it opened up a whole new world of fishing to me.  

As part of my nymphing re-awakening, I've had the chance to fish with and talk to a few guys that really have the Euro style down pat. I was most impressed with the insane catch rates and the fact you can really cover a lot of different water you normally wouldn't touch with an indicator. Anyway, that pushed me to buy and read "Dynamic Nymphing".

The book is broken down mainly into chapters focusing on specific techniques. George does a great job in explaining why certain techniques work in certain conditions and situations. Not only does it discuss techniques, but rigging and equipment options are also covered very nicely. There are plenty of on-the-water pictures and other illustrations that help show what's being discussed. Those are very helpful. Bottom line, the book covers some very valuable information that will absolutely improve your nymphing skills and put you into more fish.

Nice little Brown taken on a tight-line Euro rig with the Allen Icon.
Now that I've gotten the Euro or tight-line nymphing bug, I've changed a lot in my fly selection and design as well as my equipment when it comes to nymphing. I picked up an Allen Icon nymphing rod and absolutely love it. I can't believe how much more I actually enjoy nymphing now that I've had my eyes opened to the possibilities. In fact last year one of my first outings with the new rod, I was fishing a smallish stream that had some fairly spooky and finicky browns. I was totally blown away as I literally pulled fish after fish from the same small pool in the first spot I stopped to fish. Amen.

So if you are not opposed to throwing nymphs and want to catch more fish, check out this book and dig into the cool techniques therein. George Daniel and a lot of these other nymph masters (Lance Egan, Devin Olsen and others) are good evidence that these techniques are solid. Read it. You can buy it from Amazon here.

Cheech's Rock Roller Czech style nymph

I've Got Worms

$
0
0

Turn your last resort into your first choice

Spinoff of Mickey's UV Juan


Several years ago before the age of crazy work schedules and kids, I found myself fishing my favorite tailwater a couple times a week.  One day I hiked down to my favorite hole to find that the water levels had risen just enough to make the fishing more difficult, and I was hiving to re-think my whole strategy about fly presentation.  This was frustrating because my go-to super special sauce flies weren't getting the love that they surely required.  I found a slower eddy, and finally managed a pretty little brown that surely was starving.  When I reached down to take my fly out, I noticed that the fish had been absolutely gorging itself on aquatic worms - so much so that there were worms all caught in its teeth.  I reached for the box that I kept at the bottom of my pack (because it was embarrassing to have a box full of nothing but worms) and tied on what would save the day for me, but more importantly, that fish taught me that maybe my box of undesirables should see some playing time with the starting team.

Dumb fish?


Many years later, I still had respect for the worm, but it went to a much higher level after working in a fly shop with Mickey Anderson for a short time.  Mickey is one of the most analytic anglers that I know and he always takes into account many variables when he fishes.  I was asking him about his favorite nymph rig, and I was expecting to hear about some micro pattern that had several colors from the spectrum and a special way to present the flies.  His reply was "BIG, on a shallow rig." He then showed me the fly called the UV Juan that was doing most of the catching.  I had the same reaction that many of the people I fish with now have - yeah right...  I tied some up, and was glad that I did because it is a legitimate fish catcher.  The UV Juan is now a production fly from Umpqua*, and I have tied many spin offs that work great.  The constant that I have found with worm patterns similar to Mickey's is that they need some type of UV quality.  In the case of the UV Juan, the UV "hot-spot" is created by adding a small section of cinnamon UV Ice Dub at some point on the fly.  

By adding worms to your starting team instead of bringing them off the bench, you can turn a bad fishing day into a good day and a good fishing day into a great fishing day.

*For you Salt Lake City anglers, the UV Juan is available at Fish Tech where Mickey works.

Cheech

Cream UV Juan
UV Juan

Hook: Gamakatsu Drop Shot 1/0
Body: Cream poly yarn
Hotspot: Cinnamon UV ice dub
Orange UV Juan

Pig Sticker

Wire Worm


UV Juan

Hook: Gamakatsu wacky worm 1/0
Body: Orange backing or twisted tying thread
Hotspot: Cinnamon UV ice dub


Pig Sticker

Hook: Gamakatsu Drop Shot 1/0
Underbody: About a pound of lead
Body: Maroon floss
Hotspot: Shell pink tying thread


Wire Worm

Hook: TMC 200R #4
Body: Red wire from the craft store
Hotspot: Shell pink tying thread


This is just dirty....

You only really need one fly

$
0
0

The rest is fly box decoration

A fly box with a few flies
If I had a fly for every time someone looked at one of my fly boxes and either said "wow, that's a lot of flies, but there's really only one fly you need to tie and that's the <insert woolly bugger, Ken's Peacock King or the super-duper secret fly xyz here>" or "you're never going to fish all them flies in there", I'd have a huge box of flies for people to gawk at and wonder why I have so many flies. Think about that for a while.

So why then, do we really carry so many flies in all different sizes, colors and styles when we honestly have no chance of using even a fraction of them? Beyond the obvious OCD collection affliction we all suffer from, we worry so much that there will come a time when only that "one fly" will work and worse, we don't know when nor what that fly might be on that given day, so we keep stocking and we keep stocking.

I think we all like to fool ourselves into thinking "if I had that one fly, I'd be catching fish right now". I know one of my winter rituals is the annual fly box filling and re-filling and thinking to myself, I'm planning for the eventuality of the "one fly" and making sure I have it. I think if we get really honest, we'll probably agree that in most situations there are a lot of flies that will catch fish in a given situation. I've had times where, in a solid midge hatch with super-picky fish, they'd eat a crazy attractor pattern or fishing a favorite stillwater where the fish had destroyed my Lemon Lime bugger and I continued to catch fish after fish on nothing more than a hook with a green bead.

Setting those types of instances aside, we're most concerned about those times the fish are finicky and are focusing on a color, an insect stage, a specific size, a specific weight or any other number of variations that might come into play. And those are the times that warrant having the "one fly". We've probably all experienced those times and likely we've been on both sides of the fence. I can remember vividly the times I've sat there and watched fish rise to an insect or feed on something that I couldn't imitate. I can also remember times where I've been lucky enough to cover my bases and pull the "one fly" out of my box that saved an otherwise unremarkable day on the water. What's even better is throwing up a hail Mary on a slow day with a fly that shouldn't work and having it turn into the "one fly".

Lesson learned: Don't worry about carrying too many flies. If you care to do so, buy a pack animal to carry them or better yet, train your cat or dog to walk by your side as a living breathing fly patch. No limit fly boxes. Be judicious in what you carry, plan ahead and make sure you aren't left without that "one fly".


Trokar Tying Contest

$
0
0

The ultimate "meat" fly

4/0 Trokar Meat Minnow tied with a Bruiser Blend dubbing head

We are going to host a fly tying contest in conjunction with Trokar hooks for the ultimate "Meat" fly.  This fly should be large and in charge, designed to take down the most gnarly of flesh eating predators that swim in your waters.  This could be big trout, barracuda, sailfish, musky, or other carnivore.  You have until 4/26 to submit your fly for the contest.  The winner will receive an awesome care package of goodies from both Fly Fish Food, and Trokar. Here is how to enter:

1- Tie up some awesomeness (a fly)
2- Take a good quality picture of said awesomeness (fly)
3- Post your picture on our Facebook page or tag us on Instagram, and tell us what your target species is with it.
4- Make sure to use #trokarcontest on your pictures
5- Wait anxiously to find out if you won.

You can enter one fly and one fly only.  If you submit two flies, we will only judge the first fly that you entered.

If you win the contest, you will most likely be able to tie the next batches of your "Meat" fly with some wicked sharp Trokar hooks!

In the meantime, check out Trokar's page HERE, and a write up on how to incorporate Trokar hooks into fly tying HERE.


Lunch Lady: A Chunky Streamer for Hungry Fish

$
0
0

"I know you like em' sloppy!!!!"


Two Tone Lunch Lady

Mega Lunch Ladies tied on 5/0 hooks
As all of you know by now, I'm pretty addicted to throwing big nasty streamers at trout, and we have done tutorials on the Cheech Leech, Mongrel Meat, and Double Wide Cheech Leech, to name a few.  With the new development of our Bruiser Blend dubbing, I wanted to focus on a fly that used it's properties to get a certain action.  Bruiser blend is a great mix of bulk and movement because it slims down in the water just a bit, but not too much.  It's also moves in the water just enough, but not too much (I know it's kind of confusing).  The Lunch Lady uses a healthy portion of bruiser blend on the head, and the action that you get in the water is a rocking back and forth motion as you strip it through the water.  This might drive some of you nuts, but it actually is a pretty good representation of a smaller fish that is under stress.  This fly looks pretty complicated, but it's actually much easier to tie than any of our previous articulated patterns.  Whip some up, mix up the colors, and go catch some fish! (video tutorial below)

~ Cheech


Hooks: 2x Allen B200 -- Buy Here -- (Front hook is a size 4, back half is a size 6)

Trokar Fly Tying Contest Winner

$
0
0

Congratulations to Richard Swenson

Swenson's Winning Fly

Many thanks to all of you who submitted patterns.  It was a very hard decision, but the prize goes to Richard Swenson for his efforts in tying this meaty bundle of goodness.  I asked Richard about his fly, and he said  "I wanted an articulated streamer that was a take off on the highly successful Platte River Special color scheme." I think he has done that very well.

There is something about this fly that makes me either want to tie it, or invite Richard to go fishing so I can steal it out of his box!  For his efforts, Richard will get a care package from Trokar hooks.

Here is the recipe:

Rear Hook: Daiichi 2461 #1/0
Thread:  GSP 100, Veevus BUY HERE
Tail:  Yellow marabou, topped with medium brown marabou BUY HERE
Body: Montana Fly Company large gold Lucent Chenille BUY HERE
Hackle:  Brown dyed grizzly schlappen, Whiting
Overwing:  Medium brown marabou, topped with yellow pearl and bronze Ice Dub Shimmer Fringe

Connection wire, is Beadalon .46, with two medium brown silver lined glass beads from Spirit River

Front Hook: Daiichi 2461 #2/0
Thread:  GSP 100, Veevus BUY HERE
Short Tail:  Yellow marabou, topped with medium brown marabou (use much less than what is in the tail) BUY HERE
Body: Montana Fly Company large gold Lucent Chenille BUY HERE
Hackle:  Brown dyed grizzly schlappen, Whiting
Overwing:  Medium brown marabou, topped with yellow pearl and bronze Ice Dub Shimmer Fringe
Legs:  Legs to match colors of the fly
Eyes: Hareline Pseudo Eyes, yellow
Head: EP Streamer Brush, yellow, mark the top slightly with a brown marker

Big thanks to Richard for tying this mean machine.

Flymen Fishing Company: Mohawk Sculpin

$
0
0

Tying with the Sculpin Helmet

sculpin fly pattern
Fish Skull Mohawk Sculpin

I have to admit that I have been a bit reluctant to tie with some of the new products that have come out lately, but I finally got my hands on some Sculpin Helmets from Flymen Fishing Co.  I think we have all seen about everything there is to tie with these, so I decided that I'd throw my hat into the ring.  As you will see with this video, the Mohawk Sculpin is kind of a play on our popular El Sculpito pattern, but this one has much more of a darting motion due to the more aerodynamic and heavy head.  It's a fairly simple fly to tie as you will see in the video.

The Sculpin Helmet is a pretty slick addition to any streamer pattern, and it makes for a pretty clean head with great action in the water.  After tying a few of these, I have started adding a bunch of smaller Mohawk Sculpins to my arsenal as well.  The best part about this pattern is that it's a pretty quick tie that will be very durable for the whole season.

~Cheech

Recipe:

Hook: Allen B200 #4 BUY HERE
Head: Fish Skull Sculpin Helmet - large olive
Thread: Montana Fly Premium Thread 3/0 - white  BUY HERE
Under body: AZ Mega Simi Seal - bronze peacock  BUY HERE
Over body / tail: Magnum rabbit strip - brown barred olive  BUY HERE
Fins: Silicon streamer legs - olive gold  BUY HERE
Throat: Schlappen - Olive  BUY HERE


Scuds are the Skittles of the Sea

$
0
0

High Calorie Snacks.

This Rainbow likes junk food.  

What do you do when you get out of the water and realize that you have literally thousands of scuds attached to your waders?

Skittle Scud
Curtis and I have a tradition of hitting my old stomping grounds at least once per year to check up on our friendly obese rainbow trout in a series of lakes.  The Utah DWR finally realized that they had the potential for making a great trophy fishery, changed some regulations, and VIOLA!! Big trout!  (Yeah.  I know... shocker.)  We have specifically hit it hard for the past two years and we have done pretty well throwing chironomids, leeches, callibaetis, etc, at them.  After a day last year, I looked down and realized that my waders were so covered in scuds that I could scoop them off by the handful.  Now, when a situation like this happens, my first instinct is to tie on something that looks exactly like the bugs that I find.  Last year I did this, and guess what... no dice.  The fish wouldn't even look at my offerings.  I imagine that if I lived in a world where skittles were everywhere floating in the air, I would just walk around with my mouth open and get enough skittles to make me nice and fat.  Yes, the green skittles are my favorite, but why would I move ten feet one way to eat a green skittle, when there are ten of them right in front of my fat, gluttonous face?  You get my point?  These rainbow trout had so much junk to eat that they didn't have to move very far to get a meal.  So how do we get these lazy porkers to eat something that is fake and not as delicious as Skittles?

Taste the Rainbow!

Two things.  First, locate the fish.  Because they will most likely be hunkered down in a spot and not really going out of their way to eat, it's critical to find what area of the lake they are in, and find out at what depth they are feeding.   Second, throw something that is somewhat similar - but different.  I knew there were thousands upon thousands of scuds and sow bugs in this lake, so I tied the scud pictured in the video below.  To make my scud stand out, I tied it a little bit darker and added two hot spots.  One on the back of the fly using Loon UV paint, and the other with dubbing right behind the bead.  Guess what...  It worked, and worked well.  I only wish that I had tied more than two of them for that trip.


Recipe:

Hook:  Allen N205BL or an Allen N204BL #10 BUY HERE
Thread: Montana Fly 3/0 Olive BUY HERE
Bead: 3.3 mm Tungsten BUY HERE
Over body: J:son Realskin - Green BUY HERE and Mirage Tinsel - opal BUY HERE
Ribbing: UTC Ultrawire - copper brown sm BUY HERE
Body: Arizona Synthetic Dubbing - bronze peacock BUY HERE
Hot spot: Sow Scud Dubbing - pink
Back hot spot: Loon UV fly paint - orange BUY HERE
Shell back: Loon UV fly finish - thin BUY HERE

~Cheech

Gear Review: Maui Jim Sunglasses

$
0
0

Fishing Glasses Worth the Look


maui jim polarized sunglasses for fishing
Kipahulu Polarized Glasses from Maui Jim
So a number of years ago, Cheech somehow snaked a pair of Maui Jim glasses from our buddy Bryan Gregson and I remember his surprise at the quality and effectiveness in terms of polarized fishing lenses. Fast-forward to a few months ago, as I'm looking around for some back-up or alternative sunglasses to use with my normal Costa's. I knew the general color and style I wanted, but decided to look outside of the Costa lineup. After a few days of searching, I decided on Maui Jim's since I'd always wanted to try a pair myself.

So when I first tried on the glasses (I ended up with the Kipahulu model), I had a similar experience the first time I gazed through my Costas. "Wow, that's crazy clear and sharp". So yeah, these are killer glasses. I won't go into any sort of direct comparison of Costa's vs Maui Jim's because I like both and will be using different glasses for different situations, but these glasses are downright awesome.

Next, was the on-the-water testing for some marathon fishing sessions. Now if I have one gripe about my Costa's is that, because they are glass, they are heavier and tend to become a bit of a burden on my face after being out and about for 6 to 10 hours. Maybe I'm just a wuss. But because these Maui Jim sunglasses are a polycarbonate, they're much lighter and I was stoked about being able to wear them all day with no issues.

Beyond just the normal sun and glare protection for your eyes, the most important part of the polarization on lenses is seeing fish. These did not disappoint. Of course lens color, water color, lake/stream bed substrate and sunlight play a part in what you can and can't see, but I'd say these passed muster on both rivers and lakes.

So all told, I'm pretty happy with the MJ's and given that I've heard some great things about their customer service, I think this is a brand I can hang my hat on.

maui jim sunglasses
Me sporting my sexy MJ's with a little rainbow I lucked into


The Biot Body Primer

$
0
0

What you need to know to tie with Biots


biot body spinner pattern
Biot Bodied Callibaetis Spinner
Out of all the possible materials for fly bodies -- especially midges and mayflies -- I'd say biots are probably one of the more under-utilized yet cool-to-tie-with materials out there.

Let me nerd out (as Cheech puts it) for a few sentences. <NERD OUT> Biots are basically the shorter stouter feathers on the leading edge of a bird's primary flight feathers. These parts of the feather lay relatively tightly against each other to form a ridge against which air can pass over to the longer tapered and more delicate fibers on the rear side of the feather, providing lift. As such, these leading fibers tend to be more compacted against the quill and are typically stiffer than the fibers on the back side of the feather, thus providing us some nice material for fashioning tails, wings and bodies for all sorts of fly patterns. Because of this requirement for flight feathers, biots go beyond the normal goose and turkey biots you may first think of as you can always find biots on pheasant, duck, partridge or whatever. However, we'll stick to the geese and turkeys here. </NERD OUT>

In the world of fly tying, you'll typically see goose biots sold already separated from the quill, while turkey biots are sold with the whole feather intact. Just be mindful that you're mostly focusing on those shorter fibers (as shown at in the photo here on the left side of the quill).

Some will suggest you separate the biot side of the quill on a turkey feather with an Exacto knife or razor blade, but I personally prefer to leave them together. Either way is fine and won't affect how you tie.

The next consideration is really how to decide between a goose or a turkey biot. In general (I say "general" because this all depends on the bird and the quality or type of feathers you're using), goose biots are stiffer and shorter. Therefore, they make good tails or appendages for Copper John's, Prince Nymphs and other patterns. When it comes to bodies, because of the limited length, goose is not much good for bodies on patterns bigger than a #16 or #14 usually. Because of this, I usually stick to turkey biots for wrapping bodies and goose biots for tails and such. And the cool thing is that they come in all sorts of colors to imitate anything from midges, to baetis, to PMD's, to caddis, spinners and a lot more. See some awesome bug body colors here.


Just comparing a couple of average sized fibers from both a turkey and a goose, you can see that the turkey is significantly longer, but of course that can vary from bird to bird and feather to feather.

goose and turkey biot comparison


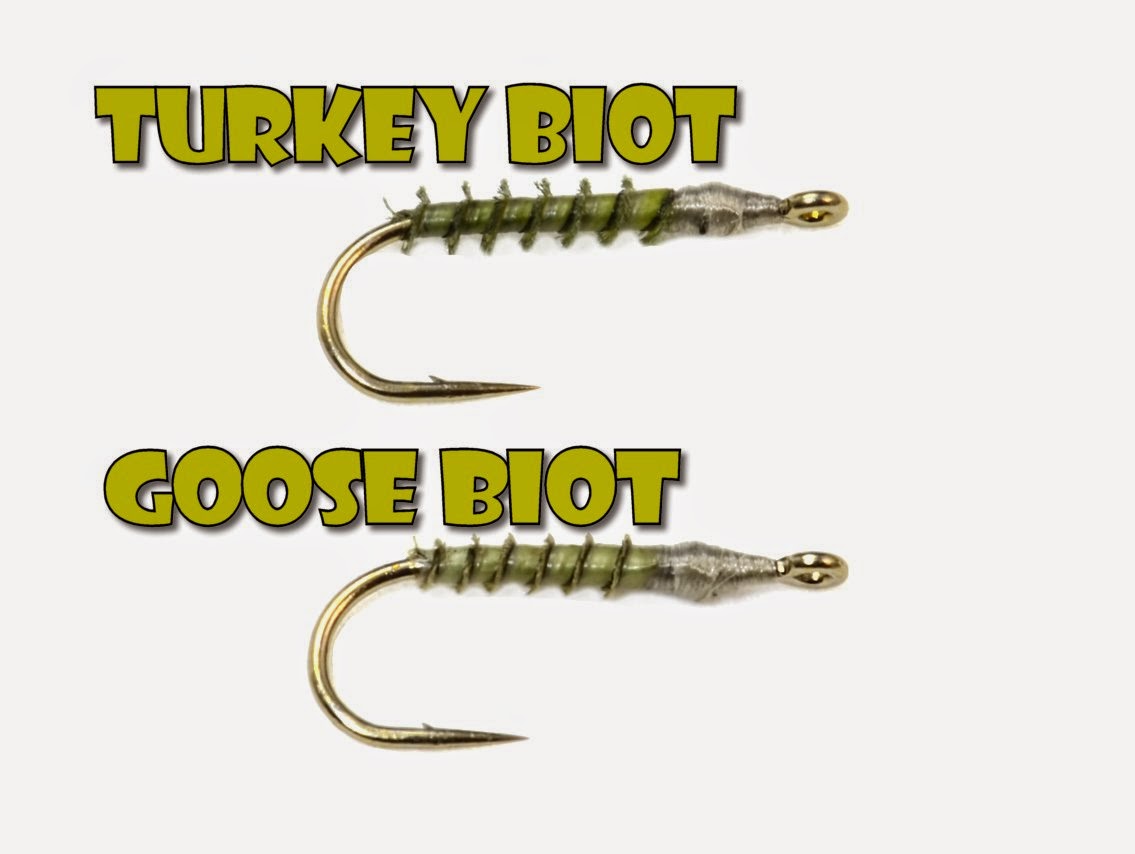
And just to show that they both provide similar results, I wrapped a body with each biot type. There's really not an appreciable difference, but I tend to like the more pronounced "ridge" provided on the turkey biot. But again, that will vary from bird to bird, so not a huge difference in the long term. So that being equal, the fact I can tie bigger fly bodies with turkey means I usually grab the turkey biots when doing bodies.


Going a step further with turkey, if you're like me, you might wonder if it's even possible or advisable to tie with the non-biot side ("lift") fibers on the feathers.
Turkey fibers

You'd be surprised to learn that, yes indeed, it's very possible to use those side of the feathers. Those feathers aren't near as durable and don't provide as nice a segmentation, but they're great on really small flies (smaller than a #20 for instance) because their tips are so tapered. You can see the difference between the two feathers here on the right. The top one is pretty wussy, but surprisingly can provide decent results.


Anyway, not the best way to go, but here's a comparison.  As you can see, the "lift" fiber did not provide a super-clean-cut segmentation line and the feather ridges were a bit weak. Probably not a deal killer, but I'll stick to the biots.


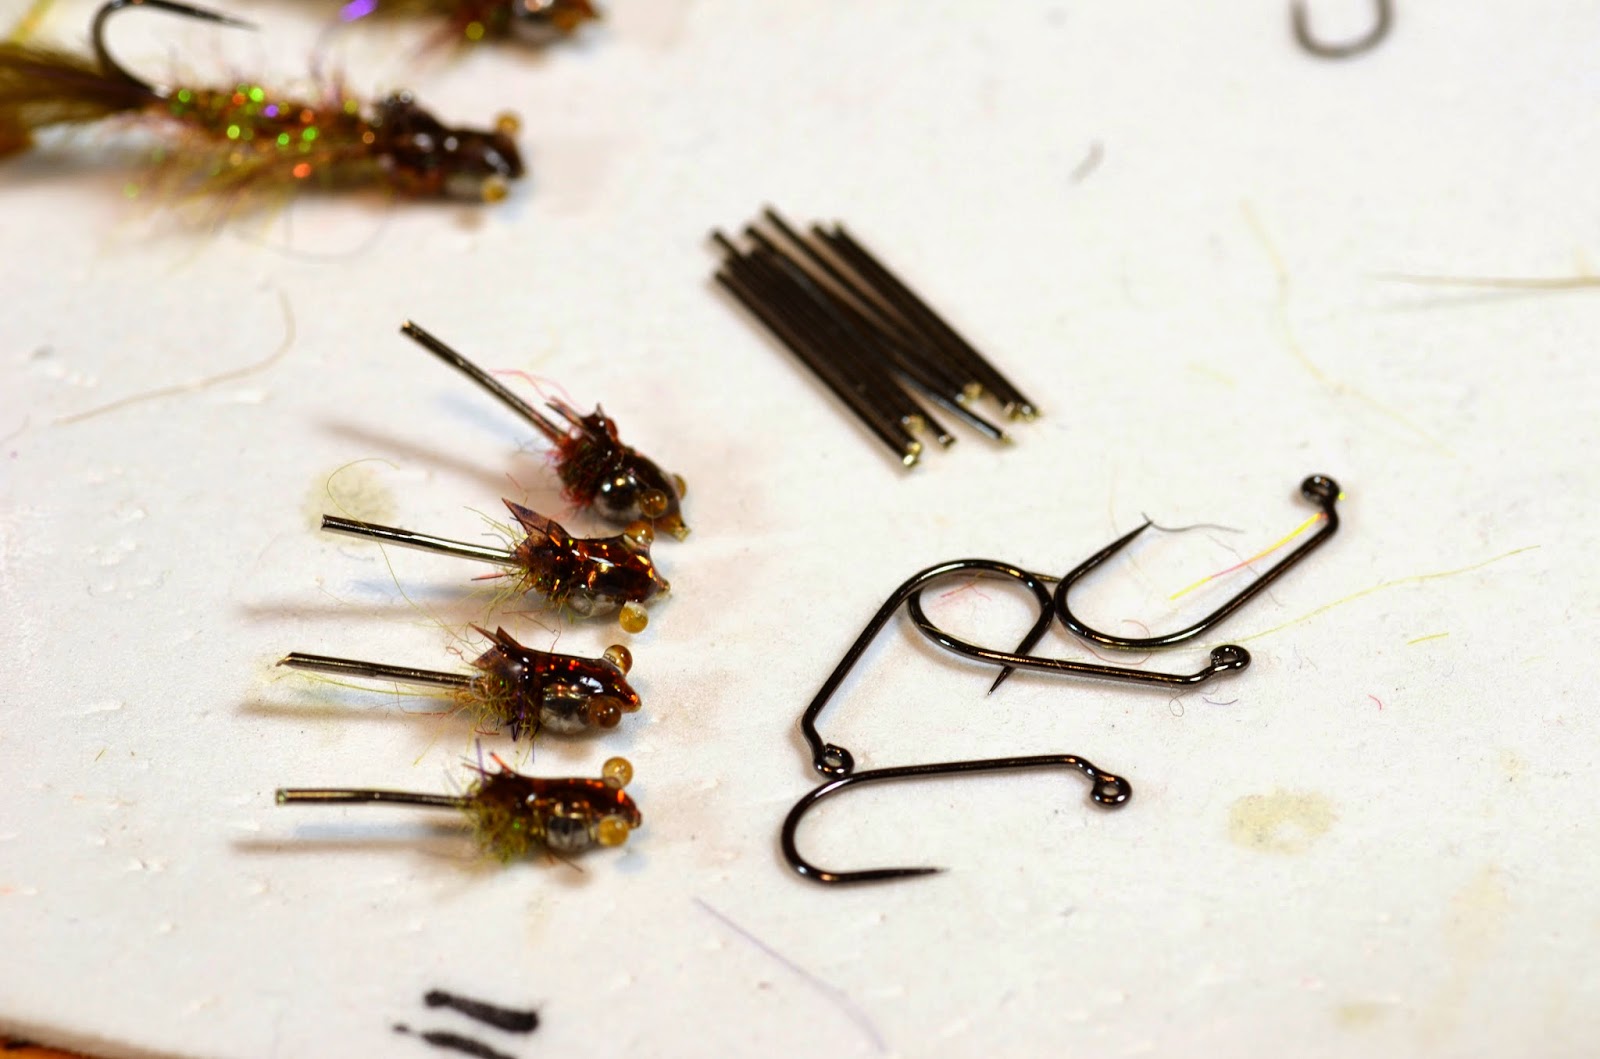
So now whether or not you choose turkey or goose, there are yet additional considerations to deal with: How to tie in and wrap the biot so that you get those well-defined ridges or a smooth body.

Well, truth be told, there are a lot of different ways people will advise you as how to tie in the biot so as to ensure the smooth vs the ridged and segmented body. Google it if you're interested. But before we go there, you're best off understanding the structure of these fibers. Then you can figure out the way that best works for you because you'll understand what part of the feather you'll want pointing where. Got it? Good.

First thing is to hold the biot up to a light source and you can see three very distinct features. First, because you know better than to cut a biot from the stem with scissors (cardinal sin #1 with biots is to cut the fibers from the quill), you'll see a fairly distinct notch. This notch will correspond to the side of the fiber that I call the "webby side". As you can see here, the webby side doesn't have any ridges to provide for that tell-tale segmentation. Whereas the "ridge" side will be the stiffer side with the very fine line of feather fibers that create the segmentation you're after.


Taking the light away, the webby side isn't as visible, but you can always find it if you have the notch identified. Worst case, if the biot is cut and you can't tell which side is which, just guess or throw it away and rip off a new one. But here's another view without the aid of a light


So here are a couple of ways to get the needed effect. To get the ridged segmentation, you want the webby side (i.e. the notch) facing the eye of the hook as you wrap forward. For me, this means I tie in the biot notch down (see the photo to the right) because I will pull the fiber up, twisting it away from me (as shown by the arrow in the first photo there). Then, as you see in the 2nd photo, as I begin to wrap the biot, the notch faces forward towards the eye of the hook. This will create the segmented look. Take a few trial and error wraps to get the hang of it. And regardless of how you tie in or twist the biot, the main thing to remember is: When wrapping, the notch or webby side facing forward gives the segmentation, the notch or webby side facing backward is the smooth effect.

So, like it says above, if you want a smooth body, the webby side needs to be facing towards the bend of the hook as you wrap it, which is basically the opposite of what's shown in the photos here. This will ensure the ridge side is covered up and smoothed out with each successive wrap.

Now, let me bloviate a bit regarding the "smooth" effect. I've churned out some decent looking smooth biot body flies over my years, but if I'm looking for a smooth segmented body, biots aren't my first choice. I'll go with thread and ribbing, peacock or even stripped quills before I use biots. First off, turkey biots don't do well at all for smooth bodies. They don't have as good segmentation color contrast, the webby portion of the fiber varies a lot in size and they are just a little too squirrelly to tie with for that purpose.  That leaves us goose. The midge pattern shown below is from an olive dyed goose biot tied with the notch facing backwards (or tied in facing up). It looks ok, but I much prefer peacock or other methods to get the smooth effect. Now that's just me and I'm sure there are a lot of tyers out there that will prefer them because they're easy to come by and look pretty good. Anyway, just my 2 cents there.
goose biots
Goose biot tied in to create the "smooth" body

Wow, now reading through this post, that's a lot of information. Plus I'm to the point where saying the word "biot" is strangely foreign and somewhat meaningless, I've said it so many times here. Either way, hope that helps in your tying. And again, we keep some great turkey biot colors in stock, so get some here.

Simi Seal Leech

$
0
0

the ultimate in simplicity and effectiveness

Simi Seal Leeches of many colors

Complexity of Canadian Black
About ten years ago, I was in Phoenix on a business trip, and I decided to find a local fly shop in the area where I was working.  Like I often do, I asked one of the shop employees if they had any local patterns that they could show me.  He pointed to a wall of dubbing behind him and said "You ever heard of Arizona Simi Seal dubbing?" I hadn't heard of it before, but I told him that I had some real seal the I used quite a bit.  He explained that Simi Seal was a completely different animal even though it bore the name "seal."

He sat me down at a vise and quickly showed me how to tie one, and man was it simple...  The whole fly was made of the same material, but it looked really good!  He gladly assisted me in helping me spend about $50, and off I went.  I would later return to the shop a few months later to tell them how great this bug fished...  I eventually met John Rohmer a.k.a. the Godfather of Dubbing.  He is the mastermind behind the great dubbings that I discovered that day, and is a wealth of information when it comes to dubbing, and fly materials in general.  He is one of the guys that I really look up to when it comes
Original Simi Seal Leech
to pure innovation in tying, and his influence is probably already on your tying bench without you even knowing it.  He has his hands in the dubbing of a lot of major manufacturers.

Since I started fishing Simi Seal Leeches, I have all but stopped fishing plain jane wooly buggers on lakes.  I have caught fish on every color that John makes, and he has told me many times "We don't make colors that don't work." I think that about sums it up.


My favorite Simi Seal Leech colors are:

Canadian Brown
Canadian Black
Bronze Peacock
Golden Peacock
Blood Leech
Peacock
Black
DW Brown

Note: You can tie a longer leech with the fibers of Mega Simi Seal, which is the same material, just longer fibers.

~Cheech

Recipe:

Hook: Allen S402 #6-#12 BUY HERE
Thread: Montana Fly 3/0 BUY HERE
Everything Else: Simi Seal Dubbing BUY HERE

I know...  Don't you wish all fly recipes looked like that?

The video shows two effective techniques so be sure to watch them both.


Cheech's Low Fat Minnow

$
0
0

Them Minners work reaaaaaal good...


Update***  

The Low Fat Minnow has been getting bigger.  This one is about twice as long as the original due to the Bruiser Blend dubbing that I used in place of Senyo's Lazer Dub.  I also used one of our new Allen Flyfishing Carp MP002 hooks.  I like this hook because it's really beefy and helps get the fly down a bit.  It's also much more cost effective than the Trokar.  Another great hook that I have been using is the Allen Flyfishing MP001 hook.


~Cheech 

The Bruiser Blend that I used is Holo Gray for the top, and White for the bottom.  The hook is the Allen MP002 #1.

Refer to the tutorial on the bottom of this page to see how to tie this fly.


>>>Update: We now have these for sale on the store <<<

I love fishing for bass.  Always have, always will.  Largemouth bass are my favorite fish to chase by far, and up until about 5 years ago, I did it with a fly rod only.  "Fly or die," was my mantra until I found my self living near, and having access to a private pond with an excellent population of healthy bucketmouth.  This pond was covered by weeds most of the months out of the year, and I tried in vain to create the ultimate weedless fly, but I eventually came to the conclusion that I needed to get serious about gear fishing if I wanted to catch these fish.  Long story short, I have about 14 baitcast rigs that get USED.  I love everything about throwing big stuff for bass, and don't be fooled that it is any less technical than fly fishing.  


One fall, I was fishing a lake that has a huge bluegill population and we were throwing lipless crankbaits that yielded a fish on seemingly every cast.  As I lipped a nice fish, It YACKED all over the deck of the boat.  Up from the gullet came 4 or 5 bluegill minnows that really made me change the way I looked at fishing with bluegill patterns.  I could literally see right through them, and their guts looked like little strands of krystal flash.  Instead of going to try to find a crankbait with those characteristics, I immediately started creating a fly in my mind.  Fishing with gear WILL improve your fly fishing and vise versa...  Gear fishing that day led me to start working on a pattern that has both great profile, and translucency.  Through much consultation with Uncle Ken, we decided that Senyo Laser dub is a very versatile material that really has some excellent properties in this fly, and the marabou acts the "guts" of the minnow that will not stay translucent.  When stripped, this fly will flip around and do a 180, so its best to fish this one on a loop knot.  I also didn't put any weight on this fly because the Trokar hook is a bit more beefy and will help the fly get down a bit.  I also tie the fly on the Gamakatsu B10S (which is a GREAT hook too).  Happy fishing, and let us know  how the "Low Fat" treats you.


Cheech


Here are some fish catching variations.

Thread: UTC 70 Denier - white
Underbody: White and olive marabou in clumps -- Buy Here --
Back chenille: Small cactus chenille - white: -- Buy Here --
Front Chenille: Medium palmer chenille - orange -- Buy Here --
Outer body (top): Senyo lazer dub - olive --Buy Here--
Outer body (bottom): Senyo lazer dub - white -- Buy Here --
Head: Clear Cure Goo hydro, and thin


SEXY SHAD


Hook: Gamakatsu B10S #4 or #6 or Allen MP001 #1 or #2 -- Buy Here --
Thread: UTC 70 Denier - white
Underbody: White, chartreuse, and grey marabou in clumps --Buy Here--
Back chenille: Small cactus chenille - white -- Buy Here --
Front Chenille: Medium palmer chenille - white  -- Buy Here --
Outer body (top): Senyo lazer dub - silver minnow.  Tag it a bit with grey marker on top --Buy Here --
Outer body (bottom): Senyo lazer dub - white -- Buy Here --
Head: Clear Cure Goo hydro, and thin

SHAD


Hook: Lazer Trokar Wacky Worm #2 or Allen MP001 #1 or #2  -- Buy Here --
Thread: UTC 70 Denier - white
Underbody: White and Grey marabou in clumps -- Buy Here --
Back chenille: Small cactus chenille - white -- Buy Here  --
Front Chenille: Medium palmer chenille - white  -- Buy Here --
Outer body (top): Senyo lazer dub - silver minnow.  Tag it a bit with grey marker on top --Buy Here --
Outer body (bottom): Senyo lazer dub - white -- Buy Here --
Head: Clear Cure Goo hydro, and thin


CHARTREUSE


Hook: Gamakatsu B10S #4 or #6 or Allen MP001 #1 or #2 -- Buy Here --
Thread: UTC 70 Denier - white
Underbody: Chartreuse marabou in clumps -- Buy Here --
Back chenille: Small cactus chenille - white --Buy Here --
Front Chenille: Medium palmer chenille - chartreuse  -- Buy Here --
Outer body (top and bottom): Senyo lazer dub - Chartreuse green.  -- Buy Here --
Head: Clear Cure Goo hydro, and thin

And not only are these minnows good for bigger fish, the smaller panfish find them irresistible too...

low-fat minnow bluegill panfish on a fly

low-fat minnow gren sunfish bluegill panfish on a fly

And finally, the HD Video tutorial on our Youtube Channel:
)


Callibaetis Comparadun

$
0
0

A Must-Have Stillwater Pattern

Back when I was a starving college student and didn't have two dimes to rub together nor any money to buy more than crappy Indian neck hackle for my dry flies, I was frustrated while fishing a great Baetis hatch as the fish ignored my mostly sinking dry fly offerings. Granted, the hackle was horrible and acted more as a soft hackle, but I was getting beat up pretty good. A turning point in my fishing life came when a nice guy down the river from me, handed me a comparadun pattern as he left for the day. My first cast resulted in a nice thick Brown Trout and I was sold on this hackle-free miracle dry fly.

Now years have passed and while I tend to gravitate to a lot of other patterns these days, the comparadun is still a great pattern and in this instance a great one to imitate the stillwater staple: the Callibaetis.

So for you stillwater guys, pay attention. This fly is one that you'll want to have at your disposal. So, in this pattern, we add a few other features not found in typical comparadun patterns. First, there's the biot body and then I also add a bit of "callibaetis fleck" in the wing through the use of Teal flank feathers. All in all, it's a pretty nice pattern. And if you've ever been on a lake during a decent callibaetis hatch, this is a pattern you will want to have in your box. You can put away the sinking lines, leeches and buggers and catch nice chunky stillwater fish on dry flies.

I've also found it's a great searching pattern on stillwaters -- even when fish aren't actively rising. You'd be surprised what a decent looking dry fly callibaetis pattern can drum up on a calm non-hatchy day.

Thread: Montana Fly Co, 8/0, Gray   -- Buy Here --
Shuck: Sparkle Emerger Yarn, Gray or Amber  -- Buy Here --
Body: Turkey Biot, Gray (or Callibaetis is also a great color)  -- Buy Here --
Wing: Comparadun Hair, Natural or Dun  -- Buy Here --
      & Teal Flank Feathers, Natural   -- Buy Here --
Thorax: UV Ice Dub, Gray or Callibaetis  -- Buy Here --

And don't forget your hair stacker: 

Book Review: 25 Best, Most Versatile Flies by Al Ritt

$
0
0

A Fly Pattern Book

When the publisher sent over our friend Al's new book, the "25 Best Most Versatile Flies, Their Histories, Stories & Step-by-Step Tying Photos", it was immediately apparent this book was meant for the fly tying desk. The book is spiral bound, great for laying on a flat surface or on a book easel to keep it open to a given pattern without having the book close on you. Plus the cover is a sturdy construction without being a hardback inflexible book that would be more difficult to adjust and accommodate at the desk.

Now for the content. Each pattern featured has a great summary write-up talking about its history, its uses and any other tidbits about the fly, especially focusing on its ability to be a versatile fly pattern. Plus, Al's selection of patterns is a great mix of old and newer patterns, so you get a good variety of flies from which to learn. I think, for me, the biggest draw for any fly tyer is the variety in this book and the angle Al took to choose the patterns. The patterns here, both individually and as a group, really cover a huge gamut of techniques and target fish, thus making them very "versatile".

Beyond the intro and getting into the nitty-gritty tying part for each pattern, the flies are expertly photographed in a concise and logical step-by-step fly tying breakdown, allowing you to clearly see how each part of the fly is constructed.  There is also a clear material list for each pattern.

One final thing to keep in mind: While this is definitely not a true beginner's "how do I tie flies?" level book, it does include such standard beginner level patterns, such as the Wooly Bugger, the Hare's Ear and the Adam's, that a beginner would still find greatly beneficial.

If you want to buy a copy, here's a quick link. We have no dog in the fight here and get no compensation from the sales, so buy it with a clean conscience!

BBBB - AKA Big Ben's Brown Bugger

$
0
0

A fly you should ALWAYS have in your box.


The BBBB


Ben Porter...  You are a true American hero.

Uncle Drew with a nice BBBB fish
I had to start this article with that line because this fly has turned many mediocre trips into great trips.  One in particular came on one of our favorite stillwaters in Eastern Utah.  Several times a year we go to this lake in hopes to find hungry, fat, and aggressive rainbow trout that fight like crazy.  Ben has come along with us several times, and one thing we learned about Ben is that the dude is just plain fishy.  Not only does he smell like fish on a daily basis, the guy has stillwater fishing dialed in.  On this particular trip, the water was a bit off color, so we heard Ben say "Time for the BBBB in this tea colored water." Ben started out fishing an opposite shore line, and we saw that he was hooking up about twice as much as everyone else.  A few hours of this, and we ashamedly drifted our way over there to have our piece of humble pie.  Luckily, Ben was gracious enough to share a fly or two, and our catch rates went up enough to get our egos back in check.  

BBBB Rainbow Trout
After that trip I was asking Ben about the pattern and it's origin, and he told us that he developed it on a trip to Canada.  He had tied it on a whim, and it ended up being the top producer on the trip.  Later known as the BBBB (or Big Ben's Brown Bugger), it has become a staple in my stillwater boxes, and if I'm ever having a slow day I know that I can tie it on to start catching fish.

~ Cheech


Recipe:

Hook: Allen S402 #6 to #10 BUY HERE
Bead: Allen brass bead 4mm BUY HERE
Under body: Lead free round wire .020 BUY HERE
Thread: Black MFC Premium 3/0 BUY HERE
Tail: Simi Seal dubbing - golden peacock BUY HERE
Body: Simi Seal dubbing - golden peacock 
Rib: UTC wire - size sm - copper brown BUY HERE
Hackle: Whiting Euro Saddle - brown
Flash (tail/body): Krystal flash - root beer BUY HERE

Note:  This fly can be tied in a variety of colors.  The majority of my BBBBs are some shade of olive.  My favorite colors of simi seal to use on this are: peacock, bronze peacock, golden peacock, dark olive, and DW brown.  You can also spice it up with a different colored bead.


Belly Flop Balanced Damsel Fly

$
0
0

Expand the stillwater arsenal

As most people can attest by reading our antics on the site here, we mess around a LOT with a LOT of different patterns and materials. So, a while back when I saw the concept of a balanced fly pattern from Jerry McBride, via Phil Rowley's website, I was understandably interested.

As it happened, I was looking for a good way to present some damsel nymphs and emergers on top of and amongst the weed beds on the shallow weedy end of a lake I fish that contains some big cutthroats and rainbows. Indicators seemed to be the ticket, allowing me to vary the depth (as opposed to floating or intermediate lines), but as I watched the naturals in the water, they didn't hang vertically -- they swam horizontally (well fairly squiggly if you're going to draw a representation of the squirrelly damsels as they swim). So the balanced style fly would seem to be a great fit.
Belly Flop Balanced Damsel at work

As I began to formulate the pattern, I kept going back to a concept my friend Jeff Brooks espoused when it
Some Belly Flops in production
came to damsel coloration and imitating them. His observations of the naturals and how they reflected a lot of colors led him to design a popular dubbing mix he calls "Golden Olive Spectrumized" to go along with the damsel pattern he tied using it. His original recipe, which calls for up to 8 different dubbings and materials, worked great for me over the years until I ran out and was too lazy to go snag all the ingredients again. Instead, I looked at the pictures of damsel nymphs I had taken and ones I found online and came up with my own mix that would incorporate the needed colors but require less ingredients (see below for the exact mix) and allow people to more easily duplicate the concoction.

Rainbow trout taken on a Belly Flop Damsel
So design history aside, I began using this pattern last year and have had some incredible days on the water. I usually fish it under an indicator and find that even in choppy windy conditions, it fishes well because the wind and waves will telegraph a jigging motion to the fly as it hangs horizontally in the water.

In one instance, in particular, I was throwing leeches and chironomids with little success. Although I knew it was early, I figured the BFBD would stand a chance. Casting into the same depth of water from the same indicator depth (the only difference being really the horizontal orientation) and it was the day-maker pattern. Fish were coming out of the woodwork to nail it at the slightest movement. Anyway...it works.

A couple of important notes: The proportions on the pattern are über-important. If you leave the bead too far from the eye of the hook, it won't hang right. Likewise, if you push it too close to the eye of the hook, it won't balance well either. Bead size and weight is also a consideration to achieve a proper balanced orientation. Tungsten is best I've found. And, at least in my mind, the dubbing combined with the tinsel underbody are a deadly combination on their own.

Material List:

Hook: Allen J100BL #8  -- Buy Here --
Thread: MFC Olive 6/0  -- Buy Here --
Bead: Tungsten 2.8mm to 3.2mm (depends on hook size and type)  -- Buy Here --
Extender Pins: You can make your own from a small pin or buy them here pre-cut.
Head casing: MFC Skinny Skin (Mottled Brown) -- Buy Here --
                    & Holographic Tinsel, Orange, Med  -- Buy Here --
Tail: Wooly Bugger Marabou, Sculpin Olive  -- Buy Here --
Under-Body:Pearl Tinsel, Large  -- Buy Here --
Dubbing: Equal mix of
  -- Ice Dub Brown Olive  -- Buy Here --
  -- Arizona Simi Seal: Canadian Brown, Canadian Olive, Olive  -- Buy Here --


Butt Muncher - Carp Fly

$
0
0

No carp will resist these hot spots

Butt Muncher carp fly

So, before we start getting complaints about the name of this fly, it was impossible to assign any other name due to the makeup of the hind end of this sucker.  We have been playing with Allen Fly Fishing's new line of carp flies, and they have been super impressive thus far.  If you bend one of these out on a carp, congratulations to you sir/maam...  You are a true american hero.  

The butt muncher has all the hot spotty, wiggly parts that carp love.  Whip this one up, rub it in some mud, and go bust some golden bones!

Recipe:

Hook: Allen Flyfishing MP002 #1 BUY HERE
Thread: MFC 3/0 pink BUY HERE
Eyes: MFC Sparkle Eyes gold/yellow - med BUY HERE
Tail: Ultra chenille - worm brown BUY HERE
Tail hot spot: Loon UV paint - orange BUY HERE
Body: Speckled chenille - lime olive BUY HERE
Collar: Coq de Leon hen saddle - speckled yellow chartreuse BUY HERE
Thorax/head: UV Ice Dub - tan BUY HERE

~Cheech


Viewing all 629 articles
Browse latest View live